Showing posts with label chicken. Show all posts

Monday, February 11, 2013

Chicken Marsala with Mushrooms

This is one of those recipes that I've had for a loooong time, and just remembered I had it! When we lived in Cleveland for dental school, we had the most ah-maaaazing neighbors. The men got along great (both loved the Seahawks), the kids were all the same age and gender, and Rachel and I hit it off great. We definitely were different in our own right, but became fast friends. And she taught me a lot. A. Lot. Like how to bake bread, rolls, cinnamons rolls, etc. She was also amazing at making up her own recipes on a whim and they were always fantastic.

So this recipe comes from Rachel. I honestly don't know where she got it, she probably doctored it up or made it up herself. I really don't know. Or care. Because it's delicious. I personally don't like mushrooms, so I pick those out, but my husband loves them so I, like a good wife, give him my pile of mushrooms so he can add them to his plate. Wife of the Year here.

Chicken Marsala4 skinless boneless chicken breasts
1/4 cup flour (you actually need to measure this!)
1/4 tsp dried marjoram (you can sub Italian seasoning, I usually do)
1/8 tsp salt
1/8 tsp pepper
2 cups sliced mushrooms
2 sliced green onions
6 Tbsp margarine or butter
1/2 cup chicken broth
1/2 cup marsala cooking wine (not actual wine, but the kind found near the vinegar, it's way cheap)

Rinse chicken, pat dry, Place each breast between 2 pieces of plastic wrap and pound with a meat tenderizer until chicken is 1" thick (don't use chicken cutlets since pounding the chicken flat makes it really tender). Stir together flour, marjoram, salt, and pepper. Lightly press chicken into flour mixture on both sides. Shake off excess. In large skillet cook mushrooms and onions in 2 Tbsp butter until tender. Empty into dish and cover to keep warm. In the same skillet cook chicken pieces in 2 Tbsp butter over medium-high heat for 2-3 minutes on each side or until cooked through. Place chicken on platter and cover. Stick in oven at 200 degrees to keep warm. Return mushrooms and onions to skillet with 2 Tbsp butter. Add remains of flour mixture and stir until a paste forms on mushrooms on med-high heat stirring constantly. Slowly add chicken broth and marsala and cook uncovered for 2-3 minutes, when sauce thickens stirring occasionally. Spoon mushroom mixture over chicken. (If the sauce is too thick for your liking, like mine was, just add a little more stock or cooking wine or a little of both to thin it out).

Wednesday, October 17, 2012

Sweet and Spicy BBQ Chicken

I'm kind of addicted to magazines. Luckily not so much the tabloid celebrity gossip, but I do love parenting, cooking, and household magazines. I get several subscriptions to my house each month and tear out magazine pages that interest me. The plan was (is) to eventually organize all these torn out pages into binders of amazing ideas, tricks, techniques...but right now it kind of all looks like this:


Anyway...several years ago I came across this recipe that combined barbeque sauce, ketchup, and honey to make a sauce that you then cooked with chicken. It was simple and delicious, but over the years I forgot the exact measurements and added whatever I had on hand. I'm usually a bit Type A about measurements, but this is one of those recipes that you can follow the directions or add your own twist to it.

So easy to put together...mix the sauce together and pour over chicken. I love to make cheesy mashed potatoes and use the potatoes as a bed for the chicken.


We actually like to serve our chicken with a small bowl filled with the sauce that is remaining in the pan. I literally smother each bite in the tangy, sweet sauce.


Sweet and Spicy BBQ Chicken
by Girls in Apron

4 chicken breasts (2-3 lbs total)
3/4 cup regular barbeque sauce
1/2 cup ketchup
1/2 cup honey
1/4 cup brown sugar
1/4 tsp cayenne pepper (or to taste)

Preheat oven to 400 degrees F.

Mix barbeque sauce, ketchup, honey, brown sugar, and cayenne pepper together in a bowl. Taste and adjust cayenne pepper to desired heat.

Pour 1/2 cup sauce into the bottom of a 9x13 pan. Place chicken breasts on top and top with the remaining sauce. Cover with foil and place in oven. Bake for 1 hour or until chicken is cooked through.

To serve: Place chicken breast on plate. Top with a few spoonfuls (or more!) of pan sauce.

Saturday, September 22, 2012

Sweet & Sour Chicken

Don't forget to "like" us on Facebook to get updates
on our newest recipes and giveaways!

We have been woefully slacking lately. At least for me, every day I have been planning on posting something new and exciting, and then I get home from work and just crash. I started a new job after being a stay-at-home mom for 8 years and by the time I get home, there is just no time for anything. I don't know how all you working moms do it, because I am so exhausted by the end of the week to get anything done! But all three of us work as well as take care of our families, and with kids in school it just got crazier! We'll try and get recipes up more now that we are in the swing of things (hopefully!).

But on to the recipe. This little gem has been in my recipe box for years. I got it in a recipe exchange. You know, those emails you get that ask you to send an email to so-and-so and then within so many weeks you'll get like 36 recipes back (but it never actually turns out that way)? Well, I was sent this recipe in one of those, and I hate to admit that I didn't actually send an email to anyone in return. I am so bad at those things and usually delete them, but I was so happy to get this recipe! I made it the next night and was so in love with it. I honestly can't remember where the recipe came from, some cook book maybe? I wish I could remember so I could give credit, so if anyone has seen something similar let me know!

Over the years, I've tweaked the recipe here and there until it fit my family's tastes and we make it a lot. It is definitely a process, with cutting, breading, frying and then baking, but it's very worth it and once you get the system down it goes pretty quick.
Yuuummmm!!! This is one of my husband's favorite meals, and it is making my mouth water!
Basically, but your chicken up into large bite-size pieces, then throw them (in batches) into a ziploc bag with flour, and shake to coat.
Place the floured pieces into a pan with hot oil, and just let them brown. You'll also do this in batches so it doesn't overcrowd the pan.
Once browned, put them in a 9x13 pan.
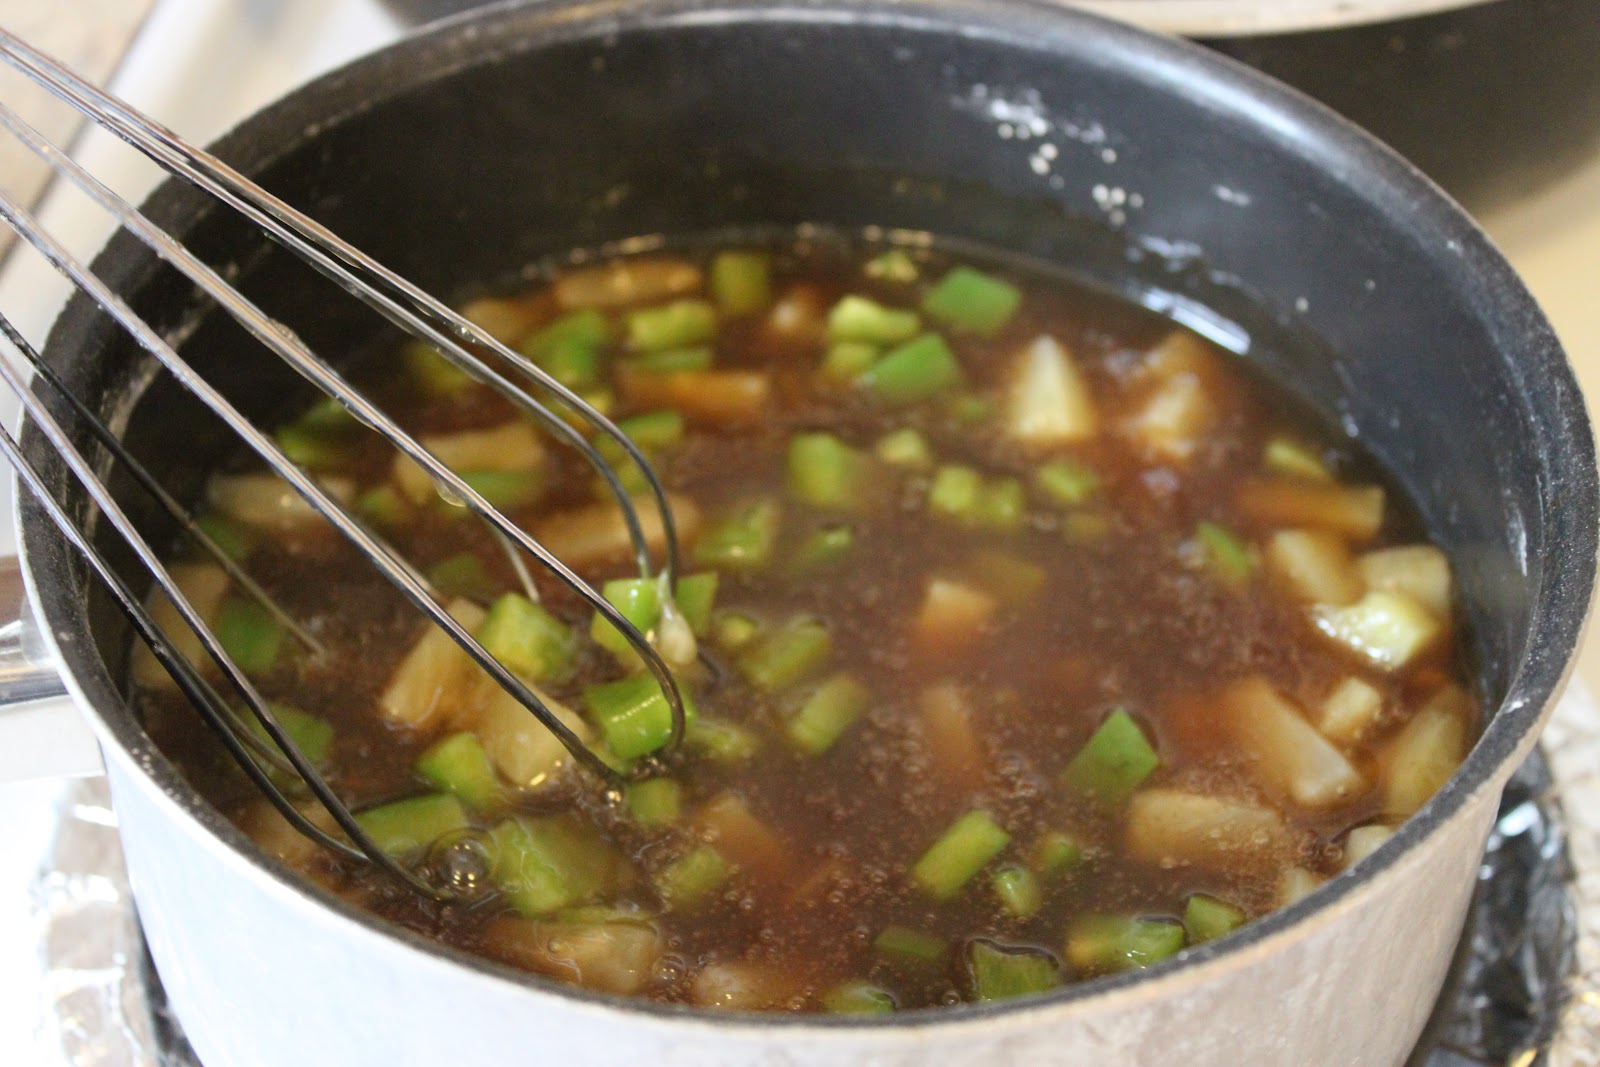
For your sauce, put the dry ingredients in the pan first, then add your liquids.
Bring it a boil and let boil one minute. It will get thick, trust me!
Remove from the heat and add your pineapple and green pepper.
Pour over the chicken to cover. I like to move the chicken around a little so all the pieces are covered.
Look how tasty it is once it's out of the oven!
Serve over rice. I used calrose, but long grain and jasmine rice would be super yummy!

Sweet & Sour Chicken


4-5 boneless, skinless chicken breasts, cubed
Flour
Vegetable oil- enough to cover the bottom of your pan
2 Tbsp cornstarch
1 cup brown sugar
2 Tbsp soy sauce
2/3 cup white vinegar
1 can pineapple tidbits, juice reserved
1 cup green bell pepper, chopped small
(**Note** If you like lots of sauce, you can double the sauce recipe)

Heat your oil in a pan over medium heat (you'll know if it's hot if you can sprinkle a little water in and it sizzles). Place chicken in Ziploc bag with flour and shake to coat. Add to oil and cook until most are browned and crispy. You'll need enough oil to cover the entire bottom of your pan.

Meanwhile, combine brown sugar and cornstarch in a small saucepan, then add vinegar, reserved pineapple juice plus enough water to make one cup, and soy sauce. Stir to combine and let boil one minute. Add pineapple tidbits and bell pepper.

Place chicken in 9x13 dish and pour sauce over it, making sure it covers everything (I kind of stir it in gently to make sure it covers everything). Bake at 375 for 30 minutes. Serve over rice.


Friday, September 14, 2012

Asian-Style Marinade

Don't judge me....but I don't love steak. My husband gasps every time I say it, because I'm pretty sure it's blasphemous to him. And my in-laws raise cattle, so I'm pretty sure I'm breaking some sort of secret family law. But I'll take fish or chicken over steak almost any day.

Unless the steak is in some yummy Asian-style marinade. Like teriyaki, or sesame, or something along those lines. Oh, and it can't be a fatty steak. Or thick cut. Or pink.

I love this marinade because it is SO easy to make, and so much cheaper (and healthier!) than the marinades you can pick up in the store. This marinade will go with steak, but also chicken and pork. We used ours with cubed up steak for shish-kabobs. But you can marinade thin cut steak, chicken, or pork with it, and serve over sauted veggies. Yum!

The marinade is so easy...it took one picture! Combine your dry seasoning (onion powder, garlic powder (or dried minced garlic - that's what I had on hand), dried oregano, and black pepper) with soy sauce, honey, and sesame oil.
I love how the marinade carmelizes on the meat! It's the sugars from the honey, and all that goodness. 
You know you are putting shish-kabobs on your menu!!
\
Asian-Style Marinade
by Girls in Aprons

1/4 cup soy sauce
2 to 3 Tablespoons honey (I like more!)
2 tsp sesame oil
1 tsp onion powder
1 tsp garlic powder
1 Tablespoon dried oregano
1 T black pepper
(Optional: 1 to 2 tsp red pepper flakes)

Combine the soy sauce, honey, and sesame oil. Add dried seasoning and combine. Marinade meat for at least half hour. Baste additional marinade on while grilling.

Wednesday, August 8, 2012

Slow Cooker Garlic and Brown Sugar Chicken

I came home the other day to a sauna. We had been gone all day and when I opened the door from the garage, I was hit with a wave of heat. And nothing depresses me more than walking into a room of sweltering heat. (Okay, lots of things can make me sad, but at the moment, when I had been gone all day, this was what depressed me the most). Houses in Washington typically do not have AC or central air. It's expensive to install, and usually only needed a few days a year. But on this day, it was needed. My house has no tree cover so it had been baking in the sun. All day. Enter my dad, who saved the day with a window AC unit that at least makes the living room bearable.

You wanna know who else saved the day? My slow cooker. I know I've raved about my slow cooker before, but really it's my BFF in hot weather. There are only so many days I can go without cooking something, and only so many days I can get away with making my family eat cereal or PB&J sandwiches for dinner.

This chicken is amazing. It is slightly sweet but definitely garlicky too. I was slightly nervous to put in all the garlic called for, but went for it and didn't regret it. After it cooked all day, it wasn't overkill at all. Served on top of rice (from my rice cooker!), it was a great meal and my kids even ate it up. Granted, I had to turn on my stove for a few minutes to thicken the sauce, but it was definitely worth it. My three-year-old even asked for seconds, and she never does that! This is a definite keeper in our house and I usually have all the ingredients on hand, so we'll be making it again. And again :)


Slow Cooker Garlic and Brown Sugar Chicken

4-6 boneless, skinless chicken breasts (I used four large frozen chicken breasts)
1 cup packed brown sugar
2/3 cup vinegar
1/4 cup lemon lime soda
2-3 Tablespoons minced garlic
2 Tablespoons soy sauce
1 tsp black pepper

2 Tablespoons cornstarch
2 Tablespoons water

Steamed rice
Red pepper flakes (optional)

Place chicken slow cooker sprayed with cooking spray. Mix together brown sugar, vinegar, soda, garlic, soy sauce, and pepper. Pour over chicken. Cook on low for 6-8 hours or high for 4 hours.

Take chicken pieces out of slow cooker and pour remaining sauce into saucepan (I poured mine through a fine mesh strainer first). Place saucepan over high heat. Mix together corn starch and water, pour into saucepan and mix well. Let sauce come to a boil and boil for 2-3 minutes, or until it starts to thicken and turns into a glaze. Remove from heat and let sit for a minute or two (it will continue to thicken as it cools down).

Serve chicken over rice or noodles and top with glaze. Sprinkle red pepper flakes on top if desired.
(Recipe from Six Sisters' Stuff via Slow and Simple)

Sunday, July 15, 2012

Citrus Chicken Salad with Sugared Walnuts, Feta, and Blackberries

As many of you know I'm a bit of a Bountiful Baskets junkie. I think the reason I like it the most is because it forces me to eat fruits and veggies I wouldn't normally buy (my poor family was on a banana/carrot diet forever!) and it forces me to be creative with the way I use them. Kale turns into Kale Chips, Butternut Squash is roasted or turned into soup, plums get put on the grill and topped with ice cream (yum!). Then I got blackberries in my basket. I was NOT just going to eat the blackberries. I was going to USE them in a recipe dang it! Thankfully I "like" Bountiful Baskets on Facebook, and they posted this salad from the Martha Stewart website. And it used blackberries! The whole thing sounded perfect for a summer night, and really anything with feta and sugared walnuts sounded pretty much right up my alley. I added a citrus marinated chicken to the recipe to make it more filling. And seriously? The dressing is to die for. Why BUY dressing when you can MAKE one that tastes this good? Really, it will change your life.

Also, don't be afraid of the amount of ingredients! Most of them are dry spices you probably already have on hand! I did have to go out and get the walnuts and feta, but everything else is pretty basic! And the salad is something I would buy in a restaurant! Feel free to switch up the blackberries too - strawberries, raspberries, and blueberries would all be delicious in this salad!


Citrus Chicken Salad with Sugared Walnuts, Feta and Blackberries
by Girls in Aprons, adapted from Martha Stewart

For the chicken:
1/4 cup lime or lemon juice
2 tablespoons olive oil or canola oil
3/4 teaspoon seasoned salt
1/2 teaspoon garlic powder
1/2 teaspoon paprika
1/2 teaspoon dried basil or thyme
2 (4 ounce) skinless, boneless chicken breast halves

Directions
In a bowl, combine the first seven ingredient; mix well. Pour half of the marinade into a resealable plastic bag. Cover and refrigerate remaining marinade; add chicken to the bag. Seal bag and turn to coat; refrigerate for at least 3 hours or overnight.
Drain and discard marinade. Grill, uncovered, over medium heat or broil 6 in. from heat for 5-7 minutes on each side or until juices run clear; basting occasionally with reserved marinade.

For the salad:

2 tablespoons white-wine vinegar
1 tablespoon fresh orange juice (I just squeezed an orange)
1 teaspoon coarse salt, plus more to taste
1/4 cup extra-virgin olive oil
10 ounces mixed salad greens, such as baby spinach and red-leaf and Boston lettuces
1 small container blackberries
9 ounces feta cheese, crumbled
Sugared Walnuts (I found them at Trader Joe's - they are oh so good...)
Freshly ground pepper, to taste

Directions:
Whisk together vinegar, orange juice, and salt. Add oil in a slow, steady stream, whisking until emulsified.

Put salad greens, blackberries, feta, and walnuts into a bowl. Drizzle with vinaigrette, and toss gently. Season with salt and pepper. Place sliced chicken on top of each salad. 

Monday, July 2, 2012

Sweet Coconut Chicken

I have this sweet and sour chicken recipe that is to die for. Seriously. I don't know why I haven't posted it yet. And I'm not posting it today either, but this one is eerily similar. It has the same basic concept, just a different sauce. And I loooove this kind of cuisine. Beef with broccoli, sweet and sour chicken, eggrolls, Mongolian Beef..... *sigh* Seriously, the way to my heart is through P.F. Changs. I am not kidding. But sometimes I want the take-out version without the take-out price, so I love to make these dishes at home.

So, my family loves coconut flavored things, and this Sweet Coconut Chicken fit the bill for us. It was slightly sweet with a hint of coconut. I liked that the coconut flavor did not over power the dish. If you like the extra coconut flavor, go ahead and add some coconut flakes to either your rice or the sauce. I'm sure either way it will be delicious.

Oh, and you have to serve this with jasmine rice. There is something about jasmine rice that just goes really well with the coconut chicken. Okay, you don't have to, I just very highly recommend it.

Sweet Coconut Chicken
recipe from Kids in the Sink 

For the chicken:2-3 boneless, skinless chicken breasts, cut into 1-2 inch pieces
salt and pepper, to taste
1 cup cornstarch
2 eggs, beaten
1/4 cup canola oil (I used vegetable oil)

For the sauce:
1 (14 oz.) can coconut milk (use the full fat version, the "lite" version doesn't have enough flavor)
3/4 cup sugar
1 tsp cider vinegar

Directions:

For the chicken: Heat oil in a skillet over medium heat and preheat oven to 325˚. While oil is heating, season chicken with salt and pepper.

Dip chicken in egg, then cornstarch, and fry in the oil until lightly golden brown, but not cooked through. I had to fry in a couple of batches so as not to overcrowd the pan.

Remove chicken from pan and place on paper towel-lined plate briefly, then place in a single layer in a baking dish.

For the sauce: In a medium bowl, whisk together the coconut milk, sugar, and vinegar. Pour the sauce over the chicken and bake for about an hour, stirring the chicken every 15 minutes. Once cooked through, let stand for at least 5 minutes to allow the sauce to thicken. Serve immediately over rice (*ahem* jasmine rice, although any rice will do because the chicken in this dish rocks!)

P.S. Some readers on Kids in the Sink asked if one hour was too long to cook and worried it would dry out the chicken. Let me tell you.... it will not. Trust me. Let it cook for an hour and gently stir it every 15 minutes and it will be perfect!


Wednesday, June 6, 2012

Cheesy Florentine Stuffed Chicken (and a bonus stuffed pasta recipe)

Isn't everything better with cheese? Okay, well maybe not everything. I worked in a preschool for a little bit and there was this little boy would had to have ranch on everything. Literally. Pizza, nachos, even his fruit. Ranch certainly doesn't make everything taste better, just like cheese in your brownies (unless it's cream cheese, of course) might be a little, um, gross.

Do you see where I'm going with this?

My kiddos, probably following in their Italian daddy's footsteps, love cheese. The more the better. They eat the mild cheeses like cheddar and mozzerella but they'll also eat gouda and gruyere.

I'm always looking for ways to incorporate cheese into my dishes. Cheese is easy to use, delicious, relatively cheap, and, in moderation, good for you.

I used to chart what my first born ate every day, just to make sure he was reaching the dietary guidelines for proper nutrition. Now I just hope that somewhere during the day they had their fruits, veggies, and grains, and in doing so try to incorporate good food in whatever I make for them. In this recipe, for instance, I've used low fat cheese, protein filled chicken, and spinach. Dairy, protein, veggies. With a side of brown rice and strawberries for dessert I felt like this might make up for the hot dogs they insisted on for lunch followed by the cookies for snack :)

Mix all that delicious cheesiness together with the spinach. It's quite good on its own, really. I let the kids taste test for their approval.

I know no one likes to see raw chicken in a picture. There's no way to make that pretty. Sorry. But here's a picture of the "pocket" you need to create for your filling.


Fill up the chicken. Don't try to use all the cheese mixture, you'll use it for a pasta recipe in a few nights and thank me for the 2-in-1 dinner idea.


Cheesy Florentine Stuffed Chicken
by Girls in Aprons

4 large chicken breasts
1 15-oz container ricotta (whole or skim)
1 cup shredded mozzerella cheese
1/2 cup grated Parmesan cheese, plus 2 Tbsp, divided
1 tsp garlic powder
1 package frozen spinach, thawed and drained
Olive oil
Salt

Preheat oven to 400 degrees. Lightly spray a 9x13-inch pan.

Using a paring knife, cut a pocket in the side of each chicken breast, making sure not to pierce the opposite side. Place each cut chicken breast in the prepared pan.

In a medium mixing bowl, mix together ricotta, mozzerella, 1/2 cup Parmesan, garlic, and spinach. Using a spoon, stuff the chicken pockets with the ricotta mixture. You will not use all the ricotta mixture. Use it for the following recipe. Brush the tops of the chicken with olive oil and sprinkle with salt and the 2 Tbsp Parmesdan cheese.

Bake for 25-30 minutes or until juices run clear and thermometer reads at least 165 degrees.

Beef and Cheese Stuffed Shells
by Girls in Aprons

1/2 lb ground beef
Leftover ricotta spinach mixture
1 box large pasta shells
1 cup prepared pasta sauce

In a large pan, cook ground beef until browned. Drain. Remove from heat. Add leftover ricotta spinach mixture.

In a large pot of salted, boiling water, cook large pasta shells for about 8 minutes or until still slightly hard. Drain and cool on an oiled baking sheet.

Using a small spoon, stuff the shells with the meat-ricotta mixture. Place in a greased 9x13-inch baking pan. Top each stuffed shell with a spoonful of pasta sauce.

Bake at 350 degrees for about 20 minutes or until cheese is melty and the pasta is cooked.


Tuesday, May 15, 2012

Crispy Coconut Chicken Fingers

I have an obsession with coconut. I looooove the sweet flavor of it. I've never actually tried it fresh before, but one of these days I'm going to break down at the store and just buy one. But I love coconut cream pie (or coconut cream pie bars), coconut cheesecake (okay, well any cheesecake, but coconut cheesecake is like out of this world!), coconut ice cream ,etc. But I also love it when it's in savory dishes, like chicken or salad or something. I found this little gem in the Our Best Bites cookbook and had to make it. It was super easy and even came with a very easy sauce to go with it, which was ah-maz-ing with the coconut. And who isn't looking for another way to make chicken these days? Trust me, you will thank me later for posting these!
My mouth is literally watering. These were so good!
Mix together your coconut, panko, garlic powder, salt, curry, onion powder and cayenne. You really do need to chop your coconut so it's about the size of your panko. This will help it stick to the chicken. 
Dip your chicken in the flour, shaking off excess.
Dip into the whisked eggs, letting the excess drip off. You don't want egg-y chicken!
Gently press the chicken into the coconut mixture, making sure it's coated well.
Place the tenders on a cookie sheet. I always bake mine on a rack with foil underneath (I also spray the rack with some Pam too), a little tip from my dad. This way it doesn't get soggy underneath and can crisp up all the way around. The original recipe has you place them on a sprayed, foil-lined cookie sheet. Either way is totally fine!
The house smelled so good!!! Don't worry if your coconut is a little darker than "golden", it's just the coconut pieces that didn't get chopped well and were sticking up. They aren't burned, just carmelized a little. I promise!
Serve with dip. Please! It's amazing!

Crispy Coconut Chicken Fingers
recipe from Our Best Bites


12 chicken tenders
1-2 eggs
1/2 C flour
1 C sweetened coconut flakes
1 C panko bread crumbs
1 1/2 tsp garlic powder
3/4 tsp table salt
3/4 tsp curry powder
1/4 tsp onion powder
1/8 tsp cayenne pepper (optional)

Sweet Dipping Sauce

1 cup apricot-pineapple preserves (I found this really easily in my regular grocery store)
2 tsp soy sauce
1/2 tsp Dijon mustard
1/4 tsp curry

Preheat oven to 450 degrees. Spray a foil-lined baking sheet with non-stick cooking spray and set aside.

Give coconut a rough chop so it’s about the same size as the panko pieces.  Combine it with Panko and spices in a shallow dish. Mix well to distribute all of the spices. Place the flour in another shallow dish, and the egg in another. Give the egg a quick beating. Working with one chicken tender at a time, dredge in flour and then dip in egg, and then finally coat in the coconut Panko mixture. Press in with your fingers to make sure the entire thing is well coated.

Place chicken tenders on your foil-lined baking sheet. (OBB gave a teeny drizzle of olive oil on top to help them crisp nicely, but it’s optional. I didn't do this).

Bake in your 450 degree oven for about 20 minutes or until juices run clear. Try not to overcook them because chicken tenders go from perfect to overcooked really fast! If your tenders are on the small side, they could even be done in about 15 minutes so keep an eye on them. If they’re big they can take more like 25.

While the chicken tenders are baking, whisk together the sauce ingredients and chill until ready to eat.

Monday, April 30, 2012

Chicken Empenadas

New Mexico has its own little food culture, mostly involving green chilies. Not the canned kind, either, although to be honest that's what I use. Fresh roasted green chiliesare used in several restaurants around here, giving even the McDonalds cheeseburger a New Mexico flair.

We all know that I'm not a fan of spicy food. Even mild salsa is killer for me. I think my loathing of spicy things started when I was little, when my parents used to give me hot sauce when I lied. While my sisters only pretended that they hated the stuff (cheaters, right?) I actually hated the stuff. One time, my sisters broke the lamp in the living room and decided to say that I did it. I didn't get in trouble for breaking the lamp, I got in trouble for apparently lying about it. Traumatic right? Now do you see why I don't like spicy things?! :)

But I've gotten used to green chilies, and love throwing them into most of my Mexican meals. I came up with this recipe a few months ago but just kind of threw it together. Please tell me that I'm not the only one that does that. I had to make this recipe again just to make sure I had it down right!


Using a 3-4" cookie cutter (or a large glass), make circles from the pie dough. Place about 1 tsp or so into the center and add a pinch of cheese. And yes, I use Uncle Ben's rice in this recipe. The extra herbs and spices give this recipe a unique flavor, but any rice will do!


Dipping your finger in water, moisten the edges of the circle of dough, and fold the dough over. Using a fork, crimp the edges.

Brush the empenadas with vegetable oil to help them crisp up.


Chicken Empenadas
by Girls in Aprons

1 package pie crust (for 2 9-inch pies)
1 Tbsp vegetable oil
2 chicken breasts, cooked and shredded or 2 cups rotissiere chicken
2 Tbsp taco seasoning
1 15-oz can black beans, drained and rinsed
1 red bell pepper, cored and diced
1 2-3 oz can diced green chilies
1 cup cheese
Vegetable oil, for brushing pastry

Preheat oven to 400 degrees.

In a large pan, heat oil over medium heat. Add chicken, taco seasoning, and water and bring to a simmer. Cook Uncle Ben's rice according to package directions. Add one cup of prepared rice to the chicken mixture. Add black beans, red bell pepper, and chilies to the mixture. Stir until heated through.

Roll out pie dough a little. For the empenadas you don't want thick dough. Using a cookie cutter or large cup, cut circles 3-4" thick, re-rolling the dough as needed. Place 1 heaping teaspoon of chicken mixture into the center of each circle and add a pinch of cheese. Dipping your finger in water, moisten the edges of the circle with the water and fold the pie dough in half. Using a fork, crimp the edges and place on a cookie sheet. Brush the top of each empenada with vegetable oil.

Place in oven for 20 minutes. Serve warm with sour cream, salsa, and guacamole for dipping.

Thursday, April 12, 2012

Sweet BBQ Sticky Fingers- A Quick Meal!

I was super impressed with the Winger's Sticky Fingers Celeste put up a couple weeks ago. They were so easy to throw together and super yummy. Even my picky eaters ate it and it wasn't too spicy for them. They loved eating with their hands too and getting all messy :)

I decided one day to take the idea and use a sweet homemade BBQ sauce instead. I use this sauce for baked chicken all the time and my husband loves the sauce. It's so easy to put together too. I love having easy dinners in my rotation, especially for nights that I have Tball practice or meetings for church. And sometimes I just don't really feel like cooking a huge meal. I know there are nights like that for you too! These are definitely a crowd pleaser and would be great for a sports night (something about sticky fingers screams boys' night to me!) but your gal pals will love these too!

Sweet BBQ Sticky Fingers
by Girls in Aprons

3/4 cup barbeque sauce (recommended: Sweet Baby Ray's original)
3/4 cup honey
1/2 cup ketchup
1/4 cup loosely packed brown sugar
1 bag (25 oz) frozen breaded chicken strips (we like Tyson's)

Bake chicken strips according to package directions. While they are cooking, combine barbecue sauce, honey, ketchup and brown sugar into a small sauce pan and warm though (do not boil). Reserve some sauce for dipping at the table.

When chicken is done, dip the chicken strips into the sauce, letting the extra sauce drip off. Set on a pan lined with foil until all the strips are coated with sauce. Dip into extra sauce or ranch and enjoy!

**NOTE: This BBQ sauce can also be used on regular chicken breasts. Combine the sauce ingredients and pour over 4 boneless, skinless chicken breasts (if they are frozen, thaw completely or your sauce will be watery). Cover with foil and bake at 400 for 50-60 minutes or until done.


Monday, March 26, 2012

Just Like Winger's Sticky Fingers!

I'll admit it. I have four crazy kids. Well, that's not true. I have three crazy kids and one in training. He's only 9-months old, but by the way he studies his brothers and watches their every move, he is going to be just as crazy. Sometimes I forget that they are crazy and my husband and I take them out to dinner somewhere other than McDonalds. These other places have no play place and no tolerance for kids running up and down aisles, throwing food, or screaming bloody murder. It's times like this that my husband and I look at each other and say "Oh, yeah. Now I remember why we don't take them out to dinner!"

So, needless to say, we don't get out much. Babysitters are expensive, and adding the money that it costs to pay for dinner and maybe a movie or something, it could climb up towards $100 for one night? Not worth it for me! I'd rather stay at home, put the kids to bed early, and make something restaurant worthy for my husband and I. You know, like a mini-celebration for surviving the day with all four kids still breathing and the house intact (mostly).

We usually have a monthly "nacho night" where we make a huge cookie sheet of nachos with all the fixings, but while nursing my youngest I couldn't have dairy. Nachos with cheese is about the saddest thing in the world. Seriously. So we got creative and stumbled upon homemade Winger's sauce. I love Winger's! I know you can buy their sauce, but you get a small amount for like $8. That is not a good deal. But homemade sauce is! And you will be surprised how easy it is to make. It even passed the husband and brother-in-law test (they are Winger's people) and they thought it tasted the same.

And just FYI I did not make up this recipe, but if you Google "Winger's sauce" or "Homemade Winger's Amazing Sauce" the recipe is all over the web. And no one is giving credit to anyone, and who knows who actually came up with this knock off? So I will credit "the web" as my source.
Combine the hot sauce, brown sugar, and water in a small saucepan. Stir until combined, heating until simmering. Dip your cooked chicken strips in the sauce with tongs. Place the dipped chicken on your serving platter.
So yummy! We served ours with fries and a salad.

Just Like Winger's Sticky Fingers
submitted by Girls in Aprons

6 T Frank's Original Hot Sauce (you can use Frank's Buffalo Sauce, but it HAS to be Frank's!)
3/4 packed brown sugar
2 T water
25 oz. package breaded chicken strips (I like Tyson's)

In a small saucepan mix together hot sauce, brown sugar, and water. Heat until simmering and remove from heat.

While sauce is cooking, heat chicken according to package directions.

When chicken is done, dip each piece in Winger's sauce, coating all the way. You can dip it twice for extra sauce. Place on serving tray. Makes 4 servings.

**I like to double the sauce so there is enough for dipping at the table.