Showing posts with label vegetables. Show all posts

Tuesday, April 23, 2013

Chicken Pot Pie Soup with Garlic Parmesan Biscuits

I know April isn't really "soup" month...but at least here in New Mexico we're had our share of colder days. And by colder I mean high 50s or low 60s. But its not the weather itself that makes is cold, it's this darned wind! It's brutal! And maybe you haven't thought of this, because I know I hadn't, but a windstorm in a desert setting means that sand is always in your hair, ears, eyes, and mouth.
 
I've been thinking of a chicken pot pie soup for weeks now, but I couldn't imagine making a soup and topping it with a pie crust. It seemed so boring. So maybe this soup is more like chicken with biscuits or whatever, but to me it's very similar to the filling of chicken pot pie soup. Call it what you want, it's delish. And start to finish, including the biscuits, took me less than 45 minutes.
 
I threw my chicken breasts in the crock pot in the morning with some water and a lemon that had been cut in half. The chicken had an ever-so-slight lemon flavor. It also made it super easy to shred. I also ate my biscuit inside my soup. I'm usually against anything that makes my bread soggy (except bread pudding...mmmmmm....bread pudding) but the garlicky cheesy rolls tasted so good with the soup.

Chicken Pot Pie Soup with Garlic Parmesan Biscuits
by Girls in Aprons

For the soup:
1 Tbsp oil
1 onion, chopped
1 stalk celery, sliced thin
2 cloves garlic
1/4 cup butter
1/4 cup flour
2 (15 oz) cans chicken broth or chicken stock
2 cups milk
2 chicken breasts (about 1 lb or so), cooked and shredded
2 tsp fresh or 1 tsp dry thyme leaves
1 12-oz bag frozen mixed vegetables
1 cup shredded cheddar cheese
Salt and pepper to taste

Heat oil in a large soup pot over medium heat. Add onion and celery and sauté until onion is translucent, 5-7 minutes. Add garlic and sauté for 1 more minute. Add butter to pot and let melt. Immediately add flour and whisk until butter and flour are combined. Continue stirring, using a whisk, for 2 minutes. Slowly add the chicken broth and milk, whisking continuously. Let simmer for 10 minutes, whisking often to keep milk from scalding on the bottom of the pan. Add thyme and frozen mixed vegetables. Continue cooking until vegetables are warmed, about 3 minutes. Whisk in shredded cheese until melted. Add salt and pepper to taste. Serve hot in a bowl and top with a warm biscuit (or two, or three).

For the biscuits:
2 cups all-purpose flour
2 Tablespoons sugar
4 teaspoons baking powder
1/2 teaspoon salt
1 1/2 tsp garlic powder
1/2 cup grated Parmesan cheese
 1/2 cup shortening (I used butter-flavored Crisco and highly recommend it)
2/3 cup plus 2 Tbsp milk
1 egg

In a bowl, combine the first four ingredients. Cut in shortening until the mixture resembles coarse crumbs. In a bowl, whisk milk and egg. Stir into crumb mixture just until moistened. Drop by heaping spoonfuls 2 inches apart onto an ungreased baking sheet (I roll mine into about golf-ball sized balls, they make about 12 rolls). Bake at 425 degrees for 10-12 minutes or until golden brown. Serve on top of soup.

Biscuit recipe adapted from allrecipes.com

Saturday, January 26, 2013

Veggie Pizza

With the Superbowl coming up, I thought I'd share one of my all time favorite appetizer recipes. There are lots of "veggie pizza" recipes out there, but this one hands down is the best I've ever had. It's super easy, you make it ahead of time, and you can customize it to your liking.

I know, vegetables are not on most guys' Superbowl menus, but the guys in our life devour this (maybe because it has the word "pizza" in the title?) and the gals at these parties might want something other than hot wings to munch on. Not that I'm downplaying the importance of hot wings at a football party. Please get hot wings too. Your Superbowl party will thank you later.
Yum... carrots, broccoli, peppers, tomatoes, onion, cheese, ranch..... It's so colorful!

Cut into squares and you are ready to go!

Veggie Pizza
by Girls in Aprons

2 pkgs refrigerator crescent rolls
**Unroll and spread on lightly greased jelly roll pan. Press edges together to form a rectangular crust and pat down evenly (you may have to cut some of the rolls up to cover the entire jelly roll pan, just be creative!). Bake at 375 for 5-7 minutes or until golden brown. Set aside to cool.

2- 8 oz packages cream cheese, softened
1 cup mayonnaise
1 package ranch dressing mix
**Mix together and spread on cooled crust.

Pizza toppings (customize to your liking):

2 stalks broccoli
3 green onions
1 green pepper
2-3 roma tomatoes
1 small bag shredded carrots

1 cup shredded cheese
Seasoning Salt
(Optional: 1 small head cauliflower, 10 fresh mushrooms, 1 can olives)

Chop vegetables fairly fine (I used my food processor to cut the broccoli and carrots smaller). Layer in any order (I mixed my veggies together in a bowl and added it on top of the ranch mixture, except the tomatoes which I added last). Sprinkle the cheese on top and then top lightly with seasoning salt. Wrap with plastic wrap and press down firmly so the veggies stay on the pizza. Refrigerate at least 8 hours to let flavors blend.

Wednesday, October 3, 2012

Sweet Red Cabbage


Oh my goodness I swear we are still here at Girls in Aprons! I think the month of September got the better of us, and between vacations and back to school and just plain life we got BUSY! But we are back!! I wanted to share this recipe with you because, seriously, I can't get enough of it! Let me tell you how I found this recipe:

My sister-in-law (and one of my best friends!) Christina lived in Germany growing up and she has shared many recipes over the years. But I have really never eaten authentic German food (because when I make German food it is done my way, not the real way!!). Anyway, Stina came to visit me in September and I thought the best place to take her was Leavenworth, WA! It's this cute little Bavarian town in the middle of nowhere and it is a tourist trap! They have the cutest shops and the best restaurants and it's all done to look like this little Bavarian village! Stina was insistent that we find an authentic German restaurant - she wanted Weinerschnitzel and dang it she was gonna get it!

Luckily, Leavenworth had several, and we found one we liked and Stina got her Weinerschnitzel and I got Jaegerschnitzel (basically a thin cut of breaded pork). Mine came with noodles and cooked red cabbage. The pork was awesome, but I was a little disappointed in the cabbage.

But no need to fear! Stina had another red cabbage recipe and she made it for me before she left! It's thinly sliced and mixed with bacon (yes ma'am - bacon!) onions, and vinegar. And sugar. Because that makes everything better. So does bacon.

BACON!

We had ours served over shredded beef sandwiches and I also had mine as a side dish. This would be awesome on bratwurst! And you can easily omit the bacon to make it vegetarian. Or if you don't have bacon on hand or it's not on sale, no worries. Just omit it. And make sure to put bacon on your grocery list for next time!!

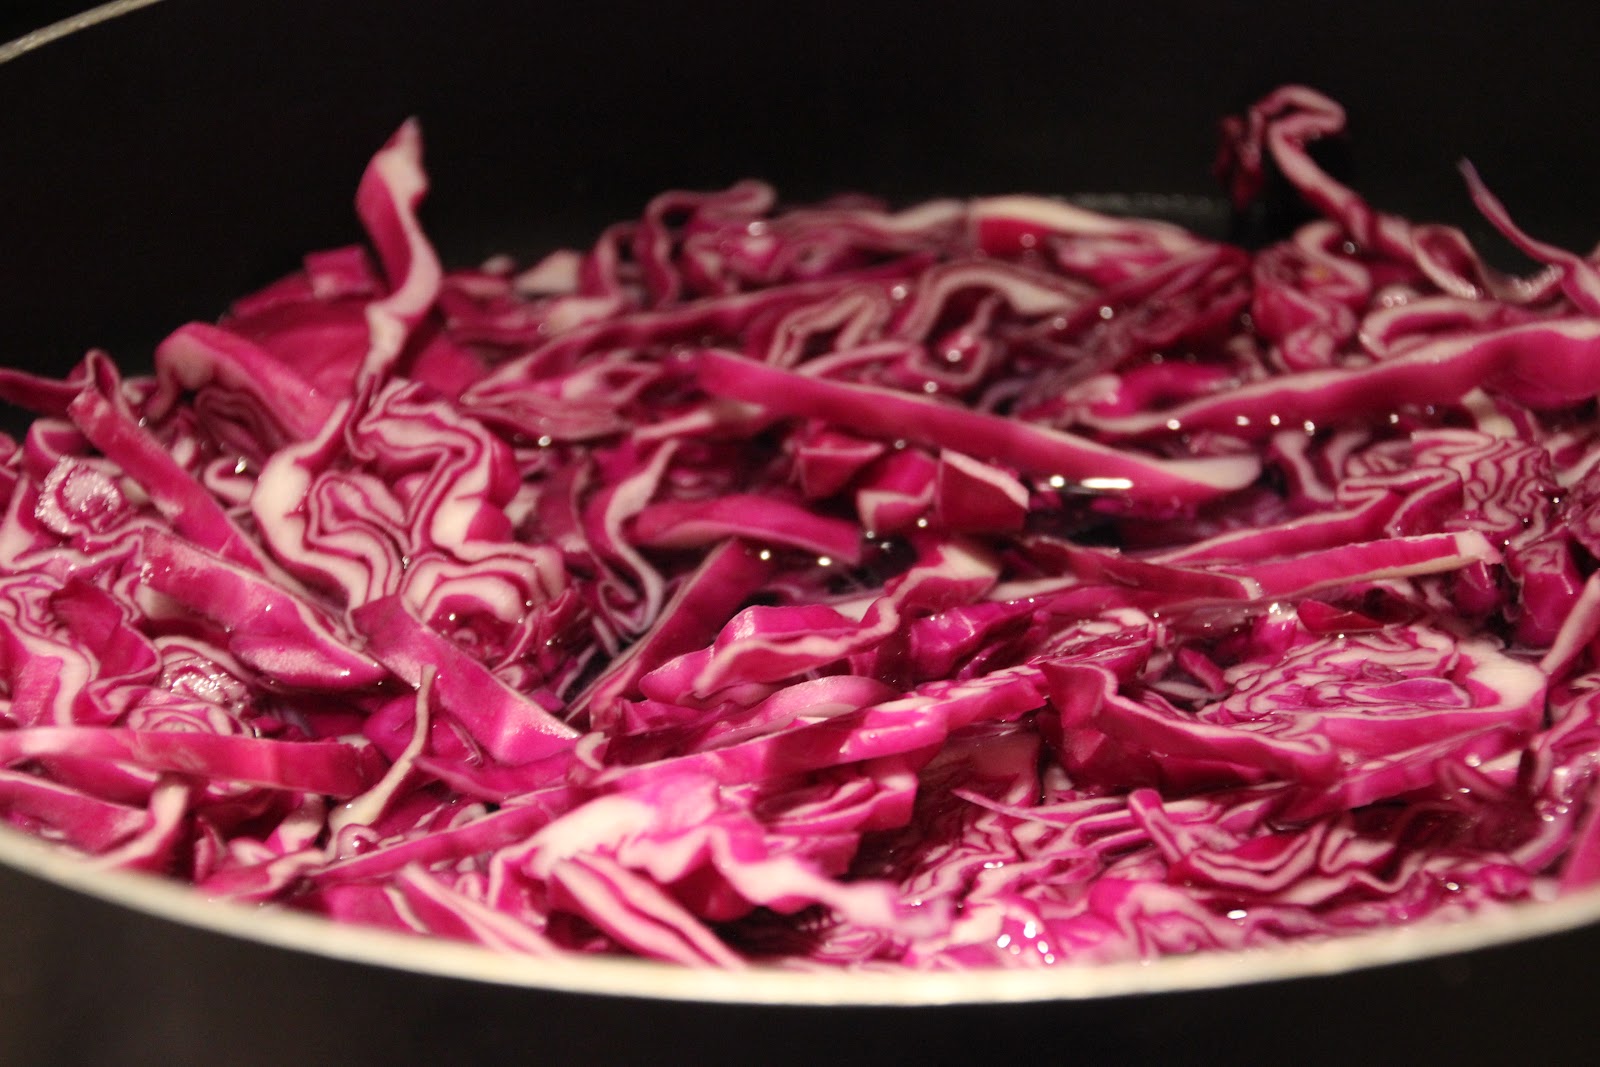
Start by thinly slicing your cabbage. You will only need about half a head of cabbage, and if you ask your grocer they will cut a head of cabbage in half for you so you don't have to buy the whole thing!
In a large skillet, add about 1 inch of water. Bring it to a boil and add the sliced cabbage, letting in boil uncovered about 15 minutes or until tender. (I like mine with a slight crunch to it still!) When it's done, strain the water and place the cabbage on a paper-towel lined plate to hang out.
Here is the awesome part - you are only using one pan!! Less dishes! Wipe out the pan from the cabbage to get the water out. Put in back on the stove and start cooking your chopped up bacon. After a few minutes add your sliced onions. Cook until bacon is done and onions are tender. Drain on a paper-towel lined plate (yes, again). In the bacon drippings add your brown sugar and flour, and then your salt, pepper, water and vinegar. Dump back in the cabbage and bacon/onion mixture and stir to combine.


Sweet Red Cabbage
by Girls in Aprons


1 medium head red cabbage (1 1/2 lb), thinly sliced
4 slices bacon, chopped (I'll be honest - I used 6 or 7)                                           
1 small onion, sliced
1/4 cup packed brown sugar
2 T all-purpose flour
1/4 cup water
3 T white vinegar
1/8 tsp pepper
1/4 tsp salt


In a large skillet bring 1 inch of water to boiling. Add your sliced cabbage and boil uncovered for about 15 minutes, stirring occasionally. Drain and set aside. Wipe out and dry the skillet with a paper towel.

In the same skillet, cook the bacon over mediu heat for about 4 minutes. Add the onion and continue cooking until bacon is cooked through and crispy and onion is tender. Remove from pan and drain on a paper towel.

Stir brown sugar and flour into bacon fat in the skillet. Add water, vinegar, salt, and pepper and mix well. Stir back in cabbage, bacon, and onion. Continue cooking until warmed through again, about 2 minutes.

 Recipe courtesy of Betty Crocker                                                                                                                                                        

Tuesday, August 28, 2012

Texas Caviar

Just in time for your Labor Day BBQ (or, let's face it, any reason to make Texas Caviar is a party in my book!)
This recipe came into my life a few years ago and my life pretty much hasn't been the same since. I had it at my sister in law's house and ate like the whole thing. It's seriously addicting! Pretty much, there is no BBQ unless Texas Caviar is coming.Whenever I bring Texas Caviar to a party or BBQ people always ask me for the recipe. I know there are a lot of versions of this recipe out there, but this is our tried and true recipe and has lots of yummy veggies in it.

Texas Caviar is basically a fresh salsa, with lots of veggies and beans in it. The cilantro really takes it over the top, though. Even if you don't love cilantro, still add it. Trust us!
Here is your lineup: black beans, kidney beans, blackeye peas, shoepeg corn, cilantro, avocados, tomatoes, red onion and green pepper. In the end you'll add the lime and vinegar (not shown). I also add some salt to taste. And go for the shoepeg corn. It's smaller and sweeter than regular corn and perfect for this salsa!
Drain and rinse all of your canned beans and corn. Just throw them in a collander and give them a good rinse, then throw them in a large bowl.
Chop your green pepper too. I like to dice mine up pretty small, but it's totally up to you. Just make sure you get rid of all the white ribs and seeds inside. Toss your green pepper into the bowl.
You want to make sure your avocados are ripe, but not mushy. Everyone has their own way of cutting an avocado. I cut mine in half, scoop out each half from the shell and lay them flat side down, like the one on the left. (Oh yeah, toss the big ol' seed in the center too)
Slice your avocado and then chop it the other way. Pretty easy, huh? Then toss all your avocados into your bowl. Oh, and chop your tomatoes, red onion and cilantro up and throw those in while you're at it. Can't forget those!
Almost done! Look at all those colors and fresh ingredients!
Seriously, folks. This is the reason we love BBQs around here! After all your ingredients are blended, add the juice of one lime and a teaspoon of vinegar. Add a sprinkle of salt just for good measure and let it chill in the refrigerator about an hour.
 And that is one looooong hour. Just sayin'.
We love to use those fun scoop chips, mostly because they hold a lot of Texas Caviar! Any chip will do, though, as long as you get that salsa in your mouth fast!
Ahh.... it's on it's way to my belly!

Texas Caviar
by Girls in Aprons

1 can white shoepeg corn
1 can black eye peas
1 can black beans
1 can kidney beans
**rinse first then throw in bowl

3 avocados - diced
3 tomatoes - diced
1/2 red onion- diced
1 green pepper - diced
1 bunch of cilantro – rinse and chop
dash salt

1 lime
1 tsp white vinegar

Mix everything then squeeze 1 lime and 1 tsp. of vinegar and let sit for a couple of hours. Serve with tortilla chips. We like the small bite sized ones or the scoop ones the best, but that's just our preference.

Monday, May 28, 2012

How To: Grilled Corn on the Cob


With summer just around the corner (for some of you summer is already there!) I know your backyard grill is going to get a serious workout! I know I plan our weekly menu around meals that can be grilled. Because, let's face it, I love the way grilled food tastes and I want to use it as much as I can before the rain comes back!

In the past my grill has basically cooked meat. Meat, meat, meat. But I always saw commercials with people grilling meat and peppers and corn, and I wanted to try it out! I had a few ears of corn just lying around (who doesn't?) and thought I'd add it to our barbeque last night.

Let me tell you - it's easy, smells wonderful, and the taste and texture are so different and amazing! For some reason the husks smell like roasted marshmallow and the corn was a little firmer, almost crispy. I definitely ate my fair share last night! Grilling vegetables brings out a different flavor than just sauteing them or frying them or however you usually cook your veggies. Give it a try!
Carefully peel back the husk of your corn
Taking the silks out is easy if you pull them all from the top. They only go about half way down the corn. You can pull any stragglers.
Soak them all in water about 20 minutes before grilling them. This keeps the husks from just burning like crazy. Which would be bad. You don't want that. Trust me.
Place the corn on a gril over medium heat. Turn every ten minutes or so. When the husks are black all the way around you know your corn is ready! Mine took about three turns or so.
Done!
Carefully peel the husks back, butter and salt (and I love parmesan cheese on mine too) and enjoy hot!

Saturday, March 17, 2012

Savory Kale Chips

There are a lot of things I've learned over the years about cooking for my family: new recipes, how to persuade picky eaters, and tips to get dinner on the table faster. But the most important thing (I think) is what I learned about grocery shopping.

When I was first married (and for the first few years after that) my husband and I would go to the grocery store, spend over a hundred dollars and stuff and then we'd come home and say "What are we going to make with all this?" I'd come up with a dinner idea and then realize I was missing one or several ingredients. I thought grocery shopping was frustrating and expensive, and although we had plenty of snack foods, we lacked in fresh produce and dinner options.

Thankfully (and I'm sure the rest of my family is grateful too) I learned to plan my menu in advance, scour grocery ads for sales, and make a grocery list based of sales and what I already had in my fridge. And for produce? Thankfully Bountiful Baskets came to my area! Getting their baskets every week forces my family and I to branch out and try new fruits and veggies (because we are not throwing any of this away!). We try new recipes with the produce and because I want most of it gone before the next basket comes we eat a lot more fruits and veggies with our meals and for snacks.

Last week we got kale in our basket. I have never had kale and didn't know what to do with it! I did a quick search for "kale" on Google and saw all these recipes for "kale chips". Apparently they taste similar to potato chips, but way healthier! And my friend Heidi said her kids loved them, and if I can get my kids to love something dark green and full of antioxidants, then point me in that direction please! This recipe is super easy, and can easily be changed up with different spices.
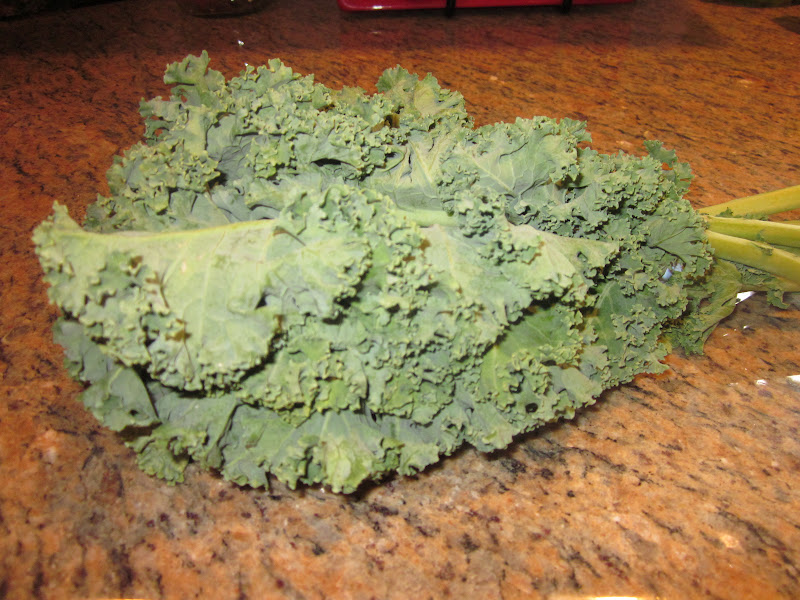
This is kale. When I first saw it I didn't know what it was. 
Cut of the bottom stem with kitchen shears or a sharp knife.

Cut the dark green leaves away from the middle stem and tear them into bite size pieces.
After washing them well and drying them really well with a salad spinner, place them in a large bowl, season with olive oil and spices, and arrange in a single layer on a cookie sheet (a non-insulated one works best) covered with foil.
Bake in your oven at 350 for 10-15 minutes. Let cool before eating!!


Savory Kale Chips

by Girls in Aprons

1 bunch kale
1 tablespoon olive oil
1/2 tsp salt
1/4 tsp garlic powder
1/4 tsp onion powder

Preheat your oven to 350. Cover a cookie sheet (preferably non-insulated) with foil.

With kitchen shears or a sharp knife cut the large stems away from the leaves. Tear the leaves into bite sized pieces. Wash well and dry in a salad spinner. Place leaves in a large bowl with oil and seasonings and mix. Lay the leaves on foil in a single layer.

Bake at 350 for 10 - 15 minutes until edges are browning.

**HINTS & TIPS:
1. If your kale is really curly, place the leaves so they curl down. This allows the air to move more under the leaves.

2. Don't use too much oil! This could make your chips soggy. You can also switch up the seasonings! Try salt and lemon, chili powder and garlic, salt and pepper, seasoning salt, Italian seasonings, etc.

3. Watch your leaves after they have cooked for 8-9 minutes. Once the edges start to brown you can pull them out. Depending on your oven you may want to turn your pan halfway through cooking. Don't let your kale chips burn - they become bitter.

4. If you find your kale chips are a bit soggy (my leaves in the middle of my pan were a bit chewy still) let them sit out on your counter overnight. They crisp right up!

Tuesday, March 13, 2012

Quiche Your Way

When I say that this is a recipe for quiche your way, I really mean it. I have a traditional quiche plus ideas for different fillers: vegetables, cheese, etc. Plus, a crustless quiche and a tip for giving it a bit of heat!
I married into a European family. Long story short, my in-laws grew up in North Africa, moved to Nice, France in their teens, met, got married, and moved to the United States in the '60s. They still have super thick accents. I should know, the first time I met them my then-boyfriend (now husband, obviously) left me with them for the longest ten minutes of my life. I couldn't understand a word they were saying! I understand them now, and I love them to death.
I also love my mother-in-law's cooking to death. She's the kind of cook that can throw some ingredients together and make an amazing meal. Unfortunately, she doesn't write down what she does, and I've failed to replicate about 90% of her recipes. When she does write down her recipes, they're a bit Rachael-Ray-like, such as "Toss in the peas" or "Add some butter".
I have, though, mastered the quiche. It's actually quite simple, and the best part is that as long as you know the base recipe (the eggs and milk) you can add whatever you want to make it your own. There are a few quiches that are standard: Quiche Lorraine is basically a quiche with cheese, usually swiss or cheddar, although you can use whatever you want. Quiche Florentine is quiche with spinach and cheese. I use fresh spinach but you can also use frozen spinach that has been thawed and squeezed dry.

In this quiche, I'm following an idea similar to Paula Deen's Spinach Bacon Quiche. I'm using milk instead of heavy cream (or half and half) and turkey bacon. Even my bacon-loving husband doesn't mind the turkey bacon, as long as it's in a recipe. He doesn't care for it by itself.


Turkey bacon gives off such little grease! I usually put a little oil in the bottom of the pan, otherwise the bacon just burns on the bottom instead of crisping up.
Roll out your dough. I know it's store bought, it seems like a silly little step, but store bought is still slightly thick, and I like to make sure it's all even. You then fold the crust into half and then into quarters, making it easier to transfer. You then....

...place the crust in your pie dish and unfold. Use your fingers to make sure the crust is shaped around the pan, including the edges and the bottom.

Layer your fillers, such as spinach, bacon, cheese, asparagus, etc. I'm not a fan of asparagus, but I hear it's great in quiche. Try different meats (ham?), cheeses, and vegetables. Make it yours!

Pour the egg/milk mixture over the fillers.

I love the crispy edges. If you want your quiche less crispy and more uniformly cooked (is uniformly a word?), wrap foil around the edges about halfway through cooking. This will keep the edges from getting too dark.
I've always struggled to find something to serve with quiche because it already had cheese, meat, and spinach, but if you omitted the spinach then you could serve it with a light salad. I usually offer fruit and croissants.


Spinach, Bacon, & Swiss Quiche
Girls in Aprons, recipe by Josette Lafranca and Paula Deen

7 large eggs
1/3 cup milk
1/3 cup heavy cream
Pinch salt
1 lb bacon or turkey bacon, cooked and crumbled
8 oz shredded Swiss cheese
2 cups spinach leaves, julienned
9" pie crust (I use Pillsbury)

Preheat the oven to 350 degrees.

Whisk the eggs, milk, cream, and salt together in a large bowl. Set aside.

Place the pie crust in your 9" pie plate. Layer the spinach, cheese, and bacon, about 3 layers each ingredient. Pour the egg mixture over the fillers.

Bake for 45-50 minutes or until eggs are set.

Individual Quiche = Quick, Healthy Breakfast
You can also bake in greased muffin tins. The quiche heats up great for quick breakfasts. Cook for about 20 minutes or until eggs are set. Let cool then remove from pan. Keep refrigerated until ready to eat. Heat for about 15 seconds in the microwave.

Crustless Quiche

Use 10 eggs, 1/2 cup heavy cream, and half cup milk. Bake in a greased 9x13 at 400 degrees for about 30-35 minutes.

Filler Options - just make sure you chop your fillers up to make bite-size pieces

Vegetables: Sauteed onions, mushrooms, leeks, broccoli, spinach, bell pepper, asparagus
Cheese: Really, anything. Try to go for something with more flavor (as in no mozzerella). Try a strong cheese you wouldn't normally eat, such as Gruyere or gorgonzola.
Meat: Bacon, turkey bacon, sausage crumbles, ham

Want some heat? The best way to add some heat to your quiche is a few drops of tabasco sauce. I wouldn't suggest red pepper flakes or jalepenos because the heat won't spread evenly, and chances are, the one person who doesn't want to bite into a jalenpeno will be the one who actually bites into it :)

Thursday, February 2, 2012

Super Stuffed Bell Peppers

I'm a self-proclaimed penny pincher (although anyone who really knows me would proclaim me that as well). Now please please don't confuse penny pincher with extreme couponer. I don't order 30 Sunday papers or spend hours clipping coupons and such (although I would consider it if a store around here automatically doubled coupons...). But I don't like paying full price for anything.

Anything you ask? Yes, anything.

Even produce, but I noticed that if, let's say, avocados were on "sale", it's because they were too ripe or really small. Apples were a great deal, but I'd learn later (as in the sad moment I bit into it) it was because they were mushy. That's when the planets aligned and angels sang...Bountiful Baskets came to my area. (AAAAAHHHH <--- that's angels singing).

I love Bountiful Baskets! In a nutshell, they are a co-op where, every Saturday morning, I go pick up a basket full of fruits and vegetables that I ordered earlier in the week. It's fun because I never know what it going to be in my basket, so it's really made me branch out and try new things, and I usually revolve the next week's menu off what I got in my basket. Oh, and did I mention that it costs me at least half of what I would pay in the grocery stores? At least half, usually more. What a deal, and my family is way healthier because of it too!

Click here to learn more about Bountiful Baskets.

Anyway, I got my basket on Saturday morning and it was amazing. And the crown jewels of my basket were these huge, beautiful red peppers. I couldn't just chop them into tiny pieces for an omelet, or strip them for a veggie platter. No, these babies were getting stuffed! And not just stuffed but super stuffed with all sorts of wonderful ingredients worthy of their awesomeness.

Okay, all that sounds weird. But hopefully this recipe finds you with some large bell peppers just hanging out, waiting to be stuffed and eaten. Also, this recipe is super versatile! Make it meatless! Add some fresh herbs! Try stuffing it with different veggies! You can really change up this recipe and make it your own. Have fun trying new ways to stuff your peppers!
Mix together the hamburger, onion, jalapeno, and garlic. Add corn, beans, tomatoes, tomato sauce and spices. Stir in cilantro and rice and salt to taste. It is NOW that you want to taste your hamburger mix and adjust it how you want it to taste!
Cut your peppers across the top. You may need to slice a small amount off the bottom to make sure the peppers can stand on their own, but don't cut through the bottom of the pepper!
With a spoon, scrape out all the "white stuff" and seeds. (You can at this point boil the peppers in a big stock pot for about three or four minutes to soften them a little. I actually like the peppers to still have a little crunch to them, but it's up to you!)
Add 1/4 of the the meat mixture to each pepper. Top with shredded cheese.
Bake and then garnish with chopped fresh cilantro.


Super Stuffed Bell Peppers
by Girls in Aprons

4 large and well shaped red, yellow, or orange bell peppers

1 lb. hamburger
1 onion, chopped
1 jalapeno, seeds and membranes removed, and then finely chopped
2 cloves garlic, finely minced
1 cup frozen corn
1 15 oz can black beans, drained
2 roma tomatoes, chopped
1 8 oz. can tomato sauce
1 cup green salsa
2 cups rice
2 tsp chili powder
1 tsp cumin
1/4 cup cilantro, chopped plus more for garnishing
salt to taste
Shredded cheese

Preheat oven to 350

Brown hamburger, onion, jalapeno, and garlic together. Drain off any fat. Add corn, black beans, tomatoes, tomato sauce and salsa. Stir in spices, rice, and cilantro. Taste and add salt if needed.

Cut off the top of your peppers, taking out the membranes and seeds. (Optional: If you want your peppers to be softer after they bake, boil them in a large pot of water for 3 or 4 minutes after you take out the seeds and membranes and let them drain - I like mine with some crunch still). Set your peppers in a baking dish and stuff each with a quarter of the meat mixture. Top with shredded cheese and bake at 350 for 30 minutes.

Monday, January 30, 2012

Chicken Pot Pie

So of the three of us "Girls", I am the only one that works full-time. I mean, outside the home. We all know that stay-at-home moms have quite a big job, too. It's a financial decision we made, and hopefully not anything too long-term. Anyway, at first I was really struggling with everything that I had to do. I got home around 6pm from work and picking up the kiddos, and I had an hour and a half to make dinner, help with homework, and spend a little quality time with each child, all the while trying to get some dishes, laundry, and cleaning done so that once the kids were in bed, I could relax before I crashed myself. Luckily I've convinced myself that a few nights a week of Top Ramen and grilled cheese sandwiches aren't going to kill us, especially if it means I get to play Legos or brush Barbie's hair for a little bit with my monkeys. And I've also learned a bit about kitchen prep on the weekend that makes weeknight meals a little easier. One of those is, as Sandra Lee would say, "semi-homemade." That means getting a rotisserie chicken and shredding it up - this is great for chicken noodle soup, chicken enchiladas, or *ahem* chicken pot pie. Chopping up veggies for the week is a huge time saver. And Pillsbury pie crust is just as good as homemade, at least in my opinion, and especially when I'm on a time crunch. I also pre-brown hamburger and shred up big bricks of cheese in my food processor, which is great to have on hand for quesadillas, soups, chili, pastas, or anything else that needs cheese (which is just about anything, am I right?).

Anyway... 

I love chicken pot pie. And I don't mean those little ones you get in the freezer section that taste like cardboard and have a gazillion calories. I mean, even I'm watching what I eat these days, and I find that dinners made from scratch (as opposed to from the freezer) are so much healthier for you, and as a big bonus, they taste much better. Trust me. My chicken pot pie is a great example of a little bit of effort with a big payoff. And while I don't know the calorie content here, I guarantee it isn't a gazillion.

Time savers here include Pillsbury pie crust (have I mentioned I love these?), rotisserie chicken, frozen vegetables (I never use canned, just a personal preference, but in this recipe canned peas would be really mushy) and pre-chopped vegetables, especially carrots, celery, and onion. I wouldn't pre-chop potatoes, though. They don't stay fresh that long.


 Chicken Pot Pie
by Kelli Lafranca for Girls in Aprons

1 1/2 cups chicken stock (or broth)
1 cup water
3-4 carrots, cut in half and then into half-moons
2 celery ribs, thinly sliced
3-4 red or Yukon gold potatoes, diced
1/2 cup (1 cube) butter
1 onion, chopped
1 cup frozen peas
1/2 cup flour
1/3 cup chopped fresh parsley
2 tsp chopped fresh thyme
2-3 cups cooked, chopped chicken (I use rotisserie)
1 package (15 oz) pie crust (2 crust package)

Preheat oven to 400 degrees.

Combine broth and water in a medium saucepan. Add carrots, potatoes, and celery and bring to a boil over medium-high heat. Reduce heat and simmer for 10 minutes.

Heat butter in a large, nonstick skillet over medium heat until melted. Add onion and saute until onion is translucent, about 5 minutes. Add 1/2 cup flour and stir together for 2 minutes. Slowly whisk in the broth mixture,  and add the frozen peas. Bring to a boil, then simmer about 5 minutes or until sauce is thickened. Remove from heat. Stir in chicken.

Line a 9" pie pan with one pie crust, making sure the edges of the crust reach the top of the dish. Fill the dish with the vegetable mixture. Using a small cookie cutter, cut a small hole in the middle of the second pie crust. Place the second pie crust on top of the vegetable mixture, securing the two crusts together, and flute the edges. Bake 20-25 minutes, or until the crust is browned.

For a fun version, make individual pot pies in large ramekins. For this, I omit the bottom crust and added everyone's initials to their own pot pie.