Showing posts with label bread. Show all posts

Sunday, October 6, 2013

Easy Homemade Pizza Dough

I think it's safe to say I've come a LONG way since I was first married. I don't think I tried baking with yeast until a few years ago, and I've been married over 11 years! Now I think I'd try almost anything that required the use of yeast...bring it on!

One of my most favorite traditions we have in my cute little family is Friday Night Pizza Night. We are all home together, we plan our favorite pizza recipe, and we rent a Redbox or buy the newest family flick that is out. We snuggle together, eat our pizza, and enjoy each other's company. My kids look forward to Friday night every week!

I want to share my dough recipe with you. I've tried a LOT of recipes, and this one has been tweaked to what our family likes best. Of course, everyone likes different styles - deep dish, crunchy, thick, whatever. I like a doughy crust with thick, chewy bread and garlic. And the best part is that this recipe is so easy. I've never failed at an attempt to make pizza dough with it!!

Keep up with Girls in Aprons as we share our favorite pizza recipes with you in the following months!

Easy Homemade Pizza Dough
Girls in Aprons

2 T active dry yeast (or 2 packets, I just buy mine in bulk at Costco)
2 T sugar
1/4 cup oil (olive oil is preferred, but you can use vegetable oil in a pinch)
2-3 tsp salt
1 tsp garlic powder (you can adjust this to your liking, or omit it)
4 cups flour 

In a mixing bowl, pour 1 1/2 cups warm water and sprinkle yeast on top. Let it stand until foamy (about 4-5 minutes).

With dough hook attachment, stir together the sugar, oil, salt, and garlic powder into the yeast mixture. Add flour and stir until mixed in completely. Dough will be sticky. Don't add more flour!! You will add a bit more as you roll it out later. Remove dough hook and cover with a clean kitchen towel. Set aside until doubled in size (about 30 minutes to an hour, depending on the temperature of your kitchen). Lightly flour your work surface. Place dough on work surface and roll out into the shape desired. I use a 12 inch pizza stone, and can get two pizzas from this recipe.

Preheat your oven to 475 degrees. (If using a pizza stone, place in oven before preheating, then remove carefully and place dough on hot stone). Put dough on pan or stone. Add sauce and topping and bake for 8-10 minutes.

* You can make this dough ahead of time. Just place in fridge and cover. Remove and let come to room temperature and rise before using. I would use it the same day you make it.
* To freeze, place dough in a freezer safe plastic bag for up to 3 months. 

Tuesday, April 23, 2013

Chicken Pot Pie Soup with Garlic Parmesan Biscuits

I know April isn't really "soup" month...but at least here in New Mexico we're had our share of colder days. And by colder I mean high 50s or low 60s. But its not the weather itself that makes is cold, it's this darned wind! It's brutal! And maybe you haven't thought of this, because I know I hadn't, but a windstorm in a desert setting means that sand is always in your hair, ears, eyes, and mouth.
 
I've been thinking of a chicken pot pie soup for weeks now, but I couldn't imagine making a soup and topping it with a pie crust. It seemed so boring. So maybe this soup is more like chicken with biscuits or whatever, but to me it's very similar to the filling of chicken pot pie soup. Call it what you want, it's delish. And start to finish, including the biscuits, took me less than 45 minutes.
 
I threw my chicken breasts in the crock pot in the morning with some water and a lemon that had been cut in half. The chicken had an ever-so-slight lemon flavor. It also made it super easy to shred. I also ate my biscuit inside my soup. I'm usually against anything that makes my bread soggy (except bread pudding...mmmmmm....bread pudding) but the garlicky cheesy rolls tasted so good with the soup.

Chicken Pot Pie Soup with Garlic Parmesan Biscuits
by Girls in Aprons

For the soup:
1 Tbsp oil
1 onion, chopped
1 stalk celery, sliced thin
2 cloves garlic
1/4 cup butter
1/4 cup flour
2 (15 oz) cans chicken broth or chicken stock
2 cups milk
2 chicken breasts (about 1 lb or so), cooked and shredded
2 tsp fresh or 1 tsp dry thyme leaves
1 12-oz bag frozen mixed vegetables
1 cup shredded cheddar cheese
Salt and pepper to taste

Heat oil in a large soup pot over medium heat. Add onion and celery and sauté until onion is translucent, 5-7 minutes. Add garlic and sauté for 1 more minute. Add butter to pot and let melt. Immediately add flour and whisk until butter and flour are combined. Continue stirring, using a whisk, for 2 minutes. Slowly add the chicken broth and milk, whisking continuously. Let simmer for 10 minutes, whisking often to keep milk from scalding on the bottom of the pan. Add thyme and frozen mixed vegetables. Continue cooking until vegetables are warmed, about 3 minutes. Whisk in shredded cheese until melted. Add salt and pepper to taste. Serve hot in a bowl and top with a warm biscuit (or two, or three).

For the biscuits:
2 cups all-purpose flour
2 Tablespoons sugar
4 teaspoons baking powder
1/2 teaspoon salt
1 1/2 tsp garlic powder
1/2 cup grated Parmesan cheese
 1/2 cup shortening (I used butter-flavored Crisco and highly recommend it)
2/3 cup plus 2 Tbsp milk
1 egg

In a bowl, combine the first four ingredients. Cut in shortening until the mixture resembles coarse crumbs. In a bowl, whisk milk and egg. Stir into crumb mixture just until moistened. Drop by heaping spoonfuls 2 inches apart onto an ungreased baking sheet (I roll mine into about golf-ball sized balls, they make about 12 rolls). Bake at 425 degrees for 10-12 minutes or until golden brown. Serve on top of soup.

Biscuit recipe adapted from allrecipes.com

Thursday, July 26, 2012

Chocolate Hazelnut Banana Bread

Ever thought of something and smacked yourself, "Why didn't I think about that before?!" It happens to me a lot :)

I was at work and a friend was talking about the amazingness of Nutella. Because it really is amazing. And we were wishing it was calorie free. I told her that my son only eats peanut butter sandwiches if they include Nutella. Her husband dips his fruit into Nutella...and therefore counteracting anything healthy and low-calorie about his snack. Her favorite was dipping bananas in Nutella and then freezing it.

Gasp. Frozen Nutella banana. Dipped in crushed hazelnuts. I just died.

Nutella...with a bananas....

That's it! Why haven't I thought about this before (as I smack myself in the head)?! I can't really call it Nutella banana bread because I use the Kroger brand that is about a dollar cheaper and tastes just as delicious. And one of my tips...don't mash your bananans. I used a large bowl with egg beaters (as opposed to my Kitchenaid which was being used for cookie dough) and just threw the peeled bananas in. The beaters mash up some of the bananas and cut the rest into pea-size amounts. The best bites contain warm banana bits and Nutella. And then I have this urge not to share any of it.


Can you kind of see how the chocolate hazelnut spread kind of marbles? I just stick a butter knife in the loaf pan and swirl in around (usually I play and spell my name) and it moves the batter and spread around in a marble effect.


Chocolate Hazelnut Banana Bread
by Girls in Aprons

2 cups all-purpose flour
1 teaspoon baking soda
1/4 teaspoon salt
1/2 cup butter at room temperature
2 tsp vanilla extract
3/4 cup brown sugar
2 eggs, beaten
5 overripe bananas
1 cup chocolate hazelnut spread (such as Nutella), microwaved until warm (about 15 seconds)

Preheat oven to 250 degrees F (175 degrees C). Lightly grease two 9x5 inch loaf pans or place cupcake liners in a muffin tin.

In a large bowl, combine flour, baking soda and salt. In a separate bowl, cream together butter and brown sugar. Stir in vanilla, eggs, and overripe bananas until well blended. Stir banana mixture into flour mixture; stir just to moisten. Pour half of the batter into prepared loaf pan or muffin tins. Drizzle half of the chocolate hazelnut spread over the batter and repeat with the batter and spread. Using a knife, make zig-zag patterns in the batter. This will incorporate the chocolate hazelnut spread into a marble pattern.

Bake in preheated oven for 2 hours, until a toothpick inserted into center of the loaf comes out clean. Let bread cool in pan for 10 minutes, then turn out onto a wire rack to cool completely.

Thursday, May 10, 2012

Banana Banana Bread with Crumb Topping

This week has been really stressful for me. Between working well over my allotted 8-5pm shift, my husband has been working even more, and my kids have been, well, crazy. I've worked through lunch, snacking on Ritz crackers and granola bars, because I don't have time to take my full hour lunch. My family has had cereal for dinner twice in a row, much to the celebration of the kiddos...although it's only Wednesday and we're already out of milk! And, here's the kicker, I have had about 6 hours of sleep each night. I'm more of a 8 or 9 hour kind of girl, so the 6 hour thing has me feeling more like a killer zombie on The Walking Dead (best show ever!).

So what's a girl like me to do when I'm stressed and tired and {possibly} grumpy?

Besides drink Diet Dr Pepper like it's a gift from heaven?

I bake. And chop vegetables. Those are two of my stress relievers. On rough days I can peel and chop a whole sack of potatoes, carrots, and celery and whip up a mean chicken noodle soup. But lately it's been all about the baking. Cookies, cupcakes, quick breads, dinner rolls...the girls at work think that I'm on a mission to make them all fat!

I made my fave banana bread recipe the other night. My grocery store sells the overripe bananas for 19 cents a pound, and by overripe I mean fruit flies are already cozying up to the bananas. So they're best used within a day or two. Sometimes I use the bananas in pancake mix or in smoothies, but in all honesty I prefer my banana bread over all that.

The best part about this bread, besides the obvious crumb topping which mimics a coffee cake, is the extra sliced bananas that go into the batter. I love finding a banana piece in my bread, it's soaked up the cinnamon and it's delicious. And, thanks to our dear friend Christina, I now know the secret to baking banana bread without a doughy center. Bake on a lower setting for a longer amount of time. Gives me an excuse to have the house smell like banana bread for 2 whole hours!


Banana Banana Bread with Crumb Topping
by Girls in Aprons

2 cups all-purpose flour
1 teaspoon baking soda
1/4 teaspoon salt
1/2 cup butter at room temperature
2 tsp vanilla extract
3/4 cup brown sugar
2 eggs, beaten
5 overripe bananas
1 ripe banana, sliced into half-moons
1 1/2 tsp ground cinnamon

For crumb topping
2 Tbsp brown sugar
2 Tbsp granulated sugar
1 tsp cinnamon


Preheat oven to 250 degrees F (175 degrees C). Lightly grease a 9x5 inch loaf pan or place cupcake liners in a muffin tin.

In a large bowl, combine flour, baking soda and salt. In a separate bowl, cream together butter and brown sugar. Stir in vanilla, eggs, and overripe bananas until well blended. Stir banana mixture into flour mixture; stir just to moisten. Fold in sliced ripe banana. Pour batter into prepared loaf pan.

Bake in preheated oven for 2 hours, until a toothpick inserted into center of the loaf comes out clean. Let bread cool in pan for 10 minutes, then turn out onto a wire rack.

Thursday, April 5, 2012

Easter Tomb Buns

As adults, we know that Easter isn't just about this bunny that hides eggs filled with candy and prizes...and if you didn't know that, we need to talk :)

However, even though we're adults, those of us with kiddos still put a lot of emphasis on the Easter egg hunts, photos with the Easter bunny, and finding the best deals on Cadbury Creme Eggs to stash away from the rest of the year - or, at least Carissa does that.

I don't know about you, but I'm always looking for a great way to help my kids understand the religious significance of Easter. It is not only the awakening of our Earth as it enters spring, but also a holiday to celebrate the awakening and resurrection of our Savior. While we have tried our best to instill this in our children in the past few weeks, their minds were still on the jelly beans we bought at the store and who was going to get more eggs.

Obviously, we need a new approach.

Then I remembered "tomb buns", an idea presented to us by our dear friend (sometimes known as the "fourth" triplet), Christina. There are dozens of variations of these treats, but the idea is that a marshmallow is baked inside dough. As the marshmallow expands and dissolves, it creates a hollow center. Here's the symbolism:

The dough = the tomb Christ was buried in
The marshmallow = our Savior, Jesus Christ
The cinnamon and sugar = the oils and spices Christ's body was anointed with
The hollowed center = the empty tomb following Christ's resurrection

This is a great family activity. You can use your own bread dough, thawed Rhodes rolls, or crescent rolls from a can. Your children can help roll the marshmallows and secure them into the dough. As they bake, you can talk to your children about the story of Christ's death and resurrection and what it means for all of us. After baking, you can then open up each bun to find the "empty tomb".


I made small dough balls and used small marshmallows because that's just what I had. Larger marshmallows will make the hollow even larger (obviously).


Cut the dough evenly into four sections.

Cut each section into four more sections. This gives you the 16 dough rolls you need for large tomb buns. If you're making small ones, cut each dough roll in half, giving you 32 dough rolls.

After rolling the marshmallow in the butter and then the cinnamon-sugar mixture, place the marshmallow on a slightly flattened dough ball.

Secure each dough ball firmly around each marshmallow. You don't want the marshmallow to melt out of the bun because it won't create a hollow center.


Dip the top of the dough ball into the melted butter. And yes, I need a manicure.

Then roll the top of the dough ball into the cinnamon-sugar mixture.

Place each dough ball into a greased muffin tin. Both small and large rolls will bake nicely in a 12-muffin size muffin tin.


And, I have to be grateful for good friends. My cinnamon seemed to go AWOL on me and I panicked. Who wants to go to the grocery store at 9pm with no makeup and jammies on? Maybe some of you, but not me. Luckily, my Costco-loving friend, Tai, lives a few blocks away and doesn't judge me (openly) about my attire or non-makeup face. Thanks Tai!

Easter Tomb Buns
from Girls in Aprons

For the bread:
1 cup milk, warmed to 110-120 degrees
1 Tbsp yeast
1/3 cup butter, softened
1/3 cup sugar
1/2 tsp salt
4 1/2 cups flour

For the rest of the recipe:
1/4 cup butter, melted
1/2 cup sugar
1 teaspoon cinnamon
16 large or 32 small marshmallows

Place the milk in a large bowl and sprinkle the yeast over the top. Wait about 5 minutes or until the yeast is starting to get foamy. Add the butter, sugar, and salt, and mix on low speed until incorporated (the butter will be lumpy). Gradually add the flour.

Place the dough on a large surface dusted with flour or cooking spray. Cut the dough into fourths and then cut those fourths into fourths. At this point, you have 16 dough rolls. If you are making large buns, you can start on the next step. If you are making small buns, cut each dough roll in half until you have 32 dough rolls.

Combine the 1/2 cup sugar and 1 teaspoon cinnamon in a small bowl.

Slightly flatten each dough roll. Roll each marshmallow in the melted butter and then into the cinnamon-sugar mixture and place one marshmallow on each dough roll. Wrap the dough around the marshmallow, sealing it carefully. Dip the top of the dough roll into the melted butter and then into the cinnamon-sugar mixture. Place each dough roll in a greased muffin tin.

Bake at 350 degrees for 20 minutes or until the bun is lightly browned. Serve warm (or reheat in the microwave for 10 seconds).

Friday, January 27, 2012

Peanut Butter Crescent Rolls

I was going to name this post: "According to my kids the best snack ever" but I felt it just didn't fully describe the recipe. And they are a little biased - like their dad, they think anything with peanut butter is manna from heaven.

So anyway, as a mom, I always have this ideas in my head of the "perfect mom". You know what I mean, right (right? or am I the only one?). The mom who gets up early enough to do her hair and makeup, whose children never have messy faces or stains on their clothes, whose car is never a pile of toys, hamburger wrappers, and Diet Coke bottles rolling around the floor. I am not one of those moms, but in my weird little head, I also have this idea that "perfect moms" always have a homemade afterschool snack for their kids.

Well by golly - call me perfect. Well, at least for today.

My kids came home today, hyper because it's the weekend and excited for the movie night planned with their cousins. I happened to have a free moment to think about a snack instead of shoving a handful of Nilla Wafers at them - and created "the best snack ever". You be the judge! But really these are easy to whip up (if I can do it with four crazy boys underfoot you can too!). And they are so verstatile - I used peanut butter with chocolate chips and peanut butter with raspberry jam. Add Nutella (which sadly we are out of), raisins, thinly sliced apples, honey, or any other combo that works for you and your family.
All you need to get started!
Place about a teaspoon or so of peanut butter (more or less depending on your preference) along the bigger end of the crescent roll. Place chocolate chips or about a teaspoon or so of jam. Roll up like normal and shape into a crescent shape.
Bake at 375 for about 10 to 12 minutes. Dust with powdered sugar and inhale. Or chew and swallow.

Submitted by Celeste - Girls in Aprons

Wednesday, January 11, 2012

Cinnamon Pull-Aparts

Really, I'm all about traditions. Since my family is so young it's easy to still start new ones while incorporating some of the traditions both my husband and I grew up with. I love reading about other people's traditions for birthdays, Christmas, back to school, etc and often times I totally steal their ideas (copying is the best form of flattery, right??). For example, one tradition I really love (and I came up with it all on my own - no stealing here!) is our "Week-O-Fun" that we do the week before school starts. We do something fun everyday (the spray park, picking out a new school outfit, bowling) to celebrate the end of summer and the start of a new school year.

This is usually a Christmas morning tradition for us. We love cinnamon pull-aparts in our house! And this recipe makes so much that, after we all eat for breakfast, there is still enough to snack on throughout the day! They are easy to make and kid friendly. Seriously, most of our family traditions revolve around food!
You need the package of biscuits that comes in a 4-pack (they will be packaged together) and ice cream for your sauce. Yes, that's right. ICE CREAM! You already know this is going to be good!
In a small sauce pan mix butter, sugar, brown sugar, and ice cream on low until combined and sugars dissolve.
Take the biscuits and cut them in quarters. Drop each quarter in the cinnamon sugar mixture to coat and place in the 9x13 pan.
This is what your sauce looks like. Don't try it though. You'll eat the whole thing before you get to use it on your biscuits!
Your cinnamon sugared biscuits. Just chilling, waiting for their caramel sauce.
Pour your sauce over the biscuits, trying to cover them all. (They all want to sauce dang it!)
Spread the sauce over the poor biscuits that didn't get any.
Bake at 400 for 15 to 20 minutes or until golden brown and bubbling. Invert pan carefully onto a large cookie sheet or serving tray. Let it cool slightly (it is like molten lava when it comes out!) and serve warm. (It's good cold too!)


Cinnamon Pull-Aparts
submitted by Celeste Pearson

4 (7.5 oz each) buttermilk canned biscuits (total of 40 biscuits)
Caramel Sauce:
1/2 cup brown sugar
1/2 cup sugar
1/2 cup vanilla ice cream
1/2 (1 stick) cup butter
Cinnamon and sugar mix
1/2 cup sugar
2 tsp cinnamon
 Butter (for the pan) or cooking spray

Preheat oven to 400 degrees. Butter or spray a 9x13 pan and set aside.

Mix sugars, ice cream and butter in a sauce pan on low. Stir frequently until sugars dissolve and mixture is slightly bubbling. Remove from heat. With scissors, cut biscuits into quarters and roll each quarter in the cinnamon/sugar mixture and put into buttered 9x13 pan. Pour the sauce on top evenly.
Bake for 15-20 minutes or until golden brown. Carefully invert pan on serving platter.
Optional: Place biscuit quarters into sprayed bundt pan.


Monday, November 21, 2011

Herbed Cornbread & Bacon Stuffing

This year, I am not in charge of our Thanksgiving dessert. I'm always in charge of dessert! So while this is a break from the norm, I'm secretly excited. Pies can take a lot of work! When I was 9 months pregnant with my third child, I entered a pie baking contest. I didn't expect to win, mostly because I'd never ever ever baked a pie before. But it was a challenge for me and I made it up as I went along. Worst part? I was up at 5am to bake the thing, hoping against hope that it turned out okay. Best part? I won first place and $100! All those old ladies who entered thought for sure they'd won, how could an amateur, first-pie-maker win? Probably luck, but also because when I can't sleep at night my mind wanders to how to make the perfect recipe. It doesn't always work out, but sometimes I'm a genius :)

Anyway, back to stuffing. I was asked to make stuffing for Thanksgiving this year and again, I've never made stuffing. Ever. At least not from scratch. I'm not counting the boxed stuffing that my kids could probably make with their eyes closed.

My mother in law makes this amazing cornbread stuffing. It was my first time having stuffing made with cornbread and I was in love. I think I literally fought over the last spoonful. It was just that good.

So here's my version of cornbread stuffing. It's delish, in my opinion. Give it a whirl!


Start with your cornbread. No, I don't usually use egg substitute but Target was sold out of eggs. Apparently that really happens.


Make your cornbread as directed on the box, easy enough. Then add your dried herbs. Pour into a 9x13 pan and cook for about half hour or until golden brown on top.


Chop up your veggies - onions and celery. You'll saute these in bacon grease!


When your cornbread has cooked and cooled, cut into 1-inch cubes and spread them out on a jelly roll pan. You'll stick these back in the oven to dry out. That way they soak in the flavors better while cooking.


Toss everything together in a large bowl. Add enough chicken stock to moisten the cornbread. I used a little over 2 cups in mine.

Cook in a buttered 9x13 pan until golden brown on top and firm in the middle.

So. Amazing. (The stuffing, not me. Well, okay, me too).


Herbed Cornbread and Bacon Stuffing
by Kelli Lafranca

2 boxes cornbread mix, Jiffy brand
2 eggs
2/3 cup milk
1 1/2 tsp dried oregano
1 1/2 tsp dried rosemary
1 1/2 tsp dried basil
1 lb bacon
1 large onion, chopped
2-3 ribs celery, chopped
2-3 cups chicken stock
Butter, for greasing the pan

Preheat oven to 400 degrees. Mix together cornbread mix, eggs, and milk until blended. Batter may be lumpy. Add dried herbs. Bake in a 9x13 greased pan for 30 minutes or until golden on top and cooked through. Set aside to cool.

Saute bacon in a large skillet or until bacon is crispy. Transfer to a plate topped with a paper towel to drain. Using the bacon grease, saute the onion and celery until the vegetables are tender. Remove from grease and set aside. Crumble the cooled bacon.

When cornbread as cooled, remove from pan and cut into 1-inch cubes. Transfer to a jelly roll pan and lay in a single layer. Cook at 400 degrees for 5-7 minutes or until dry (it will feel like toast).

In a large bowl, combine cornbread, crumbled bacon, onions, and celery. Pour chicken stock over mixutre, stirring after each 1/2-cup addition. Add enough chicken stock to moisten the cornbread (I used 2 1/4 cups). Pour mixture into buttered 9x13 pan and cook at 350 degrees for 45 minutes.

Saturday, November 19, 2011

Pumpkin Bread

Please tell me I'm not the only one obsessed with pumpkin right now.

Aubrey, my 3-year-old daughter, and I made a special trip to the store yesterday. Just for canned pumpkin. Of course I picked up other "necessities" while we were there (Diet Dr Pepper anyone?) but I was craving my pumpkin bread and wanted to kick myself for having not made it yet!

Did I mention we WALKED to the store? It's a 20 minute walk to Target and it was worth every step. This bread is just that good. It's perfect for Thanksgiving day breakfast...or any breakfast for that matter. I won't lie, I had some this morning with a glass of milk.

This bread is super easy to make. It's really just one of those recipes where you throw everything in your mixer, pour into pans, and bake. And, it makes 3 loaves of bread. So, wrap some up and share with friends, family, or neighbors. Or keep all three to yourselves, we won't judge.

Another great thing about this bread is that you can add whatever you want to it. I did one loaf with chocolate chips and did the other two loaves plain. You can also add walnuts, mashed banana, or cinnamon chips. This is also really good with the cinnamon butter I made for the pumpkin pancakes.


Pumpkin Bread
submitted by Kelli

2 (15-oz) cans pure pumpkin (not pumpkin pie mix)
1 1/2 cups vegetable oil
4 cups sugar
6 eggs
5 cups all-purpose flour
1 1/2 tsp baking powder
1 1/2 tsp baking soda
1 tsp salt
3 tsp pumpkin pie spice
1 tsp cinnamon

Optional add-ins: chocolate chips, cinnamon chips, banana bread, mashed banana, walnuts

Preheat oven to 350. Grease and flour three loaf pans.

Using an electric mixer (or a stand mixer with paddle attachment), mix together pumpkin, oil, sugar, and eggs. In a separate bowl, mix together flour, baking powder, baking soda, salt, pumpkin pie spice, and cinnamon. Add the dry ingredients in two batches to the pumpkin mix until just combined. Add any optional ingredients until just mixed.

Pour mixture evenly between the three prepared loaf pans. Bake for 1 hour or until a toothpick inserted comes out clean or with small crumbs attached.

{If your bread appears done on top but not cooking in the middle, turn your oven down to 250 and continue to cook until the middle is done. I cooked mine for half hour at 350 and one hour at 250}

Wednesday, November 2, 2011

Curried Butternut Squash Soup with Baguette Croutons

I hope everyone had a great Halloween! It seems like our Halloween was for a whole week long. From our apartment complex's party to a church party to a school party, by the time it was Halloween my kids already had enough candy to feed a small country and we hadn't even gone trick-or-treating yet!

I bought a butternut squash last week to put in my beef stew, and then I totally forgot about it. Tell me I'm not the only person who does that! I was trying to decide what to use it for...risotto? I'd always wanted to try butternut squash risotto but with the weather getting cooler (you know, in the 50s!) I decided to try soup. I've made it before but I switched it up a little.

First off, you need to know how to peel a butternut squash. It's kind of a hard squash with a tough peel. Stick your squash into the microwave for about 3-4 minutes. This will soften the flesh and the peel and make it easier to work with.

Next, take off an inch or so from the top or bottom. It keeps your squash from rolling around when you are peeling and gets rid of the ends.

 Cut the squash in half and discard the insides.

My dad likes to compost, and that included any organic scraps such as the insides of squash and melon. Every year he gets this plants that start growing that he can't identify and it's always fun to figure out which seed from which melon or squash actually took to the soil.

 Using a serrated peeler, remove the peel until you reach the orange flesh. You may need to remove a few layers before you reach it.
 After you have peeled the squash, cut it up into 1-inch cubes.
 Throw the cubed squash into a soup pot with the sauteed onions, garlic, curry, and chicken broth.
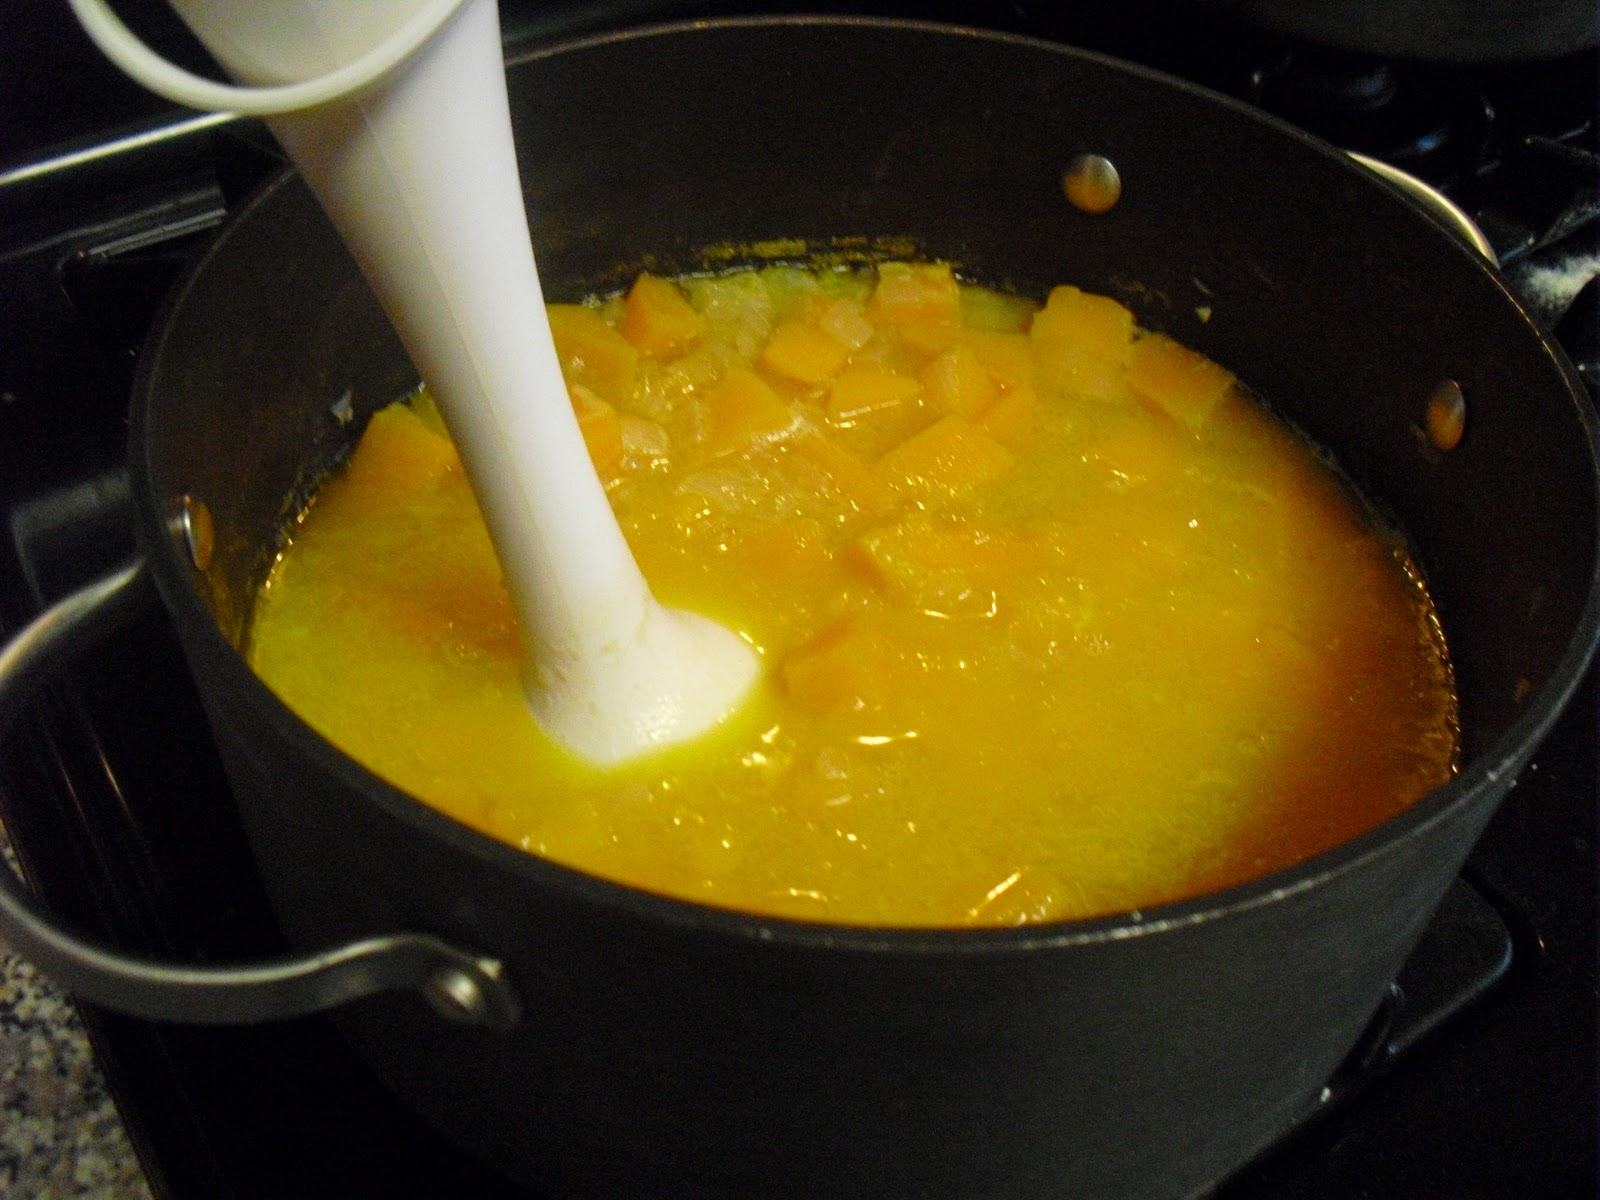
 When the squash has softened (about 20 minutes) use an immersion blender to blend the ingredients together. If you don't have an immersion blender, transfer the soup to a blender in batches.
 When everything is blended you have a beautiful soup. Look at that color!
 Brush the croutons with olive oil. This will help them become golden in the oven.

Curried Butternut Squash Soup

2 Tbsp olive oil
1 onion, diced
2 garlic cloves, minced
1/2 tsp curry powder
4 cups (32 oz) chicken stock
4 cups (1 1/2 - 2 lb) cubed butternut squash

In a large pan over medium heat, saute onion, garlic, and curry in oil until onion is soft, about 5 minutes. Add chicken stock and squash and cook until squash is tender, about 20 minutes. Using an immersion blender (or a blender), blend all ingredients until soup is smooth and thick. Add salt and pepper to taste.

Baguette Croutons

Preheat oven to 400 degrees. Slice a baguette into slices about 1/4" thick. Lay on a baking sheet and brush with olive oil. Bake for about 10 minutes or until toasts start to brown. Break the toasts in half and use as croutons in the soup.