Showing posts with label fall. Show all posts

Saturday, November 19, 2011

Pumpkin Bread

Please tell me I'm not the only one obsessed with pumpkin right now.

Aubrey, my 3-year-old daughter, and I made a special trip to the store yesterday. Just for canned pumpkin. Of course I picked up other "necessities" while we were there (Diet Dr Pepper anyone?) but I was craving my pumpkin bread and wanted to kick myself for having not made it yet!

Did I mention we WALKED to the store? It's a 20 minute walk to Target and it was worth every step. This bread is just that good. It's perfect for Thanksgiving day breakfast...or any breakfast for that matter. I won't lie, I had some this morning with a glass of milk.

This bread is super easy to make. It's really just one of those recipes where you throw everything in your mixer, pour into pans, and bake. And, it makes 3 loaves of bread. So, wrap some up and share with friends, family, or neighbors. Or keep all three to yourselves, we won't judge.

Another great thing about this bread is that you can add whatever you want to it. I did one loaf with chocolate chips and did the other two loaves plain. You can also add walnuts, mashed banana, or cinnamon chips. This is also really good with the cinnamon butter I made for the pumpkin pancakes.


Pumpkin Bread
submitted by Kelli

2 (15-oz) cans pure pumpkin (not pumpkin pie mix)
1 1/2 cups vegetable oil
4 cups sugar
6 eggs
5 cups all-purpose flour
1 1/2 tsp baking powder
1 1/2 tsp baking soda
1 tsp salt
3 tsp pumpkin pie spice
1 tsp cinnamon

Optional add-ins: chocolate chips, cinnamon chips, banana bread, mashed banana, walnuts

Preheat oven to 350. Grease and flour three loaf pans.

Using an electric mixer (or a stand mixer with paddle attachment), mix together pumpkin, oil, sugar, and eggs. In a separate bowl, mix together flour, baking powder, baking soda, salt, pumpkin pie spice, and cinnamon. Add the dry ingredients in two batches to the pumpkin mix until just combined. Add any optional ingredients until just mixed.

Pour mixture evenly between the three prepared loaf pans. Bake for 1 hour or until a toothpick inserted comes out clean or with small crumbs attached.

{If your bread appears done on top but not cooking in the middle, turn your oven down to 250 and continue to cook until the middle is done. I cooked mine for half hour at 350 and one hour at 250}

Saturday, November 12, 2011

Pumpkin Pie Dip

I love the fall. The leaves changing colors, the cooler temperatures, the kids going back to school...

I also love that I can bake things that include pumpkins and turkey and cinnamon. Those things just doesn't sound as good in the summertime, right?

My dad sent me some recipes from Taste of Home and this one jumped out at me. Probably because exactly 1 cup of pumpkin was sitting in my fridge from my pumpkin pancakes. In fact, the only thing I didn't have was gingersnaps...not my favorite cookie any other time, but with this dip they were divine. Seriously. Perfect for bringing to a holiday party or pre-Thanksgiving dinner snacking or even cleaning-up-after-Thanksgiving snacking.


Get all this together.


 After mixing the cream cheese and powdered sugar, add the canned pumpkin and mix, mix, mix some more.


Add the rest of the ingredients and pour into a serving bowl. Serve with gingersnaps. You can also serve it with fruit slices (think apples and pears) or on zucchini or banana bread. 


Pumpkin Pie Dip
courtesy Taste of Home

1 package (8 oz) cream cheese, softened
2 cups powdered sugar
1 cup canned pumpkin
1/2 cup sour cream
1 teaspoon ground cinnamon
1 teaspoon pumpkin pie spice
1/2 teaspoon ground ginger
Gingersnap cookies


In a large bowl, beat cream cheese and powdered sugar until smooth. Beat in the pumpkin, sour cream, cinnamon, pumpkin pie spice, and ground ginger until blended. Serve with gingersnaps. Refrigerate leftovers.

Wednesday, November 9, 2011

White Chicken Chili- a 30 minute meal!

I love summer. I love that the kids aren't in school so we can sleep in and have lazy days. I love that we can just do what we want without the chaos of alarm clocks and school functions. I love that I can go out without towing everyone's huge jackets with me, and when it's dark out I still don't need to do that. I don't necessarily love the heat, but in the Pacific Northwest it's pretty mild and I'm completely okay with that.

One thing I don't love about summer- the taboo on soups and chilis. If I make anything of the sort during the warmer months, my family looks at me like I'm crazy. So during the summer we stick to barbecuing, hamburgers, salads, etc. So finally it got a little cooler here (more like freezing). We were having the sister missionaries over for dinner and it was T-minus one hour to dinner time. This chili is super simple and I literally threw it together with about half an hour to go. The cornbread I made took longer to bake than this took to cook!
Mmm... White Chicken Chili. It was so delicious and easy to make!
Your line-up. Most of this I had on hand too!
The finished product. Yeah, I didn't take any during photos... it is really a "dump in the pot" kind of meal but it is super yummy. My kids ate it up so fast! One note, you want to make sure you rinse your beans!

White Chicken Chili
by Carissa Poyfair 

2 Tbsp extra virgin olive oil
1 onion, finely chopped
3 cloves garlic, minced
2 cans Great Northern beans or cannellini beans, rinsed
2-3 cups chicken, cooked and shredded
14 oz. can diced green chilies
32 oz. chicken broth, divided
1 cup frozen corn
1/2 tsp cayenne pepper
1 1/2 tsp cumin
salt and pepper, to taste

In a large pot, heat the oil on medium heat and saute the onion until tender, about 2 minutes. Add the garlic and cook one minute. Add the beans, chicken and chilies and stir until combined. Add 3 cups of chicken broth and let come to a boil. Add the corn, cayenne pepper, cumin and salt and pepper. Let it come to a boil, then lower the heat and let it simmer about 10 minutes. If it is too thick, add more chicken broth to your liking. Test your seasoning and adjust as necessary. Garnish with sour cream and freshly chopped cilantro, if desired.

**If you prefer your chili thicker, you can add less broth, or try this trick I learned. Smash some of the white beans against the side of the pot. This releases their starch and helps thicken the liquid a bit.

Wednesday, November 2, 2011

Curried Butternut Squash Soup with Baguette Croutons

I hope everyone had a great Halloween! It seems like our Halloween was for a whole week long. From our apartment complex's party to a church party to a school party, by the time it was Halloween my kids already had enough candy to feed a small country and we hadn't even gone trick-or-treating yet!

I bought a butternut squash last week to put in my beef stew, and then I totally forgot about it. Tell me I'm not the only person who does that! I was trying to decide what to use it for...risotto? I'd always wanted to try butternut squash risotto but with the weather getting cooler (you know, in the 50s!) I decided to try soup. I've made it before but I switched it up a little.

First off, you need to know how to peel a butternut squash. It's kind of a hard squash with a tough peel. Stick your squash into the microwave for about 3-4 minutes. This will soften the flesh and the peel and make it easier to work with.

Next, take off an inch or so from the top or bottom. It keeps your squash from rolling around when you are peeling and gets rid of the ends.

 Cut the squash in half and discard the insides.

My dad likes to compost, and that included any organic scraps such as the insides of squash and melon. Every year he gets this plants that start growing that he can't identify and it's always fun to figure out which seed from which melon or squash actually took to the soil.

 Using a serrated peeler, remove the peel until you reach the orange flesh. You may need to remove a few layers before you reach it.
 After you have peeled the squash, cut it up into 1-inch cubes.
 Throw the cubed squash into a soup pot with the sauteed onions, garlic, curry, and chicken broth.
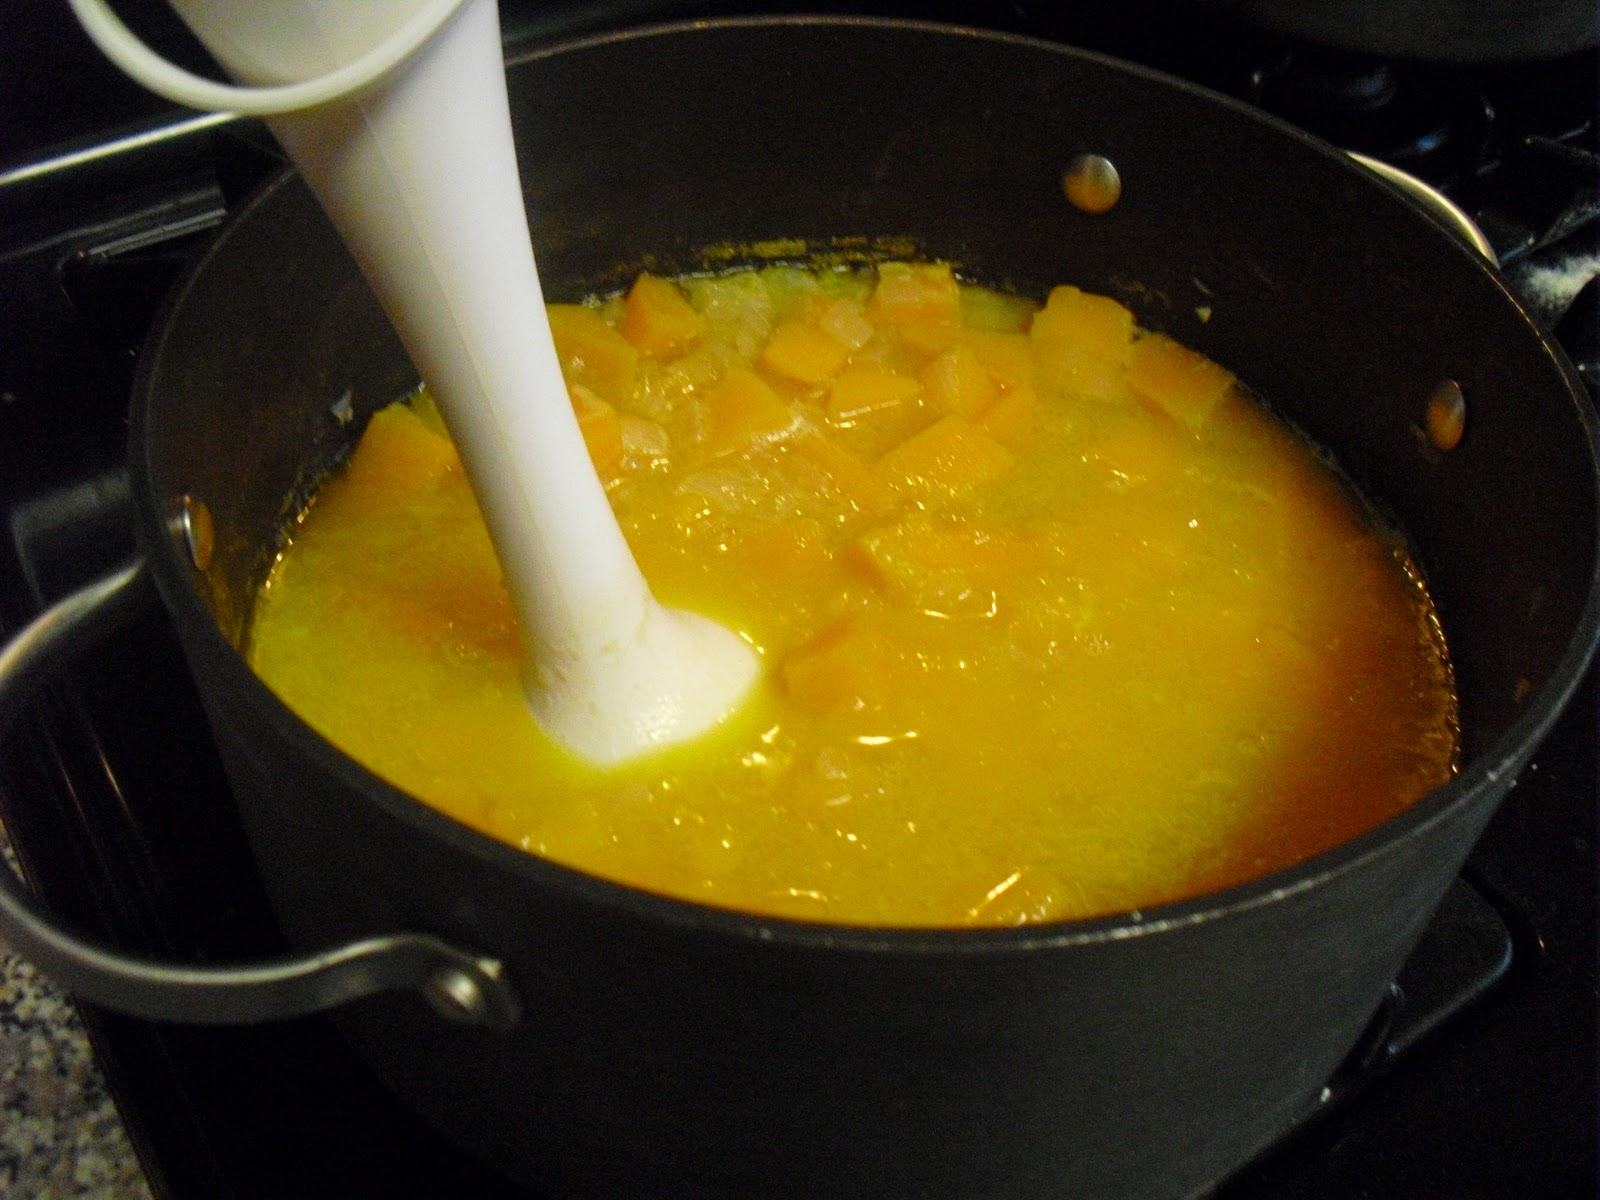
 When the squash has softened (about 20 minutes) use an immersion blender to blend the ingredients together. If you don't have an immersion blender, transfer the soup to a blender in batches.
 When everything is blended you have a beautiful soup. Look at that color!
 Brush the croutons with olive oil. This will help them become golden in the oven.

Curried Butternut Squash Soup

2 Tbsp olive oil
1 onion, diced
2 garlic cloves, minced
1/2 tsp curry powder
4 cups (32 oz) chicken stock
4 cups (1 1/2 - 2 lb) cubed butternut squash

In a large pan over medium heat, saute onion, garlic, and curry in oil until onion is soft, about 5 minutes. Add chicken stock and squash and cook until squash is tender, about 20 minutes. Using an immersion blender (or a blender), blend all ingredients until soup is smooth and thick. Add salt and pepper to taste.

Baguette Croutons

Preheat oven to 400 degrees. Slice a baguette into slices about 1/4" thick. Lay on a baking sheet and brush with olive oil. Bake for about 10 minutes or until toasts start to brown. Break the toasts in half and use as croutons in the soup.

Sunday, October 30, 2011

Pumpkin Pancakes with Cinnamon Butter

I'm not usually much of a breakfast for dinner person. I used to be, and then I got married.

Jeremiah doesn't like breakfast food unless it's breakfast time. This includes but is not limited to eggs, pancakes, French toast, and crepes. In fact, crepes are "dessert" to him. He was raised by French parents, so he's not entirely to blame.

He also won't eat casseroles, but that's another {sad} story.

Tonight, though, angels were looking out for me and my craving for pumpkin pancakes. Jeremiah is sick and only wants soup.

He'll eat Top Ramen but not casseroles? Who did I marry?!

So I made pumpkin pancakes the way I've been making them but used a technique I found online. I separated the eggs, mixing the yolks with the batter and beating the whites until stiff, then folding them into the batter. The result was super light and fluffy pancakes. It's an extra step, and certainly not necessary, but you won't be disappointed. Trust me.

Love the pic? Maybe just a little? I played around with my photoshop and this was the best I could do. I'm not a photographer by any means {in case that wasn't obvious} but I do try!


 Isn't pumpkin so pretty? I love the vibrant orange!
 Sift the dry ingredients together in one bowl and all the wet ingredients in another bowl, except the egg whites if you are planning on beating them separate.
 Another thing I love is beaten egg whites. Weird, maybe, but I love how shiny and glossy and light they are.
 You know your pancakes are ready to turn over when you see bubbles rise to the surface and the underside is browned.

 A pile of pancakes {well, at least the ones my munchins didn't eat} topped with cinnamon butter.


Pumpkin Pancakes
by Kelli Lafranca

1 1/4 cup all-purpose flour
3 Tbsp sugar
2 tsp baking powder
1 1/2 tsp pumpkin pie spice
1/2 tsp salt
1 1/3 cup milk (whole will make it richer, I used non-fat and it was still great)
3/4 cup canned pure pumpkin
4 Tbsp unsalted butter, melted
4 large eggs, separated
1 tsp vanilla extract
Butter, for greasing

Whisk first 5 ingredients in a large bowl to blend.

Whisk milk, pumpkin, butter, egg yolks, and vanilla in medium bowl to blend well. Add pumpkin mixture to dry ingredients; whisk just until smooth. Batter will be thick. Using an electric mixer, beat egg whites in another bowl until stiff but not dry. Fold whites into batter.

Heat a large pan over medium to medium-high heat (or heat a griddle to 300 degrees) and melt butter to grease the bottom. Pour 1/4 cup of batter onto heated pan. Cook until bubbles appear on the surface and the bottoms are browned, about 1-2 minutes per side. Flip over and cook another minute. Grease pan with butter after each batch. Serve with cinnamon butter.

Cinnamon Butter

1 stick butter, at room temperature
1 tsp cinnamon

Whisk together butter and cinnamon.

You can use this cinnamon butter on pancakes, toast, and other bread. Keep in the fridge.

Thursday, October 13, 2011

Broccoli Cheddar Soup

I don't know about you guys, but one of my favorite things about fall (besides Starbuck's Salted Caramel Hot Chocolate) is finally getting to make soup again! If I make soup in the summer, my family looks at me like I'm crazy. But as soon as the weather changes, it's all they ask for.

We make lots of soup in this house. Minestrone, corn chowder, taco soup, homemade chicken noodle, beef stew, and on and on. We love soup especially with yummy homemade rolls, and one of the soups my kids (yes, my kids) ask for the most is broccoli cheddar soup.

I got this recipe in my former life in Cleveland. My husband and I had just discovered Panera Bread and we loved their broccoli soup. So did every one else, since it was sold out by noon most days. So I went home one day and researched some recipes and found one that was very similar. I can't remember where I got the recipe (it's been years!) so if someone wants to take credit, go for it. I have changed it up to suit my tastes and cooking style since I am all about the easy.

Here's your lineup. All of the vegetables came from my Bountiful Basket last Saturday. I *love* my baskets and how easy it is to get my kids to eat more healthy these days! It's all pretty easy, and you can cut down on the fat in this cream-based soup by using fat free half and half like I did.
Mmmm.....  just looking at the ingredients makes me happy. Oh, and do yourself a favor. A big one. See those carrots on the left? The big, huge raw ones? Don't use those. Unless you love cutting carrots julienne-style. It took me almost half an hour to try and cut them small enough for my liking. So go out and buy a bag of pre-cut matchstick carrots. Like the kind that you use on salads. You'll thank me later. I suppose you can grate your carrots, but you don't want them toooooo thin, because they will just get mushy and get lost in the soup. Enough about carrots.
Start by sauteeing your onion in butter. I love the smell of sauteed onions. The only way to make this better is to add garlic to it. And hey, you can if you want. No one will stop you.
While the onion sautes, start your roux. It's just flour and butter whisked together. Later this will be what makes your soup nice and thick. But make sure you cook it for a couple minutes to get rid of the flour taste.
Next you slowly add your half and half while stirring constantly. No one likes a lumpy soup. Just slowly put it in there and whisk.
Next add your broth. I just typed brother, not broth. Please don't add your brother. You can use stock if that's what you have on hand. In fact, I think the original recipe I found used stock, but I'll be honest and admit I don't really see a difference in stock and broth, other than the higher price tag on the stock. Someone can enlighten me if you like.
After the half and half/broth mixture has simmered about 20 minutes, dump in the veggies. You want to chop them up pretty small in order to have them soften quickly. Simmer them for about 20 to 25 minutes too, but check on them periodically. When they are tender, it's time to blend!
Now, you can put your soup in batches in your blender and add it back to the pot. Or if you have an immersion blender like me, you can use that too. I like mine about 50/50. Half pureed, half not. The more you blend it, the thicker it will be, but I still like to have some chunks of broccoli and carrot in my soup. If you like yours less pureed or all the way pureed, it's totally up to you.
Next is the cheese. The best part of every meal. And please, please, please use sharp cheddar. Any other kind just won't do this soup justice.
Okay, so this isn't the prettiest soup out there. But it definitely rocks! If I can find a better picture later, I will repost it. But trust me when I say this will warm you up and fill you up all at once. Enjoy!

Broccoli Cheddar Soup

2 Tbsp butter, melted
1 medium onion, chopped
1/2 cup butter (1 stick), melted
1/2 cup flour
4 cups half and half (fat free is fine)
4 cups chicken broth (or stock)
1 pound fresh broccoli, chopped
2 cups carrots, julienned (or precut matchstick carrots)
salt and pepper to taste
1/2 tsp nutmeg (optional)
16 oz. grated sharp cheddar (about 4 cups)

Saute onion in 2 Tbsp butter. Set aside. Cook melted butter and flour using a whisk over medium heat for 3-5 minutes, stirring constantly. Slowly add the half and half, stirring constantly while adding. Add the chicken stock, whisking the whole time. Bring to a boil and simmer for 20 minutes.

Add the broccoli, carrots and onions. Cook over low heat until the veggies are tender, about 20 minutes. Add salt and pepper. The soup should be thickened by now. Pour in batches into blender and puree to your liking (or use an immersion blender). Return to pot over low heat and add the grated cheese. Stir until well blended and melted. Add nutmeg, if desired, and check your salt and pepper, adding more if necessary.

This is amazing in bread bowls, as well!