Showing posts with label cookies. Show all posts

Monday, December 17, 2012

White Chocolate Cherry Shortbread

I'm a Pinterest addict. And that's not an exaggeration. At last count I had over 3,000 pins and I've only been on Pinterest maybe 6 months. And I've only actually used about a dozen of those pins for projects and recipes. I have a long way to go. I'd probably do more Pinterest-inspired projects if I actually owned a home AND learned how to sew. And developed a case of insomnia that allowed me several hours of nothing to do.

One of the latest things I Pinterested was a list of Christmas cookies from Better Homes and Gardens. I chose these cookies based on the picture alone. I think I thought they were white chocolate peppermint cookies, so I was a bit surprised to find they were cherry. I'm not a fan of marashino cherries. I don't understand why they have to come on every milkshake I order. But, I put judgement aside and judged a book by its cover...or in this case, a cookie by its picture. The picture was gorgeous, I just had to try it out. I just made a few tiny adjustments.


I don't even like maraschino cherries, but in this cookie they are amazing!


I drained my cherries first in a colander before laying them on the paper towels to drain again. Love the color!


Cutting the butter in. When a recipe asks for cold butter, they really means COLD. I chop up my butter into small cubes and then put it in the freezer for 5-10 minutes before cutting it in. You can also use your Kitchenaid mixer for this.


The batter. It's shortbread, so it's going to be dry. If it's too dry and you can't seem to knead it in a ball, add a little water or cherry juice, but only a little. You want the shortbread to be flaky.


I didn't dip my cookies. I really wanted the cherries to shine through and thought if the cookies were dipped the white chocolate might overshadow the cherries. A drizzle and a sprinkling of white sprinkles turned out beautifully. A great balance of cherry and white chocolate.


White Chocolate Cherry Shortbread
by Better Homes and Gardens

1/2 cup maraschino cherries, drained and finely chopped (about a 10 oz jar)
2 1/2 cups all-purpose flour
1/2 cup sugar
1 cup cold butter
12 ounce white chocolate baking squares with cocoa butter, finely chopped (I used white chocolate chips instead of baking squares. Saved me a ton of money and chopping time)
1/2 teaspoon almond extract
2 drops red food coloring (optional) (I didn't use red food coloring. My son is allergic to it so we don't even have it in the home. You are welcome to use that or add juice from the cherry jar for extra cherry taste and to give the cookies a red tint)
2 teaspoons shortening

White nonpareils and/or red edible glitter (optional)
1. Preheat oven to 325 degrees F. Spread cherries on paper towels to drain well.
2. In a large bowl, combine flour and sugar. Using a pastry blender, cut in the butter until mixture resembles fine crumbs. Stir in drained cherries and 4 ounces (2/3 cup) of the chopped chocolate. Stir in almond extract and, if desired, food coloring. Knead mixture until it forms a smooth ball.
3. Shape dough into 3/4-inch balls. Place balls 2 inches apart on an ungreased cookie sheet. Using the bottom of a drinking glass dipped in sugar, flatten balls to 1-1/2-inch rounds.
4. Bake in preheated oven for 10 to 12 minutes or until centers are set. Cool for 1 minute on cookie sheet. Transfer cookies to a wire rack and let cool.
5. In a small saucepan, combine remaining 8 ounces white chocolate and the shortening. Cook and stir over low heat until melted. Dip half of each cookie into chocolate, allowing excess to drip off. If desired, roll dipped edge in nonpareils and/or edible glitter. Place cookies on waxed paper until chocolate is set. Makes about 60.


Monday, October 22, 2012

Chocolate Gooey Butter Cookies

 I love this title.

Chocolate? Yes please! Gooey? Mmmm... the best. Butter? Why not? Cookies? Love them!

This recipe has followed me from my Cleveland days. My husband, who doesn't like chocolate, loves these cookies. Like, loves them. These little morsels don't last a day in our house! They are super soft and exactly what the title says- gooey. The center has this soft, gooey-like texture that is amazing.

Obviously, this is a Paula Deen recipe. She makes great desserts, doesn't she? And this one doesn't disappoint. It has the butter in it, doesn't it?! And if you are interested in checking other "gooey butter" recipes out, she has an amazing Pumpkin Gooey Butter Cake that is perfect for this time of year!

You are going to start out with your dough, which is super thick. It needs to be put in the freezer for about an hour so you are able to roll it into a ball....
Like so. About a Tablespoon size, I go for about the size of a golf ball.
Roll each into powdered sugar. Yes, it's that kind of cookie.
Place on an ungreased cookie sheet. They don't get much bigger but you don't really want to crowd your pan so don't put them too close together. And don't overcook them. They'll look undercooked but once they cool they are perfect!
Let them cool on a wire rack. And try to resist eating them! They are super yummy warm, but you really get that gooey center when they are cooled.
Top with a little extra powdered sugar. More powdered sugar never hurt anyone. Unless you've breathed it in before...

Chocolate Gooey Butter Cookies

1 (8-ounce) brick cream cheese, room temperature
1 stick butter, at room temperature
1 egg
1 teaspoon vanilla extract
1 (18-ounce) box moist chocolate cake mix
Powdered sugar, for rolling and dusting

Preheat oven to 350 degrees F.


In a large bowl with an electric mixer, cream the cream cheese and butter until smooth. Beat in the egg. Then beat in the vanilla extract. Beat in the cake mix. Cover and refrigerate for 2 hours (or freeze for about an hour) to firm up so that you can roll the batter into balls. Roll the chilled batter into tablespoon sized balls and then roll them in powdered sugar. Place on an ungreased cookie sheet, 2 inches apart. Bake 12 minutes (no more!). The cookies will remain soft and "gooey." Cool completely and sprinkle with more powdered sugar, if desired.

Recipe courtesy Paula Deen- Foodnetwork.com

Tuesday, August 14, 2012

Chocolate Peanut Butter Sandwich Cookies

My favorite candy of all time is Reese's peanut butter cups. I get a Reese's Blizzard every time we go to Dairy Queen. There is no "branching out" for me. Cheesecake Factory has a chocolate peanut butter cheesecake that I get every time. I don't even care that it has enough calories to last me a week.

It runs in our family, too...sort of. Celeste's husband was convinced to find out the gender of their third baby (he wanted to keep it a surprise, something I feel is a bit like torture) when a friend baked him a chocolate peanut butter cheesecake. It was just that good.

Oh, and they had a boy.

So when I went to the store to get school lunch supplies for the kids, I was bummed that there were no chocolate peanut butter cookies. For me, not for the kids. They got Chips Ahoy. So instead I grabbed a box of cake mix and decided that I would have to make my own, dang it!

Ever had cake mix cookies? They're a lot of fun, especially when you find a new flavor of cake mix, like strawberry or butter pecan. The possibilities really are endless, and they are so easy to make. Hardly any measuring and certainly less dishes to do!


I rolled the cake mix into balls about the size of a small ping pong ball. This allowed for same-size cookies, and they didn't flatten too much.


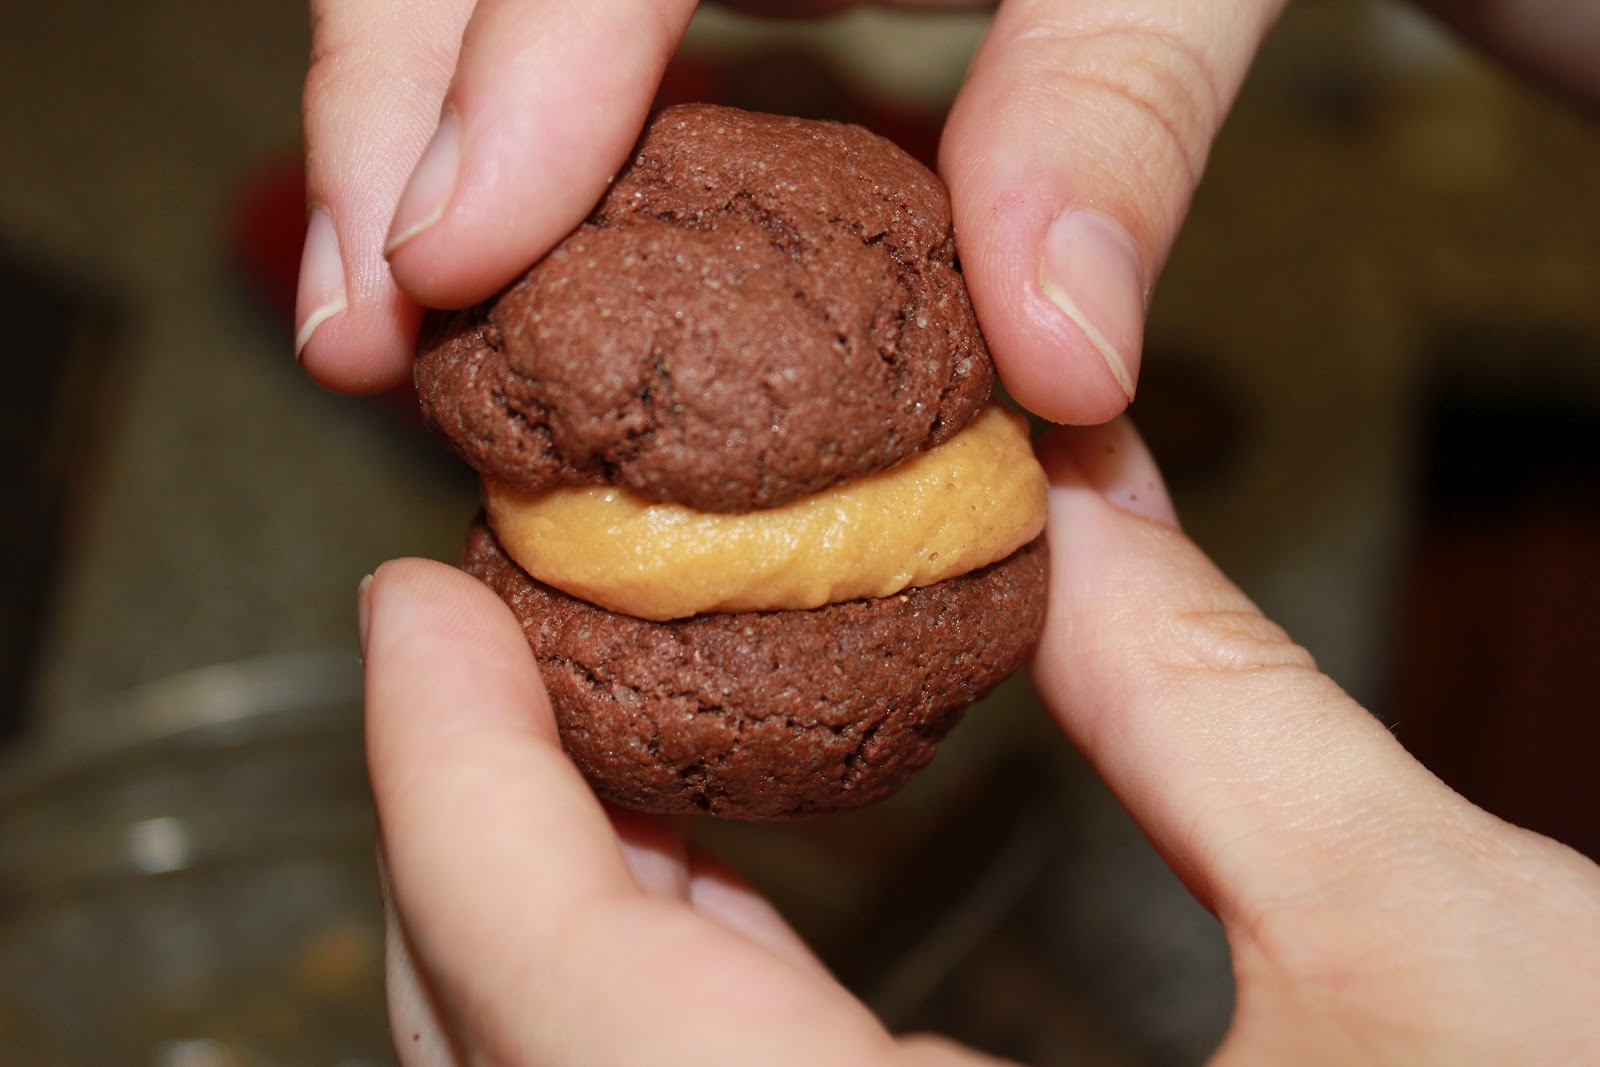
Be generous with the frosting, mostly because it's insanely delicious but also because the cookies are pretty thick and you don't want to lose the frosting in all the chocolatey-ness of the cookies.


See how the cookies are the same size? You could certainly make your cookies bigger or smaller, the key really is just making them the same size.


Chocolate Peanut Butter Sandwich Cookies
by Girls in Aprons

Cookie mix:
1 package chocolate cake mix, any variety (I used devil's food cake)
1 egg
1/4 cup water
1/4 cup vegetable oil

Peanut Butter Filling
1 cup creamy peanut butter
3/4 cup powdered sugar
2-3 Tbsp milk

Preheat oven to 350 degrees F.

Using an egg beater or stand mixer fitted with a paddle attachment, mix cake mix, egg, water, and oil together on medium speed until well blended. Roll by tablespoonfuls and place on a greased cookie sheet one inch apart. Bake for 15 minutes. Allow to cool for 5 minutes on cookie sheet before transferring to a wire rack to finish cooling.

Meanwhile, mix peanut butter and powdered sugar together with a whisk. Add milk one tablespoonful at a time until smooth but not thick, about the thickness of canned frosting.

Place a cookie upside down in one hand and apply a generous amount of peanut butter frosting to the bottom end. Top with another cookie and place on a plate. Repeat with the rest of the cookies.

You can dust the cookies with more powdered sugar or roll the sides in crushed peanuts, too.

Sunday, January 22, 2012

Chinese Fortune Cookies

I love Chinese food. Maybe not the real authentic stuff with raw fish and seaweed, but PF Changs is certainly up on the list of my favorite restaurants. Maybe not exactly what you would find in China exactly, but hey, they call it Chinese and I love it.

You can read about the origins of Chinese New Year here. I thought it was great, though, that Wikipedia mentioned that "Within China, regional customs and traditions concerning the celebration of the Chinese new year vary widely. People will pour out their money to buy presents, decoration, material, food, and clothing. It is also the tradition that every family thoroughly cleans the house to sweep away any ill-fortune in hopes to make way for good incoming luck. Windows and doors will be decorated with red colour paper-cuts and couplets with popular themes of "good fortune" or "happiness", "wealth", and "longevity"...The Chinese New Year tradition is to reconcile, forget all grudges and sincerely wish peace and happiness for everyone."

And, just in case you were wondering...2012 is the year of the DRAGON! Very Harry Potter-ish, right?

Here at Girls in Aprons, we really look for excuses to make good food, and Chinese New Year is no exception, even if we don't technically celebrate it. I played around with a few recipes and finally came up with one that, well...worked. My first batch was thick and tasteless. My second was thinner but still didn't quite have the taste I was looking for. Finally, I figured out a recipe that gives you a sweet, almondy taste with a bit of a crunch. And a fortune, of course.

PS: Want to make a whole meal? Try our fried rice and egg rolls with your cookies. It will become your go-to meal for any Chinese holidays!


For starters, you need a really cute sous chef. Then you whip up the almond extract and the egg whites until they are foamy. Don't go for soft peaks, you'll have whipped them too much. The best way I can describe is soft, soft peaks. The whites should have doubled in size.


Generously butter a cookie sheet (unless you have amazing cookie sheets that have super-non-stick powers). You only want to bake about 2-3 cookies at a time, because you have to be quick like lightning when they get out of the oven, otherwise they cool before you can bend them in shape.

Using the back of the teaspoon, spread the batter around into circles about 3 inches wide.

While your cookies are baking, lay out your previously made fortunes so they are ready for the grabbing. I would have normally printed some, but we are fresh out of ink, so I wrote a few. As did my 7-year-old, with such ominous fortunes as "Beware of the bathtub" and "You should watch two hours of tv today". Mine was more like hints, such as "Love is cleaning your room without being asked" and "Chocolate is a great way to say sorry."

As soon as your cookies come out of the oven, flip them over and lay a fortune down. Immediately fold them in half and put the center on the lip of a mug. Pull down on both ends to fold the fortune cookie (see pictures).


A muffin tin helps the fortune cookies keep their shape, and after they are all done, you can stick them in a 200 degree oven to dry them out a bit (some of them, depending on the thickness, can be a little cakey).

Chinese Fortune Cookies
by Kelli Lafranca

2 egg whites
1/2 tsp almond extract
Pinch of salt
1/4 cup all-purpose flour
1/4 cup sugar

Preheat an oven to 375 degrees. Grease a baking sheet with butter. Set aside.

In a mixing bowl, using egg beaters, beat the egg whites and almond extract until foamy but not stiff. Add the rest of the ingredients and blend well.

Pour a teaspoonful of batter onto prepared baking sheet and, using the back of the teaspoon, spread into a 3-inch circle. Repeat two more times, making three cookies per sheet. Bake for 5 minutes or until starting to brown at the edges. Using a spatula, immediately remove the cookies from the baking sheet, flip them upside down (bottom is now on top) and place a fortune slip on top. Fold in half and place the cookie on the edge of a mug and pull down on the corners. Place in a cupcake pan to help hold the shape while it cools.

If your cookies aren't dry enough for you, stick the cupcake pan in a 200-degree oven for about 10 minutes.

**I found most of my fortunes (except for the crazy ones, we made those up) here.


Wednesday, December 21, 2011

Lemon Raspberry Thumbprint Cookies

I know I'm not the only one who has waited until the last possible moment to make cookie plates for friends and family. I normally have this done a week or so before Christmas, yet here we are FOUR days before Christmas and I've only made one of the four treats I am planning to give out. Tomorrow I need to get my bake on, and hope that my mother-in-law will willingly help with the dishes and/or the kiddos.

I usually find a good reason to be in the kitchen, whether it's because I can blast the music and dance while I bake, or whether it's because I can eat the raw dough (you know you do it, too!), or because mixing and chopping and stirring is my own personal stress-reliever...just not the dishes!

Anyone who loves to bake needs a good shortbread cookie dough recipe. Once you know this recipe you can let creativity take over. You can add different flavorings and extracts, nuts, chocolate, fruit, roll it around in ground nuts, coconut, or powdered sugar, create new shapes...really, the possibilities are many.

I took a shortbread recipe I learned a long time ago from Barefoot Contessa and made my own version of thumbprint cookies. They are bright and delicious and make me very happy when I eat one.

You start with the basics, and I'm not sure why, but the vanilla is stealing the spotlight and hiding the raspberry jam, but it's there. Promise.


Mix, mix, mix. If my picture was better you'd see little yellow bits from the lemon zest. So. Good!


After everything is mixed, roll out the dough into a flat disk and let chill for about 30 minutes. If you chill it longer than that, you'll need to let it thaw slightly otherwise it won't be pliable...and yes, I know this from experience.


What? My picture is a little off-center? That's because my handy 7-year-old took it for me. But you get the basic idea. After rolling the dough into 1 1/2" balls, use one hand to hold it together slightly (it's prone to cracking) and press down a 1/4 teaspoon into the center.


Using the same 1/4 teaspoon, fill the holes with raspberry jam. Pretty, right?


All finished!


Lemon Raspberry Thumbprint Cookies
submitted by Kelli Lafranca, adapted from Ina Garten

3 sticks unsalted butter, at room temperature
1 cup sugar
1 tsp pure vanilla extract
3 1/2 cups flour
1/4 tsp salt
Zest from 1 lemon
Raspberry jam

Preheat the oven to 350 degrees F.

In an electric mixer fitted with the paddle attachment, cream together the butter and sugar until they are just combined and then add the vanilla. Separately, sift together the flour and salt. With the mixer on low speed, add the flour mixture to the creamed butter and sugar. Mix until the dough starts to come together. Dump on a floured board and roll together into a flat disk. Wrap in plastic and chill for 30 minutes.

Roll dough into 1 1/2-inch balls. Place the balls onto an ungreased cookie sheet and, using a 1/4 teaspoon, make an indent in the top of each ball. Fill each indentation with 1/4 teaspoon raspberry jam. Bake for 18-22 minutes or until the bottoms are lightly golden. Let cool on a wire rack.

Candy Cane Kiss Cookie Bites

These little bites were super easy to make and so yummy! I love peppermint and chocolate together. I've been known to drop a candy cane into my hot chocolate and I recently discovered chocolate-covered mini candy canes. Love it! Around December-ish, Hershey's comes out with Candy Cane Kisses and they are so good. White chocolate and a peppermint ribbon- they are speaking my language! I could eat an entire bag (I said could, not did) and love to find ways to use these babies up. On the back of the bag they had a peppermint swirled cheesecake recipe that I need to make sometime too.

A couple of years ago, I made these cookies, but I made them into regular sized cookies. They were a huge hit at a ward Christmas dinner, but I didn't like how I had to take a huge bite in order to get to the center where the Candy Cane Kiss was (because we all know that's the best part), so this year I made them with my mini muffin tins and I love the way they turned out. So much easier to fit on a holiday treat plate, and I was able to get chocolate cookie and peppermint in each bite. Plus, anything is cuter when it's mini, right?

Adorable, right? I love the little bite-sized cookie!
Fill your lightly-sprayed mini muffin tins a little more than half way.
While the cookies are baking, unwrap a bag of these bad boys.
After your cookies have cooled a few minutes, press in the Kisses.
Press them in pretty good, and then let them do their thing. The bottom will melt a little and stick to the cookie.
Add to your treat plate, take to a potluck, or just eat them up yourself. Super easy, right?

Candy Cane Kiss Cookie Bites
submitted by Carissa @ Girls in Aprons

1 cup (2 sticks) butter, softened
1 1/2 cup sugar
2 eggs, room temperature
1 tsp vanilla extract
2 cups flour
2/3 cup cocoa powder
3/4 tsp baking soda
1/2 tsp salt
1 cup mini semi-sweet chocolate chips
1 bag Candy Cane Kisses, unwrapped

Preheat oven to 350 degrees. Beat together butter and sugar. Add eggs one at a time and vanilla and mix until light and fluffy. In a separate bowl, combine flour, cocoa powder, baking soda and salt. Add gradually to your butter mixture until well blended. Add your chocolate chips and stir until combined.

Lightly spray your mini muffin tins and drop batter into each hole, filling it a little more than half way. Bake for 10-12 minutes, or until done (it will look dry on top). Let cool for a couple of minutes, then press the Candy Cane Kisses into the center of each cookie. Transfer to wire racks until completely cooled.

Saturday, August 20, 2011

Chewy Chocolate Chip Cookies

I love me some chewy chocolate chip cookies. I could eat a whole batch all by myself, especially just out of the oven. I probably wouldn't even share with my kids.

However, I've tried so many different recipes for "world famous" or "the best" chocolate chip cookies and the results were always the same - dry, crispy cookies. Sure, they were okay warm out of the oven, but once they cooled down I was disappointed. Don't get me wrong, if you love crispy cookies good for you. I'm just not a fan. Unless they're Oreos and I can dip them in milk.

**As a tip, if you ever have dry, crispy, or stale cookies, don't throw them out! Freeze them until you need a pie crust. Then throw them in a food processor and pulse until fine. Add some melted butter, just enough to hold cookie crumbs together. It makes a fantastic chocolate cookie crust as a replacement for graham cracker crusts. Try it with chocolate pudding pie or cheesecake!***

I think I finally found the recipe. The cookies are slightly crunchy on the outside but soft and chewy on the inside. My fave! I stole it from Our Best Bites who stole it from Cooks Illustrated. The secret, or at least what I think is the secret, is melted butter (no worrying about actually thinking ahead of time to leave the butter out overnight!) and an additional egg yolk. Now I don't know the science behind this, but this is what Cooks Illustrated said:

"Most cookies start with creamed butter. Creaming incorporates air into the dough, resulting in an undesirable (in these cookies) lightness. Our thoughts sifted to chewy brownies and blondies, both of which typically begin with melted butter. We tried both creamed and melted butter and found that melted butter did indeed give us the dense, chewy texture that we were after.

We turned to the one factor that we hadn’t yet fully examined–the egg factor–and found that one whole egg plus one egg yolk keeps the cookies soft and pliable hours after emerging from the oven. Also, cooling the cookies directly on the cookie sheet promotes the soft, chewy texture. Finally, we had a thick, chewy chocolate-chip cookie that could rival any gourmet bakery’s."

So, yeah, what they said. However it works, I love it. I totally agree with the "bakery" cookie comment, no more paying $2 for a bakery cookie, I can make my own thank you!

Start with these ingredients - I chose to use half semi-sweet chips and half peanut butter chips in my cookies. Next time I'm using Nestle's new dark chocolate chips. I'm super excited to try them! Speaking of trying, you might notice my chocolate chip bag is opened. I'm a chocoholic, I may or may not have tried a few prior to cookie making.

Start adding the sugar and brown sugar in your mixing bowl. The add the melted butter.

Give it a good stir and add in the eggs and vanilla (I never measure, a little extra vanilla never hurt anyone).

Gradually add the pre-measured dry ingredients. Mix it all together.

Finally, add your chocolate (and peanut butter) chips, along with toasted almonds, if desired. And I usually desire them, I love the little crunch they give the chewy cookies, but not when I have peanut butter chips in the mix.

Here's another tip from Cook's Illustrated.


"Form scant 1/4 cup dough into ball. Holding dough ball using fingertips of both hands, pull into two equal halves. Each half will have a jagged surface where it was ripped from the other; rotate each half up so the jagged surface faced the ceiling and press the halves back into one ball so that the top surface remains jagged. (The nooks and crannies you have created will give the baked cookies an attractive and somewhat rough, uneven appearance.) Place formed dough onto one of two parchment paper-lined cookie sheets, about 9 balls per sheet. "


If you want to make large, bakery style cookies, put the two halves back together as Cook's suggests. For smaller cookies (portion control!) just keep the two halves apart. It looks like this:


Then bake! The cookies are done when the bottoms are golden brown. The tops will appear a little underdone, but don't worry, they will finish cooking as they cool. If you overbake then you're going to get crispy cookies, which defeats the purpose of making chewy cookies :)


And eat, eat, eat...or share if you'd like!


Chewy Chocolate Chip Cookies
courtesy Our Best Bites - love them!

2 cups plus 2 Tbsp flour
1/2 tsp baking soda
1/2 tsp salt
12 Tbsp butter (1 1/2 sticks), melted and cooled until warm
1 cup brown sugar
1/2 cup granulated sugar
1 large egg plus 1 egg yolk
2 tsp vanilla extract
1 1/2 cups semi-sweet or bittersweet chocolate chips (I prefer Nestle's dark chocolate chips and I just throw in the whole bag - I'm hoping for Target to clearance them so I can hoard the whole stock)

  • Heat oven to 325 degrees. Adjust oven racks to upper- and lower-middle positions. Mix flour, salt, and baking soda together in a medium bowl and set aside.
  • With an electric mixer, thoroughly blend the butter and two sugars together. Mix in the egg, egg yolk, and vanilla. Add the dry ingredients and mix until just combined. Stir in chips.
  • Take about 1/4 C dough and form into a ball. Break ball in half and place dough on cookie sheet with broken edge facing up (or just use a standard sized cookie scoop). Bake until cookies are set around outer edges start to hardenyet centers are still soft and puffy, 10-13 minutes. Cool cookies on cookie sheets. Serve or store inairtight container.