Showing posts with label Asian. Show all posts

Saturday, September 22, 2012

Sweet & Sour Chicken

Don't forget to "like" us on Facebook to get updates
on our newest recipes and giveaways!

We have been woefully slacking lately. At least for me, every day I have been planning on posting something new and exciting, and then I get home from work and just crash. I started a new job after being a stay-at-home mom for 8 years and by the time I get home, there is just no time for anything. I don't know how all you working moms do it, because I am so exhausted by the end of the week to get anything done! But all three of us work as well as take care of our families, and with kids in school it just got crazier! We'll try and get recipes up more now that we are in the swing of things (hopefully!).

But on to the recipe. This little gem has been in my recipe box for years. I got it in a recipe exchange. You know, those emails you get that ask you to send an email to so-and-so and then within so many weeks you'll get like 36 recipes back (but it never actually turns out that way)? Well, I was sent this recipe in one of those, and I hate to admit that I didn't actually send an email to anyone in return. I am so bad at those things and usually delete them, but I was so happy to get this recipe! I made it the next night and was so in love with it. I honestly can't remember where the recipe came from, some cook book maybe? I wish I could remember so I could give credit, so if anyone has seen something similar let me know!

Over the years, I've tweaked the recipe here and there until it fit my family's tastes and we make it a lot. It is definitely a process, with cutting, breading, frying and then baking, but it's very worth it and once you get the system down it goes pretty quick.
Yuuummmm!!! This is one of my husband's favorite meals, and it is making my mouth water!
Basically, but your chicken up into large bite-size pieces, then throw them (in batches) into a ziploc bag with flour, and shake to coat.
Place the floured pieces into a pan with hot oil, and just let them brown. You'll also do this in batches so it doesn't overcrowd the pan.
Once browned, put them in a 9x13 pan.
For your sauce, put the dry ingredients in the pan first, then add your liquids.
Bring it a boil and let boil one minute. It will get thick, trust me!
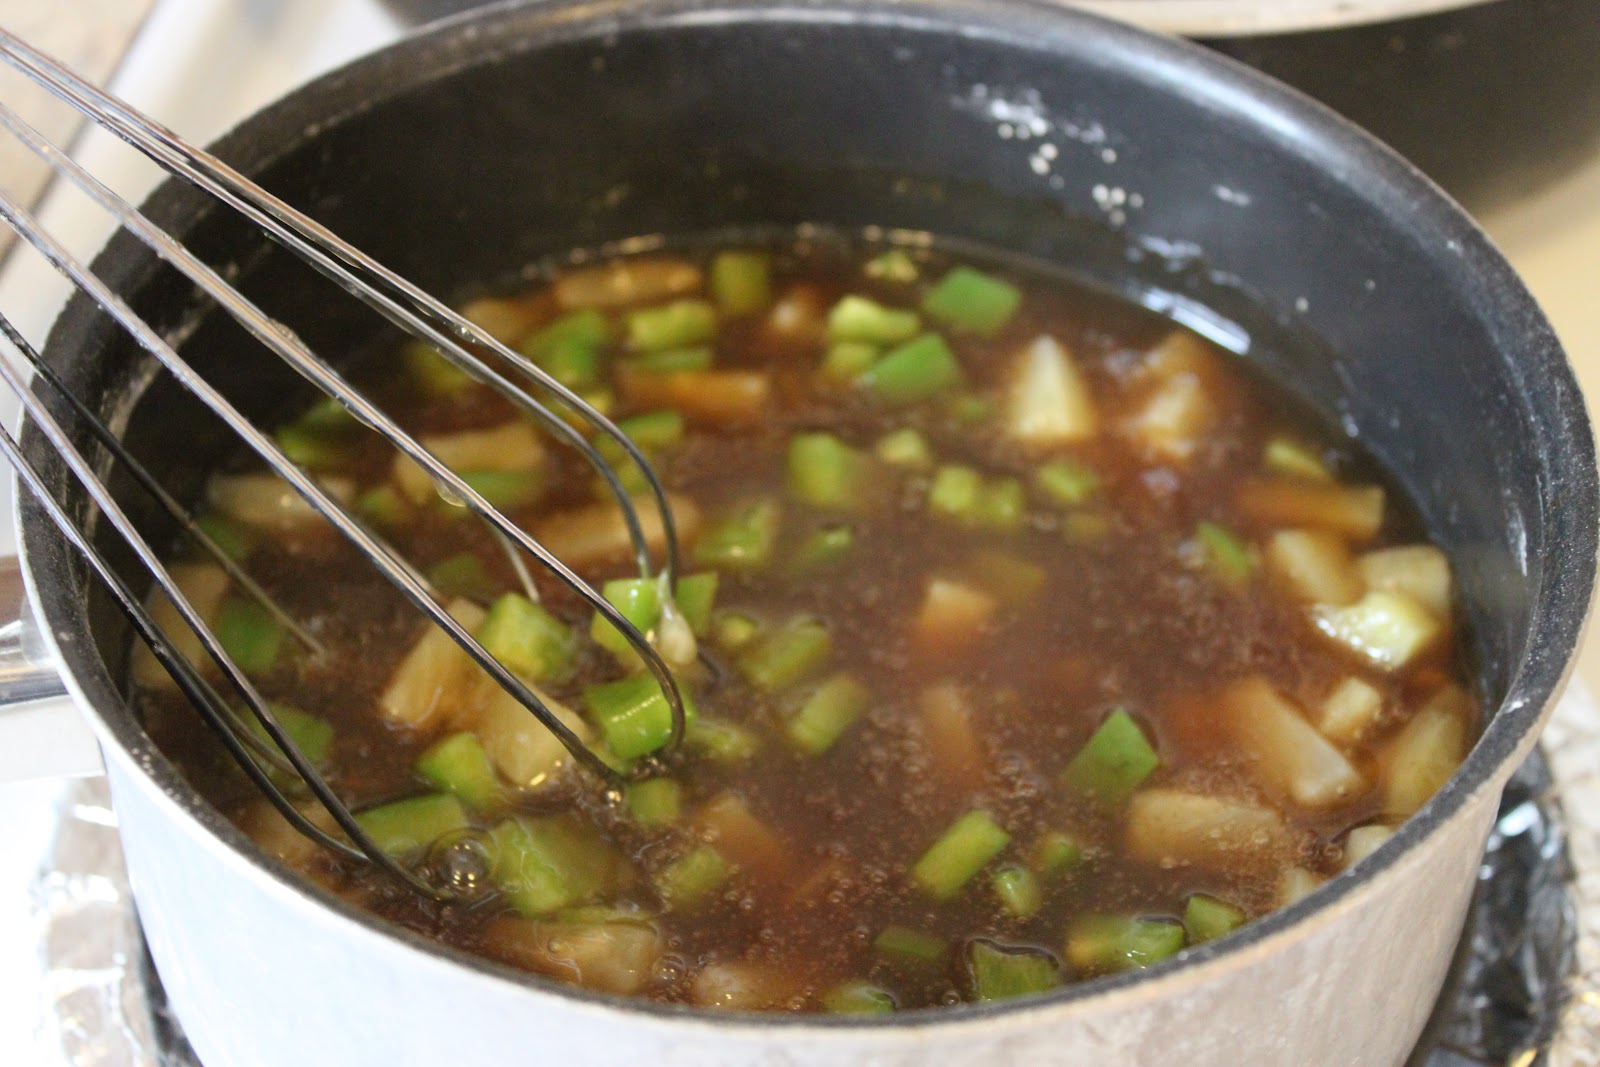
Remove from the heat and add your pineapple and green pepper.
Pour over the chicken to cover. I like to move the chicken around a little so all the pieces are covered.
Look how tasty it is once it's out of the oven!
Serve over rice. I used calrose, but long grain and jasmine rice would be super yummy!

Sweet & Sour Chicken


4-5 boneless, skinless chicken breasts, cubed
Flour
Vegetable oil- enough to cover the bottom of your pan
2 Tbsp cornstarch
1 cup brown sugar
2 Tbsp soy sauce
2/3 cup white vinegar
1 can pineapple tidbits, juice reserved
1 cup green bell pepper, chopped small
(**Note** If you like lots of sauce, you can double the sauce recipe)

Heat your oil in a pan over medium heat (you'll know if it's hot if you can sprinkle a little water in and it sizzles). Place chicken in Ziploc bag with flour and shake to coat. Add to oil and cook until most are browned and crispy. You'll need enough oil to cover the entire bottom of your pan.

Meanwhile, combine brown sugar and cornstarch in a small saucepan, then add vinegar, reserved pineapple juice plus enough water to make one cup, and soy sauce. Stir to combine and let boil one minute. Add pineapple tidbits and bell pepper.

Place chicken in 9x13 dish and pour sauce over it, making sure it covers everything (I kind of stir it in gently to make sure it covers everything). Bake at 375 for 30 minutes. Serve over rice.


Friday, September 14, 2012

Asian-Style Marinade

Don't judge me....but I don't love steak. My husband gasps every time I say it, because I'm pretty sure it's blasphemous to him. And my in-laws raise cattle, so I'm pretty sure I'm breaking some sort of secret family law. But I'll take fish or chicken over steak almost any day.

Unless the steak is in some yummy Asian-style marinade. Like teriyaki, or sesame, or something along those lines. Oh, and it can't be a fatty steak. Or thick cut. Or pink.

I love this marinade because it is SO easy to make, and so much cheaper (and healthier!) than the marinades you can pick up in the store. This marinade will go with steak, but also chicken and pork. We used ours with cubed up steak for shish-kabobs. But you can marinade thin cut steak, chicken, or pork with it, and serve over sauted veggies. Yum!

The marinade is so easy...it took one picture! Combine your dry seasoning (onion powder, garlic powder (or dried minced garlic - that's what I had on hand), dried oregano, and black pepper) with soy sauce, honey, and sesame oil.
I love how the marinade carmelizes on the meat! It's the sugars from the honey, and all that goodness. 
You know you are putting shish-kabobs on your menu!!
\
Asian-Style Marinade
by Girls in Aprons

1/4 cup soy sauce
2 to 3 Tablespoons honey (I like more!)
2 tsp sesame oil
1 tsp onion powder
1 tsp garlic powder
1 Tablespoon dried oregano
1 T black pepper
(Optional: 1 to 2 tsp red pepper flakes)

Combine the soy sauce, honey, and sesame oil. Add dried seasoning and combine. Marinade meat for at least half hour. Baste additional marinade on while grilling.

Monday, July 2, 2012

Sweet Coconut Chicken

I have this sweet and sour chicken recipe that is to die for. Seriously. I don't know why I haven't posted it yet. And I'm not posting it today either, but this one is eerily similar. It has the same basic concept, just a different sauce. And I loooove this kind of cuisine. Beef with broccoli, sweet and sour chicken, eggrolls, Mongolian Beef..... *sigh* Seriously, the way to my heart is through P.F. Changs. I am not kidding. But sometimes I want the take-out version without the take-out price, so I love to make these dishes at home.

So, my family loves coconut flavored things, and this Sweet Coconut Chicken fit the bill for us. It was slightly sweet with a hint of coconut. I liked that the coconut flavor did not over power the dish. If you like the extra coconut flavor, go ahead and add some coconut flakes to either your rice or the sauce. I'm sure either way it will be delicious.

Oh, and you have to serve this with jasmine rice. There is something about jasmine rice that just goes really well with the coconut chicken. Okay, you don't have to, I just very highly recommend it.

Sweet Coconut Chicken
recipe from Kids in the Sink 

For the chicken:2-3 boneless, skinless chicken breasts, cut into 1-2 inch pieces
salt and pepper, to taste
1 cup cornstarch
2 eggs, beaten
1/4 cup canola oil (I used vegetable oil)

For the sauce:
1 (14 oz.) can coconut milk (use the full fat version, the "lite" version doesn't have enough flavor)
3/4 cup sugar
1 tsp cider vinegar

Directions:

For the chicken: Heat oil in a skillet over medium heat and preheat oven to 325˚. While oil is heating, season chicken with salt and pepper.

Dip chicken in egg, then cornstarch, and fry in the oil until lightly golden brown, but not cooked through. I had to fry in a couple of batches so as not to overcrowd the pan.

Remove chicken from pan and place on paper towel-lined plate briefly, then place in a single layer in a baking dish.

For the sauce: In a medium bowl, whisk together the coconut milk, sugar, and vinegar. Pour the sauce over the chicken and bake for about an hour, stirring the chicken every 15 minutes. Once cooked through, let stand for at least 5 minutes to allow the sauce to thicken. Serve immediately over rice (*ahem* jasmine rice, although any rice will do because the chicken in this dish rocks!)

P.S. Some readers on Kids in the Sink asked if one hour was too long to cook and worried it would dry out the chicken. Let me tell you.... it will not. Trust me. Let it cook for an hour and gently stir it every 15 minutes and it will be perfect!


Tuesday, April 10, 2012

Teriyaki Burgers with Glazed Pineapple and Asian Slaw

I looooove me some Red Robin. Sometimes I branch out and try something new, but usually I cave and go for my all-tme favorite burger: the Bonzai Burger. Who would've thought that I'd actually like pineapple on my cheeseburgers? If you've never had it, you must try it. Go to Red Robin, or put in on your bucket list. Or better yet, try out this recipe!

To be honest it never dawned on me to actually make my own Bonzai burger at home until my sister Carissa said she glazed her pineapple with teriyaki sauce and put it on her burger. She's a genius! We have homemade cheeseburgers about three times a month. Don't judge - I have five boys in this house and it's nice to eat dinner without hearing complaining!! We usually try to switch it up and make different variations: guacamole and bacon, marinara and pepperoni, "Fair" burgers (you know, loaded up with sauteed onions) but the Teriyaki burgers I make are my favorite! The Red Robin Bonzai burger doesn't have Asian slaw on it, but I have a sort of addiction to cole slaw on my burgers and pulled pork sandwiches, so I figured this would just make the burger so much better. And I was right, as usual. :)

For the slaw, whisk together mayonnaise, rice vinegar, sesame oil, and honey. Sesame oil can be a little pricey (not too bad though) but don't skip it! It really gives the slaw a great nutty flavor. I love using sesame oil on fried rice too.
Mix dressing with a bag of coleslaw. Sprinkle with sesame seeds. This is really good on it's own or on the sandwich (or both!!).
For the pineapple, cut thin slices (about 1/4 inch) off a fresh pineapple. Saute with your favorite teriyaki sauce (I like Kikkoman Teriyaki Baste & Glaze). Don't use the watery teriyaki sauces. You want a nice thick sauce! Flip the pineapple over and continue to cook until the pineapple is warmed through, about 2 minutes.
While cooking your burgers, season with salt, pepper, garlic, and ground ginger. Then my trick is to transfer the burgers to the pan the pineapple was in so they soak up the leftover teriyaki sauce and pineapple juices. Layer your bun with burger, pineapple, and slaw. No need to extra condiments!! And have napkins ready - this one is messy!


Teriyaki Burgers with Glazed Pineapple and Asian Slaw

by Girls in Aprons


ASIAN SLAW:
1 bag coleslaw mix
1 cup mayonnaise
2 T rice vinegar
1 T sesame oil
3 T honey
1 to 2 T sesame seeds (use as much as you like!)

Whisk together mayonnaise, vinegar, sesame oil, and honey. Stir in coleslaw and sprinkle with sesame seeds. Chill in fridge for at least an hour.

GLAZED PINEAPPLE:

1 fresh pineapple
Teriyaki Sauce (the thick stuff!)

Cut the pineapple into thin strips (about 1/4 inch thick). In a saucepan over medium heat pour about 1/4 cup of sauce into pan and top with pineapple. After about two minutes flip the pineapple over and add more sauce if needed. Remove and set aside. Turn off heat and reserve left over sauce and pineapple juice.

FOR BURGER:

1 pound hamburger
Seasonings: salt, pepper, garlic powder, ground ginger
4 hamburger buns

Separate hamburger into four patties. Season on both sides with seasonings. On your grill cook uncovered over medium-high heat for 5-6 minutes on each side or until the meat is no longer pink. Dip both sides of the burger in the left over sauce and pineapple juice in the saucepan. Layer your buns with burger, pineapple, and slaw.

**If you are only using the slaw for the burgers you can half the recipe.

Thursday, March 22, 2012

Mongolian Beef

I have been in a cooking rut lately. I know what you're thinking (Whaaaaat? Isn't she supposed to LOVE cooking?!) and I am thinking the same thing. Mostly I'm just tired and by the time dinnertime rolls around I just don't have the energy to pull something together which stems from me not having the energy to put together a menu at the beginning of the week so dinnertime is now a dilemma about what to make and what I don't have in my pantry and refrigerator. But thank you Pinterest for coming to my rescue again!

Now, when I was first married and living in Utah, my cooking skills were nonexistant (pasta and sauce for dinner anyone? Like canned sauce with no meat or anything? Ew). I still cooked dinner most nights, but one of my husbands and my favorite places to eat was P.F. Chang's. Yum. I think I'm drooling just thinking about it. When we lived in Cleveland it was right down the street. Now that we're settled in Washington, the closest one is an hour away in Seattle. Boo!

I digress. So, when we went to P.F. Changs we would always order lettuce wraps (you can find the knock-off recipe here) and Mongolian Beef. We always ordered a few entrees so we could have leftovers, but we always ordered Mongolian Beef first. It was just so tasty! So when I found this recipe on Pinterest, I decided to give it a try.

Disclaimer: No where in this recipe did it mention P.F. Changs, and after making it I see that it isn't a knock off of the recipe. There are "knock off" recipes out there, and believe me when I say I'm going to make those too! This one is actually a little different, the meat isn't crispy like P.F. Chang's but it is still soooo good. Trust me! And another plus? It was all made in ONE WOK. For those nights that I'm not feeling ambitious, a one pot dinner sounds about right (minus the one I used to cook the rice). This is super easy and was made in no time.

The kicker? My kids looooved it. It's seriously a winner if my picky picky kids will eat it!

Mongolian Beef
by Girls in Aprons, from pinkbites.com

1 lb of flank steak, thinly sliced crosswise (or use whatever kind of steak you want!)
1/4 cup of cornstarch
3 teaspoons of canola oil, divided
1/2 teaspoon of grated ginger
1 tablespoon of chopped garlic (about 2 -3 large cloves)
1/2 cup of water
1/2 cup of soy sauce
1/2 cup brown sugar
1/2 teaspoon of red pepper flakes
3 large green onions, sliced crosswise into thirds

Pat your steak slices dry and mix with cornstarch. Make sure they are all well coated, then place in a strainer and shake off excess cornstarch.

Mix together the water, soy sauce, brown sugar and red pepper flakes. Heat half of the oil in a large wok at medium-high and add the garlic and ginger. Immediately add the soy sauce mixture. Cook the sauce for about 2 minutes and transfer to a bowl. Don't worry if the sauce doesn't look thick enough at this point. The corn starch in the beef will thicken it up later. 

Turn the heat up and add the remaining oil to the wok (at this point I actually added about 2-3 TBSP of oil). Add the beef and cook, stirring until it is all browned (this is a quick thing). Pour the sauce back into the wok and let it cook along with the meat. Now you can choose to cook it down and reduce the sauce or leave it thinner. Add the green onions on the last minute so the green parts will stay green and the white parts crunchy.

Serve it hot with rice. Serves 2 (although it was plenty for two adults and three kids with a little leftover)

Thursday, March 8, 2012

P.F. Chang's Lettuce Wraps

I love P.F. Chang's. If you've never been, put it on your bucket list! Their mongolian beef is amazing. And don't even get me started on their cashew chicken! But their lettuce wraps are what really get me going. They are technically an appetizer on the menu, and if you know me, you'd know I'm a "no appetizer just water is fine with me" kind of restaurant customer. But at P.F. Chang's I break all the rules! It brings out my wild side.

And P.F. Chang's is where my hubby took me the night he proposed, so it has sentimental value too.

But anyway, back to the good food! Looking at this recipe the first time I was thinking "Dang that's a lot of ingredients!" But really, most of the stuff you should already have in your pantry. All I had to go buy was hot chinese mustard and water chestnuts! And it looks time consuming, but it really isn't. Just some stirring of ingredients and cooking of chicken. And really, it's all worth it. Because they taste just like P.F. Changs, just cheaper and a little healthier too!

I made an Asian theme that night, and served it with Fried Rice - there were no empty stomachs that night!

P.F. Chang's Lettuce Wraps (made by you!)
by Girls in Aprons, slightly adapted from www.theculinarylife.com

FOR THE CHICKEN:
3 T vegetable oil
2 boneless, skinless chicken breasts, cut into bite sized pieces
1 8 oz. can sliced water chestnuts, drained and minced
1/2 cup minced white mushrooms (or use any mushroom you prefer)
1/2 yellow onion, minced
3 green onions, chopped to about 1/2 inch long
3 cloves garlic, minced
1 to 2 T sesame oil


FOR THE STIR FRY SAUCE:
4 T soy sauce
4 T brown sugar (not packed tightly)
1 tsp rice vinegar

Combine the soy sauce, brown sugar, and rice vinegar in a small bowl. Set aside.

Heat vegetable oil over medium-high heat until shimmering, about a minute. Add chicken and stir fry for about 3 to 4 minutes, or until the chicken is mostly cooked through. Add the water chestnuts, mushrooms, onion, green onion, garlic, and stir fry sauce, stirring until the onion and mushrooms are cooked through and tender, about 3 to 4 minutes. Drizzle with 1 tablespoon of sesame oil, adding more to your preference. Keep warm.

FOR DIPPING/POURING SAUCE:
4 T sugar
1/2 cup hot water
3 T soy sauce
2 T rice vinegar
2 T ketchup
1 T freshly squeezed lemon juice (please PLEASE do NOT use the bottled stuff!)
1/4 tsp sesame oil
1 tsp hot water
2 cloves garlic, minced
1 T Chinese hot mustard (or for those who don't want the heat you can use dijon mustard - but seriously, my kids could handle the hot mustard!)

1 head butter lettuce, bibb lettuce, or iceberg (they use iceberg at P.F. Changs, but I really like how the butter lettuce held up to the lettuce wraps)

In a medium sized bowl dissolve sugar in the 1/2 cup hot water. Stir in soy sauce, rice vinegar, ketchup, lemon juice, and sesame oil. In a small bowl, combine the 1 tsp hot water, garlic, and mustard. Add 1/2 tsp or so at a time to the soy sauce mixture, until you've reached your desired taste and spicy level. This is how they do it at P.F Changs. You can also completely omit the mustard sauce if you want.

To prepare: Take a whole leaf of lettuce and place about 2 spoonfuls or so of the chicken mixture on the lettuce. Spoon pouring sauce over the chicken. Carefully roll up and enjoy!

Sunday, January 22, 2012

Chinese Fortune Cookies

I love Chinese food. Maybe not the real authentic stuff with raw fish and seaweed, but PF Changs is certainly up on the list of my favorite restaurants. Maybe not exactly what you would find in China exactly, but hey, they call it Chinese and I love it.

You can read about the origins of Chinese New Year here. I thought it was great, though, that Wikipedia mentioned that "Within China, regional customs and traditions concerning the celebration of the Chinese new year vary widely. People will pour out their money to buy presents, decoration, material, food, and clothing. It is also the tradition that every family thoroughly cleans the house to sweep away any ill-fortune in hopes to make way for good incoming luck. Windows and doors will be decorated with red colour paper-cuts and couplets with popular themes of "good fortune" or "happiness", "wealth", and "longevity"...The Chinese New Year tradition is to reconcile, forget all grudges and sincerely wish peace and happiness for everyone."

And, just in case you were wondering...2012 is the year of the DRAGON! Very Harry Potter-ish, right?

Here at Girls in Aprons, we really look for excuses to make good food, and Chinese New Year is no exception, even if we don't technically celebrate it. I played around with a few recipes and finally came up with one that, well...worked. My first batch was thick and tasteless. My second was thinner but still didn't quite have the taste I was looking for. Finally, I figured out a recipe that gives you a sweet, almondy taste with a bit of a crunch. And a fortune, of course.

PS: Want to make a whole meal? Try our fried rice and egg rolls with your cookies. It will become your go-to meal for any Chinese holidays!


For starters, you need a really cute sous chef. Then you whip up the almond extract and the egg whites until they are foamy. Don't go for soft peaks, you'll have whipped them too much. The best way I can describe is soft, soft peaks. The whites should have doubled in size.


Generously butter a cookie sheet (unless you have amazing cookie sheets that have super-non-stick powers). You only want to bake about 2-3 cookies at a time, because you have to be quick like lightning when they get out of the oven, otherwise they cool before you can bend them in shape.

Using the back of the teaspoon, spread the batter around into circles about 3 inches wide.

While your cookies are baking, lay out your previously made fortunes so they are ready for the grabbing. I would have normally printed some, but we are fresh out of ink, so I wrote a few. As did my 7-year-old, with such ominous fortunes as "Beware of the bathtub" and "You should watch two hours of tv today". Mine was more like hints, such as "Love is cleaning your room without being asked" and "Chocolate is a great way to say sorry."

As soon as your cookies come out of the oven, flip them over and lay a fortune down. Immediately fold them in half and put the center on the lip of a mug. Pull down on both ends to fold the fortune cookie (see pictures).


A muffin tin helps the fortune cookies keep their shape, and after they are all done, you can stick them in a 200 degree oven to dry them out a bit (some of them, depending on the thickness, can be a little cakey).

Chinese Fortune Cookies
by Kelli Lafranca

2 egg whites
1/2 tsp almond extract
Pinch of salt
1/4 cup all-purpose flour
1/4 cup sugar

Preheat an oven to 375 degrees. Grease a baking sheet with butter. Set aside.

In a mixing bowl, using egg beaters, beat the egg whites and almond extract until foamy but not stiff. Add the rest of the ingredients and blend well.

Pour a teaspoonful of batter onto prepared baking sheet and, using the back of the teaspoon, spread into a 3-inch circle. Repeat two more times, making three cookies per sheet. Bake for 5 minutes or until starting to brown at the edges. Using a spatula, immediately remove the cookies from the baking sheet, flip them upside down (bottom is now on top) and place a fortune slip on top. Fold in half and place the cookie on the edge of a mug and pull down on the corners. Place in a cupcake pan to help hold the shape while it cools.

If your cookies aren't dry enough for you, stick the cupcake pan in a 200-degree oven for about 10 minutes.

**I found most of my fortunes (except for the crazy ones, we made those up) here.


Tuesday, December 27, 2011

Homemade Eggrolls with Sweet and Sour Sauce

Am I the only one after Christmas that gets an uncontrollable urge to clean everything? It's almost like Spring Cleaning to me, but this mostly has to do with throwing away or donating old toys to make room for the new ones my kids got. I also home I'm not the only one who has already heard "I have nothing to do!" from their kids. Maybe they'll help me clean.... Wishful thinking.

Well, after Christmas is over, I start to look forward to New Years Eve. My family all gathers together (the ones that are here, at least) and we eat lots of yummy food, have a kid's New Years at 8pm then ship them off to bed, then we all stay up until midnight playing board games and eating more yummy food. When I was younger (aka "before kids") I could stay up easily until midnight. Now that is so far past my bedtime that I need games and food to keep me up that long!

Our family tradition on New Years is to make lots of appetizers and just snack all night long. We usually have a meat and cheese platter, veggie tray, spinach artichoke dip (that recipe is coming soon!), and lots more unhealthy but equally delicious things. This year, we are starting a new tradition... egg rolls!

Now, Adam and I have been making these for years. When we were in Cleveland and I was pregnant with my third baby, a woman in our ward (shout out to Lori Croshaw!) made these for us after I won them at a Relief Society service auction. My pregnant mind heard the word eggrolls and my hand just shot up. You can't deny a pregnant woman her cravings! And boy, am I glad. They are addicting and once you get the hang of it, super easy to put together. Maybe a little work, but not hard work.
They are crispy and yummy, and the sweet and sour sauce really is the icing on the cake!
Your lineup- all of these can be found in your regular grocery store! The eggroll wrappers are in the produce section too, and I've usually found them by the mushrooms or something similar.
Saute it all together. Your kitchen will smell amazing.
To wrap your eggrolls, have your wrapper facing this way, like a diamond.
Put your filling on horizontal to you, like so. Not too much, or your wrapper will break. Usually mine is a heaping 1/4 cup of filling. Some eggroll wrappers are small and some are bigger, so just use your best judgement.
Take the corner closest to you and fold it up, tucking it under the filling
Fold in your sides...
And roll the rest up until you have an eggroll!
Just dip your finger in some water and seal the final corner closed. Put on a cookie sheet until all your eggrolls are wrapped.
Ah, the best part. Frying :)
Dig in! My husband and brother-in-laws have been known to eat ten or more of these in one sitting! I usually end up doubling the eggroll recipe to feed them all!

Egg Rolls with Sweet and Sour Sauce
submitted by Carissa, adapted from my friend Lori

2 C. cooked chicken breast, seasoned and chopped small
1 bag shredded coleslaw
2 cloves garlic, minced
2 stalks green onion, sliced
2 T. cooking oil
2 C. bean sprouts
2 T. soy sauce
½ tsp. fresh ginger minced or grated (not powdered!)
Egg roll wrappers (usually found in the produce or organic section)

Stir fry everything, except the chicken, together until tender. Add chicken and warm through.

Wrap in egg roll wrappers according to instructions on the package. Fry until golden brown on each side (the oil should be around 350 degrees- any hotter and they will get too "golden"). Drain on paper towels. Makes approximately 24 eggrolls.

Sweet and Sour Sauce
1 C. brown sugar
2 T. corn starch
2 T. soy sauce
2/3 C. chicken broth
1 tsp. minced fresh ginger root
2/3 C apple cider vinegar
2 clove garlic minced

Cook on medium high heat until it bubbles and then 2 more minutes. If you are doubling your egg rolls, double this too!

**Note: For fresh ginger, peel the skin with the back of a spoon or you can use a sharp knife to cut it off. To mince, just cut off the amount you need and mince. Or you can grate it with a microplane or the fine side of a cheese grater. It has a yummy lemony smell and makes this dish taste amazing! Ginger is super cheap (think like 25 cents!) so it's a great thing to learn to use!

Wednesday, December 7, 2011

Quick & Easy Fried Rice

About a year ago I was what you would have called "mostly organized". My house was cleaned top to bottom every Saturday. I had a meal plan for each week and had groceries stocked at any given moment. I knew what days we had basketball practice, church meetings, and play dates. Everything in my house had a place and, if one of my kids or my husband asked where something was, I could direct them to the correct place to find said item.

Fast forward one year. Insert new baby in June.

Now this baby isn't my first. He's my fourth child. But something about moving from three to four kids turned my world upside down. I all of a sudden didn't have time to plan meals or grocery shop. I forgot meetings, misplaced coupons and gift cards (I'm still having a hard time getting over that!), and scrambled to keep my house halfway clean. During those first few months of my new baby's life I got really creative with dinners. I have picky eaters and a small grocery budget, so eating out or prepackaged foods are not an option. This recipe here was a lifesaver! It's kid friendly, cheap, and makes a ton. Seriously. A ton. We eat it for dinner, my husband takes leftovers for lunch, I eat it for lunch, and there is still enough to use the next day or so.

And this recipe can easily be changed up to suit your likes and what you have on hand. Use whatever meat you want, or skip it all together. Don't have onions? Use green onions. Celery is optional (carrots are not!). If I have cabbage on hand I'll slice some up really thin and add it to my veggie mix. Eggs are usually added in my recipes, but sometimes I get lazy and don't put them in. The recipe can be halved too for a smaller amount (this recipe easily feeds eight!). I usually use kielbasa (or rope sausage) and, I know, it's not really authentic to the meal. But my family prefers it because it gives the dish a great flavor. But really, the best part is that it whips up pretty fast, and once the veggies are cut, I can prepare it with one hand, while holding a baby in the other!
Your ingredient line-up
Dice your carrots, celery, and onions. I use the celery and the leaves of the celery. Don't throw them out! They have lots of flavor (I use them in stews too!)
I had to take a picture - it's so pretty!
When your pan and oil are hot add your veggies. Fry for about 2 minutes. Stir it every minute or so to make sure it doesn't burn.
Add meat and cook another 3 or 4 minutes or until veggies are tender (if using raw chicken, cook it first in the pan for 2 minutes and then add the veggies and cook.)
Reduce heat to medium. Scoop rice into pan. (This is why you'll want to use a big pan or wok!)
Add soy sauce. I usually eyeball the amount, but it's around 1/3 cup. Just enough to cover the rice. Taste it and add more if you need to!
Stir in peas and let them warm through.
While your peas warm (that sounds funny), heat a medium pan on high with about 1 tablespoon of oil. Add your bowl of whisked eggs once the pan is hot (you'll want to wait until it is hot - I usually drip a little bit of egg into the oil and if it sizzles right away you're good). Don't stir the egg - let it set up like an omelet. Once the top of the egg is no longer runny, flip it over and cook another minute or so.
Add to pan and break apart with spoon. You can just scramble your eggs in the pan, but this way breaks smaller and the fried egg is fluffy and, to me, more "fried-rice-ish". So just try it this way, okay?
Drizzle about 1 tablespoon of sesame oil on the rice. Stir to combine and taste it (see, being the cook has it's perks!). You can add more to taste, but know that with sesame oil, a little goes a long ways! If you've never cooked with sesame oil it will change your life! It's a little pricey but you only use a little at a time. And I've got other recipes to share that will help you use this wonderful stuff!
I dish up the rice and let my kids sprinkle their own sesame seeds. It's like decorating a cupcake, but for dinner. And with rice, not cake. Anyway, they love sesame seeds!
Yum! I'm digging in!

Quick & Easy Fried Rice
by Celeste

3 cups uncooked rice
3 carrots, peeled and diced
2 celery stalks, diced
1 onion, diced
1 rope sausage, diced, or 1 lb. ham, diced, or 1 lb. chicken, cubed
1/3 cup soy sauce
1 12oz package frozen peas
3 eggs
Sesame oil
Sesame seeds
Vegetable oil

Cook rice according to package directions (or in your rice cooker). Set aside.

Heat about 2 tablespoons of vegetable oil in a large pan or wok on high. When it's hot add the onion, carrots, and celery. Cook 2 minutes. Add sausage or ham (if using raw chicken cook it first for 2 minutes and then add vegetables). Cook 3 to 4 minutes or until vegetables are tender, stirring often so it doesn't burn. Lower heat and add cooked rice, soy sauce, and peas. Stir to combine.

In a medium pan, heat 1 to 2 tablespoons oil on high. In a small bowl lightly whisk eggs together. When the pan and oil are hot, add the eggs. When the eggs are set on top (not runny) flip over and cook another minute. Add to rice mixture and, using a spoon, break apart and mix in. Drizzle with 1 tablespoon sesame oil (add more to taste) and garnish with sesame seeds. Serve hot or cold.