Showing posts with label dinner. Show all posts

Monday, February 11, 2013

Chicken Marsala with Mushrooms

This is one of those recipes that I've had for a loooong time, and just remembered I had it! When we lived in Cleveland for dental school, we had the most ah-maaaazing neighbors. The men got along great (both loved the Seahawks), the kids were all the same age and gender, and Rachel and I hit it off great. We definitely were different in our own right, but became fast friends. And she taught me a lot. A. Lot. Like how to bake bread, rolls, cinnamons rolls, etc. She was also amazing at making up her own recipes on a whim and they were always fantastic.

So this recipe comes from Rachel. I honestly don't know where she got it, she probably doctored it up or made it up herself. I really don't know. Or care. Because it's delicious. I personally don't like mushrooms, so I pick those out, but my husband loves them so I, like a good wife, give him my pile of mushrooms so he can add them to his plate. Wife of the Year here.

Chicken Marsala4 skinless boneless chicken breasts
1/4 cup flour (you actually need to measure this!)
1/4 tsp dried marjoram (you can sub Italian seasoning, I usually do)
1/8 tsp salt
1/8 tsp pepper
2 cups sliced mushrooms
2 sliced green onions
6 Tbsp margarine or butter
1/2 cup chicken broth
1/2 cup marsala cooking wine (not actual wine, but the kind found near the vinegar, it's way cheap)

Rinse chicken, pat dry, Place each breast between 2 pieces of plastic wrap and pound with a meat tenderizer until chicken is 1" thick (don't use chicken cutlets since pounding the chicken flat makes it really tender). Stir together flour, marjoram, salt, and pepper. Lightly press chicken into flour mixture on both sides. Shake off excess. In large skillet cook mushrooms and onions in 2 Tbsp butter until tender. Empty into dish and cover to keep warm. In the same skillet cook chicken pieces in 2 Tbsp butter over medium-high heat for 2-3 minutes on each side or until cooked through. Place chicken on platter and cover. Stick in oven at 200 degrees to keep warm. Return mushrooms and onions to skillet with 2 Tbsp butter. Add remains of flour mixture and stir until a paste forms on mushrooms on med-high heat stirring constantly. Slowly add chicken broth and marsala and cook uncovered for 2-3 minutes, when sauce thickens stirring occasionally. Spoon mushroom mixture over chicken. (If the sauce is too thick for your liking, like mine was, just add a little more stock or cooking wine or a little of both to thin it out).

Saturday, December 29, 2012

Caprese pasta with turkey meatballs

I hope everyone is recuperating from the holidays! We are still working through all our leftovers and cookie platters. My kids are still in that post-Christmas honeymoon stage, waking up early and staying up late to play with their new toys. I'm just trying to decide if it's silly of us to keep our Christmas decorations up year round. Not only do they make me happy, they are a pain to put away and I just don't have the drive to do it right now.
 
On to this delicious dish...I made a similiar dish several years ago, following a recipe from Giada. Of course we loved it and, of course, I lost the recipe. So I created my own. For all I know it's exactly the same, but I'm pretty sure there are so changes. I think she used ground chicken, which is great if that's what you want to use, but I happened to have ground turkey.
 
 
This dish is amazing. The meatballs are bite size and loaded with flavor. The tomatoes are warm and burst in your mouth. The cheese is melty and soft, gathering the flavors of the dish. You will impress your family with this dish. Promise.
 
 
Fry up your meatballs. You'll have to do this in batches.

 
See all those beautiful brown bits? You'll scrape those off with the chicken stock. They add a lot of flavor.

 
Letting the meatballs hang out for a bit.

 
You'll add the chicken stock to the pan and use this to cook through the meatballs and soften the tomatoes.


Here's a great how-to for cutting basil. Stack your basil on top of each other, roll in up, and chop. You'll end up with a beautiful pile of julienned basil, and it took less than a minute.

 
Adding everything together. Yes, I used two different pastas. I just happened to have half a box of each.


Caprese Pasta with Turkey Meatballs
by Girls in Aprons, inspired by Giada di Laurentiis
 
1 lb ground turkey
1/4 Italian bread crumbs
1 1/2 tsp dried basil
1 Tbsp tomato paste
2 eggs
1/2 cup Parmesan cheese
1/2 tsp salt
1 Tbsp Worchestershire sauce
2 Tbsp olive oil
1 14-oz can chicken stock (about 2 cups)
10 oz grape tomatoes
1 lb pasta, preferably bowtie, penne, or rotini
Salt, for pasta water
1/2 lb (8 oz) mozzerella cheese, cubed
1/4 cup fresh basil leaves, julienned
 
Mix ground turkey, bread crumbs, dried basil, tomato paste, eggs, Parmesan cheese, 1/2 tsp salt, and Worchestershire sauce together. Form into small meatballs, about the size of a ping pong ball. In a large pan, heat oil over medium heat. Add meatballs, cooking in batches, browning the meatballs on all sides. Remove meatballs from pan and set aside. In the same pan, add chicken broth, using a wooden spoon to scrape up all the brown bits left over from the meatballs. Bring the broth to a simmer and add the tomatoes and return the meatballs to the pan.
 
While tomatoes simmer, bring a large pot of water to a boil and add 2 tsp salt. Cook pasta according to package directions.
 
When tomatoes are soft and the meatballs are cooked through, 7-8 minutes, remove from heat. Add the cooked pasta using a slotted spoon. Toss everything together. Transfer to a serving dish. Immediately add cubed mozzerella cheese and basil, stirring until the cheese starts to melt. Serve warm.

Wednesday, December 12, 2012

Walt Disney's Chili and Beans

I've been in need of a vacation for, like, ever. Seriously. My job is pretty demanding and high stress, so the idea that a family vacation was coming up was sometimes the only thing holding me together.
 
After saving for two years, we finally took our family to Disneyland. We went the week after Thanksgiving, which in my opinion is the perfect time to go. Weather was decent, lines were short (longest wait was 20 minutes), and the park was all dressed up for Christmas. Every night we got to watch Sleeping Beauty's Castle light up for the night and then it would "snow" on Main Street. By far my best memory of the trip. The kids were speechless.
 
 
While most people, including my children and husband, bought Disneyland trinkets, Mickey Mouse ears, and other paraphernalia, I had my eyes on a Disney Parks cookbook. There were 4 to choose from and I settled for Chef Mickey, which for some reason is priced unbelievable high online. I'm thinking because it's really only available at the park? The cookbook offers recipes from restaurants at Disneyland and DisneyWorld, plus some older recipes from the mysterious "vault" that Disney always eludes to.
Being a bit enamoured by the experience, I was more than thrilled to see two of Walt Disney's personal recipes listed in the book. One for Chili and Beans and one for Browned Roast Beef Hash. I went with the chili first. I had almost all the ingredients and just had to find out how Mr. Disney himself liked his chili!


Chili and Beans
Walt Disney's personal recipe

2 lbs dried pinto beans
2 medium onions, sliced
1/4 cup vegetable oil
2 lbs lean ground beef
1 cup chopped celery
1 tsp chili powder
1 tsp paprika
1 tsp dried thyme
1 (28-oz) can chopped tomatoes, undrained
Salt and pepper, to taste

Wash and sort beans and soak overnight in cold water.

Drain beans and place in a 2-quart saucepan. Add fresh water to cover by 2 inches. Add sliced onions and simmer, covered, for 2 hours, until tender.

Heat oil in a large pan and saute garlic. Add beef and celery and cook until lightly browned. Add chili powder, paprika, and thyme. Mix in chopped tomatoes. Cover and simmer for one hour.

When beans are tender, combine with the meat, stirring gently. Add salt and pepper to taste.

Girls in Aprons note: I added about 3/4 -1 cup of drained water from the pinto beans into the beans and meat mixture to give it a little bit of a sauce to go with the dish.

Cook's note (aka Walt's personal notes!!!) - For a spicier chili, add 1/8 tsp each of coriander, turmeric, chili seeds, fellen, cloves, cinnamon, and ground ginger. You can also add dried hot pepper to taste.

Wednesday, October 17, 2012

Sweet and Spicy BBQ Chicken

I'm kind of addicted to magazines. Luckily not so much the tabloid celebrity gossip, but I do love parenting, cooking, and household magazines. I get several subscriptions to my house each month and tear out magazine pages that interest me. The plan was (is) to eventually organize all these torn out pages into binders of amazing ideas, tricks, techniques...but right now it kind of all looks like this:


Anyway...several years ago I came across this recipe that combined barbeque sauce, ketchup, and honey to make a sauce that you then cooked with chicken. It was simple and delicious, but over the years I forgot the exact measurements and added whatever I had on hand. I'm usually a bit Type A about measurements, but this is one of those recipes that you can follow the directions or add your own twist to it.

So easy to put together...mix the sauce together and pour over chicken. I love to make cheesy mashed potatoes and use the potatoes as a bed for the chicken.


We actually like to serve our chicken with a small bowl filled with the sauce that is remaining in the pan. I literally smother each bite in the tangy, sweet sauce.


Sweet and Spicy BBQ Chicken
by Girls in Apron

4 chicken breasts (2-3 lbs total)
3/4 cup regular barbeque sauce
1/2 cup ketchup
1/2 cup honey
1/4 cup brown sugar
1/4 tsp cayenne pepper (or to taste)

Preheat oven to 400 degrees F.

Mix barbeque sauce, ketchup, honey, brown sugar, and cayenne pepper together in a bowl. Taste and adjust cayenne pepper to desired heat.

Pour 1/2 cup sauce into the bottom of a 9x13 pan. Place chicken breasts on top and top with the remaining sauce. Cover with foil and place in oven. Bake for 1 hour or until chicken is cooked through.

To serve: Place chicken breast on plate. Top with a few spoonfuls (or more!) of pan sauce.

Saturday, September 22, 2012

Sweet & Sour Chicken

Don't forget to "like" us on Facebook to get updates
on our newest recipes and giveaways!

We have been woefully slacking lately. At least for me, every day I have been planning on posting something new and exciting, and then I get home from work and just crash. I started a new job after being a stay-at-home mom for 8 years and by the time I get home, there is just no time for anything. I don't know how all you working moms do it, because I am so exhausted by the end of the week to get anything done! But all three of us work as well as take care of our families, and with kids in school it just got crazier! We'll try and get recipes up more now that we are in the swing of things (hopefully!).

But on to the recipe. This little gem has been in my recipe box for years. I got it in a recipe exchange. You know, those emails you get that ask you to send an email to so-and-so and then within so many weeks you'll get like 36 recipes back (but it never actually turns out that way)? Well, I was sent this recipe in one of those, and I hate to admit that I didn't actually send an email to anyone in return. I am so bad at those things and usually delete them, but I was so happy to get this recipe! I made it the next night and was so in love with it. I honestly can't remember where the recipe came from, some cook book maybe? I wish I could remember so I could give credit, so if anyone has seen something similar let me know!

Over the years, I've tweaked the recipe here and there until it fit my family's tastes and we make it a lot. It is definitely a process, with cutting, breading, frying and then baking, but it's very worth it and once you get the system down it goes pretty quick.
Yuuummmm!!! This is one of my husband's favorite meals, and it is making my mouth water!
Basically, but your chicken up into large bite-size pieces, then throw them (in batches) into a ziploc bag with flour, and shake to coat.
Place the floured pieces into a pan with hot oil, and just let them brown. You'll also do this in batches so it doesn't overcrowd the pan.
Once browned, put them in a 9x13 pan.
For your sauce, put the dry ingredients in the pan first, then add your liquids.
Bring it a boil and let boil one minute. It will get thick, trust me!
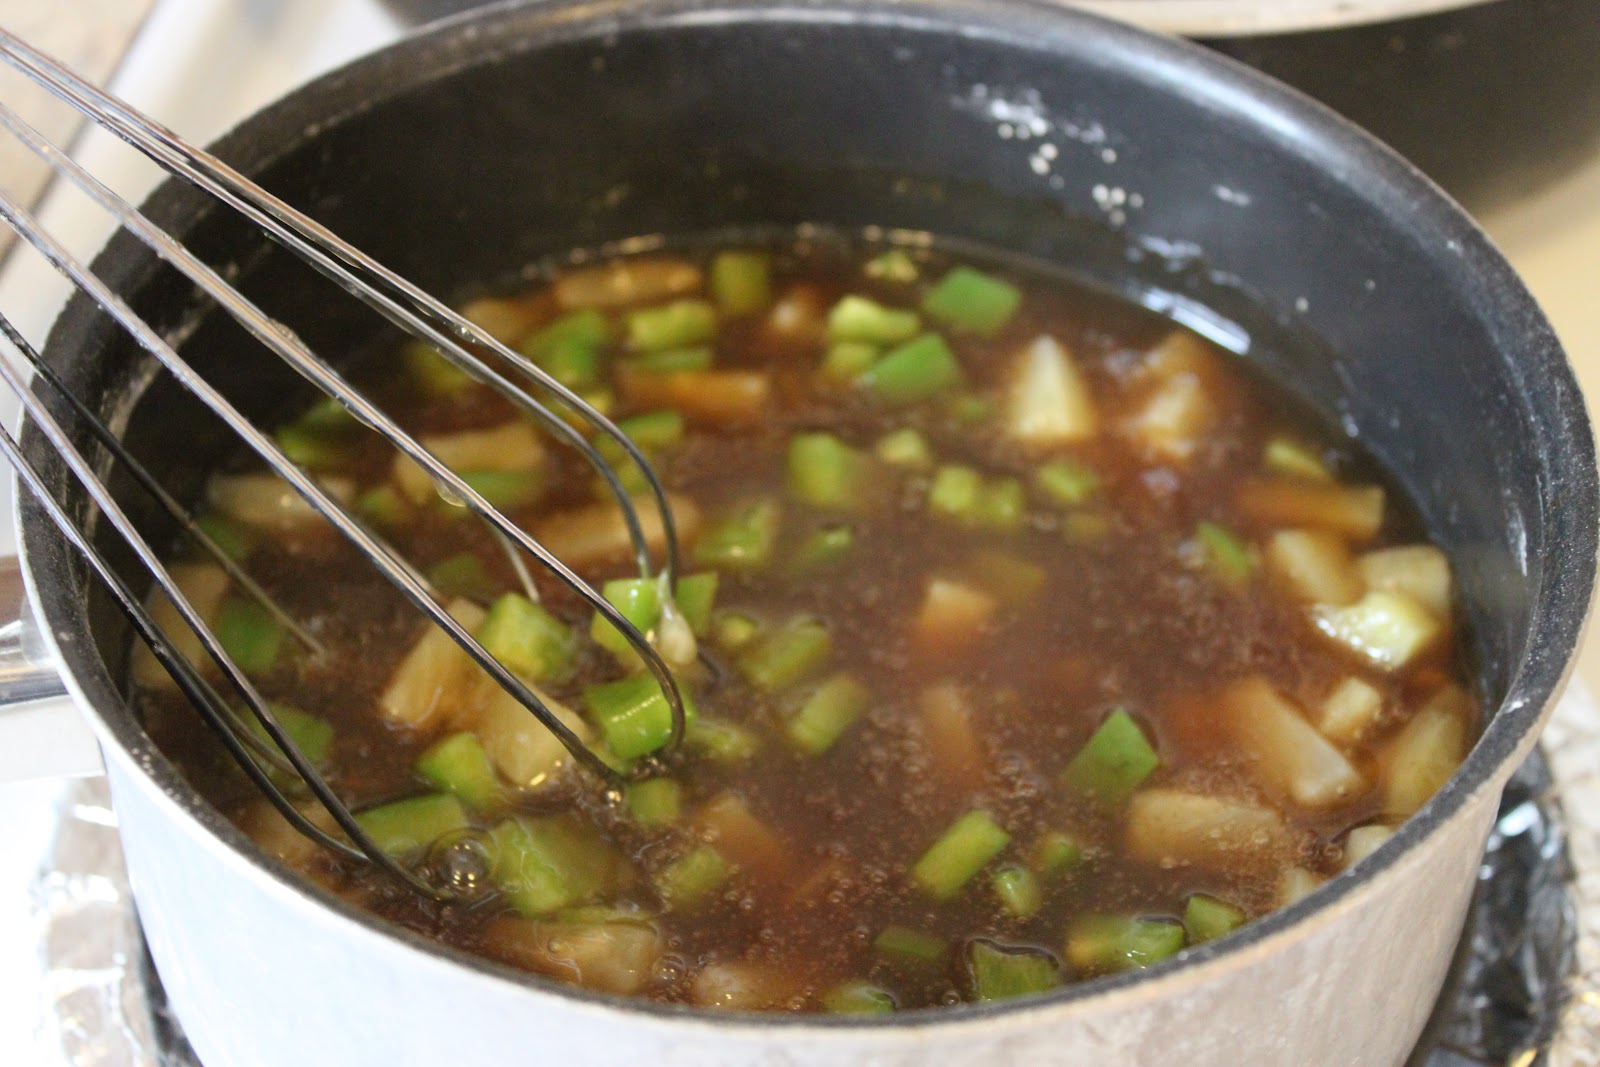
Remove from the heat and add your pineapple and green pepper.
Pour over the chicken to cover. I like to move the chicken around a little so all the pieces are covered.
Look how tasty it is once it's out of the oven!
Serve over rice. I used calrose, but long grain and jasmine rice would be super yummy!

Sweet & Sour Chicken


4-5 boneless, skinless chicken breasts, cubed
Flour
Vegetable oil- enough to cover the bottom of your pan
2 Tbsp cornstarch
1 cup brown sugar
2 Tbsp soy sauce
2/3 cup white vinegar
1 can pineapple tidbits, juice reserved
1 cup green bell pepper, chopped small
(**Note** If you like lots of sauce, you can double the sauce recipe)

Heat your oil in a pan over medium heat (you'll know if it's hot if you can sprinkle a little water in and it sizzles). Place chicken in Ziploc bag with flour and shake to coat. Add to oil and cook until most are browned and crispy. You'll need enough oil to cover the entire bottom of your pan.

Meanwhile, combine brown sugar and cornstarch in a small saucepan, then add vinegar, reserved pineapple juice plus enough water to make one cup, and soy sauce. Stir to combine and let boil one minute. Add pineapple tidbits and bell pepper.

Place chicken in 9x13 dish and pour sauce over it, making sure it covers everything (I kind of stir it in gently to make sure it covers everything). Bake at 375 for 30 minutes. Serve over rice.


Tuesday, August 21, 2012

Creamy Burrito Casserole

I like to try and do a "theme" night each week. Not because I'm trying to start any traditions or anything, it's mostly because on Sunday night, when I'm planning my meals for the week, I need some inspiration. We typically have "Taco Tuesdays" (although it's sometimes on a Wednesday... or Friday), and I usually have a "Meatless Monday", and so on. Anyway, Taco Tuesdays are my kids favorite. They absolutely love crunchy tacos, and the fact that Mexican style food is easily tailored to fit their own likes and dislikes is a plus.

This time, though, I wanted something different. We usually go for enchiladas or chimichangas (using leftover roast from Sunday... so good!), or the usual tacos, so I found this recipe. It looked killer good. Creamy Burrito Casserole was also super easy to throw together and tasted like the title intends it to taste. It was definitely creamy and my kids ate it up. It was like a super creamy enchilada, but without all the tortilla rolling.
Creamy layers. This was so easy to throw together and will definitely fill everyone up! The leftovers the next day were just as good!
Start by browning your meat and onion.
Add seasoning and refried beans.
Your sauce- sour cream and cream of mushroom soup. Easy peasy. Normally I'm not a cream-of-anything soup person, but every once in a while you just have to do it. And you won't be disappointed!
Layers! Spread your bean layer on top of the tortilla layer.
Sour cream layer on top of the cheese. See? Easy :)
I'm hungry and this looks great. This is definitely my kind of comfort food and is in our rotation for dinner ideas. And I usually have most (if not all) of the ingredients on hand for last minute ideas!

Creamy Burrito Casserole

1 lb ground beef 
1/2 medium onion, chopped
1 (1 1/4 ounce) package taco seasoning (I just sprinkled some from my huge Costco container)
6 large flour tortillas
1 (16 ounce) can refried beans
2 -3 cups shredded cheese
1 (10 3/4 ounce) can cream of mushroom soup
1/2 cup sour cream

Preheat oven to 350 degrees.
 
Brown ground beef and onion; drain. Add taco seasoning and stir in refried beans. Set aside.

Mix cream of mushroom soup and sour cream in a separate bowl. Spread half of the sour cream mixture on the borrom of a 9x13 casserole dish. Tear up three tortillas and spread over sour cream mixture (I cut mine in half). Put half of the meat/bean mixture over the tortillas and add a layer of cheese. Repeat the layers (sour cream mix, tortillas, meat mix and cheese). Bake for 20-30 minutes. Serve with sour cream.

Recipe from food.com

Wednesday, August 15, 2012

Sausage, basil & gorgonzola pizza

Ever had something really good at a restaurant and felt like you would just die without the recipe?! I'm still trying to find the perfect re-creation of P.F. Chang's lettuce wraps and don't even get me started on California Pizza Kitchen's BBQ Chicken Salad - something so simple looking is deceivingly hard to make!

Carissa made a pizza a year or so ago using one of Giada de Laurtentiis' recipes. I know it was on pizza crust with no sauce and used caramelized onions, sausage, gorgonzola (I think), and fresh basil. I'm not one to look us recipes unless I'm baking something and need exact measurements...and even then I don't always measure (honestly, does anyone measure vanilla?!). So I figured I would try to re-create that pizza.

I made a few adjustments, the first being that I used ciabatta bread instead of pizza crust. To be honest this is a shortcut I use often because I don't have time after work to make any kind of yeast bread and it cuts out a whole step just to use bread. I know I've said this before but ciabatta bread is my favorite for savory meals like this. It's my go-to bread of paninis and pizzas and open-faced sandwiches.

The best part about this recipe is you really can add more or less depending on your liking. I omitted the gorgonzola from the second half of the pizza because I knew my kids wouldn't care for it. I also added extra onion to the end, knowing that I would eat that part. I love me some caramelized onion!


How to cut fresh basil:


Stack your basil leaves on top of each other, making sure to remove the stem.


Roll up (they say like a cigarette, but not having ever done that.....)


Chop thinly down the roll.


And ta-da! Thinly sliced ("julienned") basil!


Sausage, Basil & Gorgonzola Pizza
by Girls in Aprons, inspired by Giada de Laurentiis

1 loaf ciabatta bread, found in the bakery
Olive oil, for drizzling
1 lb sausage (I used basic breakfast sausage)
1 onion, thinly sliced
2 Tbsp butter
2 Tbsp olive oil
1/4 tsp salt
8 oz gorgonzola, crumbled
2 cups mozzerella cheese, shredded
1/4 Parmesan cheese, grated
1/4 fresh basil

Preheat oven to 350 degrees.

Cut ciabatta bread open in half. Place on a large baking sheet and drizzle with olive oil. Place in oven for 5 minutes or until just starting to get crusty. Remove from oven.

Meanwhile, heat 2 Tbsp butter and 2 Tbsp olive oil in saute pan over medium-low heat. Add onions and salt and cook until onions are soft and lightly brown, about 20 minutes, stirring often.

Cook sausage in large pan until brown and crumbly. Drain and set aside.

Divide mozzerella between the two ciabatta slices. Then top with sausage, gorgonzola, onions, and sprinkle with Parmesan cheese. Place back in oven for 10-12 minutes or until cheese is melted. Remove from oven and top with fresh basil. Cut and serve warm.

Wednesday, August 8, 2012

Slow Cooker Garlic and Brown Sugar Chicken

I came home the other day to a sauna. We had been gone all day and when I opened the door from the garage, I was hit with a wave of heat. And nothing depresses me more than walking into a room of sweltering heat. (Okay, lots of things can make me sad, but at the moment, when I had been gone all day, this was what depressed me the most). Houses in Washington typically do not have AC or central air. It's expensive to install, and usually only needed a few days a year. But on this day, it was needed. My house has no tree cover so it had been baking in the sun. All day. Enter my dad, who saved the day with a window AC unit that at least makes the living room bearable.

You wanna know who else saved the day? My slow cooker. I know I've raved about my slow cooker before, but really it's my BFF in hot weather. There are only so many days I can go without cooking something, and only so many days I can get away with making my family eat cereal or PB&J sandwiches for dinner.

This chicken is amazing. It is slightly sweet but definitely garlicky too. I was slightly nervous to put in all the garlic called for, but went for it and didn't regret it. After it cooked all day, it wasn't overkill at all. Served on top of rice (from my rice cooker!), it was a great meal and my kids even ate it up. Granted, I had to turn on my stove for a few minutes to thicken the sauce, but it was definitely worth it. My three-year-old even asked for seconds, and she never does that! This is a definite keeper in our house and I usually have all the ingredients on hand, so we'll be making it again. And again :)


Slow Cooker Garlic and Brown Sugar Chicken

4-6 boneless, skinless chicken breasts (I used four large frozen chicken breasts)
1 cup packed brown sugar
2/3 cup vinegar
1/4 cup lemon lime soda
2-3 Tablespoons minced garlic
2 Tablespoons soy sauce
1 tsp black pepper

2 Tablespoons cornstarch
2 Tablespoons water

Steamed rice
Red pepper flakes (optional)

Place chicken slow cooker sprayed with cooking spray. Mix together brown sugar, vinegar, soda, garlic, soy sauce, and pepper. Pour over chicken. Cook on low for 6-8 hours or high for 4 hours.

Take chicken pieces out of slow cooker and pour remaining sauce into saucepan (I poured mine through a fine mesh strainer first). Place saucepan over high heat. Mix together corn starch and water, pour into saucepan and mix well. Let sauce come to a boil and boil for 2-3 minutes, or until it starts to thicken and turns into a glaze. Remove from heat and let sit for a minute or two (it will continue to thicken as it cools down).

Serve chicken over rice or noodles and top with glaze. Sprinkle red pepper flakes on top if desired.
(Recipe from Six Sisters' Stuff via Slow and Simple)