Showing posts with label side dish. Show all posts

Tuesday, October 9, 2012

Homemade Seasoned Fries

 
the latest recipe and giveaway updates!
 
This recipe comes to you courtesy of Man in Apron. Okay, he wasn't wearing an apron, but he is a man! My husband makes these amazing homemade seasoned french fries, and I had to share the recipe. They taste like something from a restaurant, but...they're not. Amazing, right? I got me a keeper!

My family of four boys can eat me out of house and home, so I try to use fillers to keep them full.

Translation: We eat a lot of potatoes.

Luckily they like potatoes and potatoes are cheap! We do some sort of burger meal a week (sloppy joes, cheeseburgers, chicken sandwiches, etc) and I've been doing my same old oven fries forever. My husband decided to change things up though, and we won't be going back to oven fries anytime soon!

These fries are a tiny bit a labor of love, but they aren't awful, especially when I made sloppy joes for dinner, which takes about 3 seconds to make. I can make fries for heaven's sake!!

*Note: I used a mandolin to slice the potatoes. If you don't have one, just slice your potatoes by hand into the size of French Fries. It won't take that long, I promise!
Wash and peel your potatoes. Cut your potatoes to the size you like. I try to make them about the size of fries you get in fast-food restaurants.
Place the fries in a bowl of cold water while you prepare the batter and oil.
Combine one cup of flour with 3 tsp seasoning and 1 tsp salt. I used 4 tsp of Johnny's seasoning salt (it already has salt in it) but you can do a combo of any seasoning you like: garlic powder, onion powder, paprika, chili powder, cumin, oregano, etc. It all depends on what flavor you are going for!
Whisk your flour mixture with about 1/2 cup of water. You want it to be a little runnier than pancake batter.
Dip fries in batter one at a time. When oil is hot, dip fries in one at a time so they don't clump together. They shouldn't be touching at first, but once they start to brown up it's okay. Let them fry up until golden and crispy. Remove and let them drain on a paper towel.
Yum!! Seasoned Fries!
Serve with your favorite sauce (we love fry sauce - 1/2 ketchup and 1/2 mayo mixed!)

Homemade Seasoned Fries
by Girls in Aprons

2 to 3 pounds russet potatoes
1 cup all-purpose flour
1 tsp salt
3 tsp seasonings (a combo of different seasoning, like 1 tsp garlic powder, 1 tsp onion powder, and 1 tsp oregano) or seasoning salt
1/2 cup water
Vegetable oil

Wash and peel potatoes.Cut into fry slices (or use a mandolin). Place cut potatoes into a bowl of cold water while you prepare the batter and oil.

In a medium sized bowl, combine the flour with the salt and seasonings. Mix in half cup water with whisk until it's at runny pancake batter consistency. If you can drizzle it with a spoon you're good!

Pour oil in a large pan about 1/4 inch thick. Heat over medium high heat. When hot, dip a fry in the batter and place potatoes one at a time in oil so they don't clump together. Make sure they potatoes aren't touching at first, but once they start browning up it's fine. Fry potatoes until brown and crispy, and remove to drain on a paper towel-lined plate. Serve warm. Makes about servings.

Wednesday, October 3, 2012

Sweet Red Cabbage


Oh my goodness I swear we are still here at Girls in Aprons! I think the month of September got the better of us, and between vacations and back to school and just plain life we got BUSY! But we are back!! I wanted to share this recipe with you because, seriously, I can't get enough of it! Let me tell you how I found this recipe:

My sister-in-law (and one of my best friends!) Christina lived in Germany growing up and she has shared many recipes over the years. But I have really never eaten authentic German food (because when I make German food it is done my way, not the real way!!). Anyway, Stina came to visit me in September and I thought the best place to take her was Leavenworth, WA! It's this cute little Bavarian town in the middle of nowhere and it is a tourist trap! They have the cutest shops and the best restaurants and it's all done to look like this little Bavarian village! Stina was insistent that we find an authentic German restaurant - she wanted Weinerschnitzel and dang it she was gonna get it!

Luckily, Leavenworth had several, and we found one we liked and Stina got her Weinerschnitzel and I got Jaegerschnitzel (basically a thin cut of breaded pork). Mine came with noodles and cooked red cabbage. The pork was awesome, but I was a little disappointed in the cabbage.

But no need to fear! Stina had another red cabbage recipe and she made it for me before she left! It's thinly sliced and mixed with bacon (yes ma'am - bacon!) onions, and vinegar. And sugar. Because that makes everything better. So does bacon.

BACON!

We had ours served over shredded beef sandwiches and I also had mine as a side dish. This would be awesome on bratwurst! And you can easily omit the bacon to make it vegetarian. Or if you don't have bacon on hand or it's not on sale, no worries. Just omit it. And make sure to put bacon on your grocery list for next time!!

Start by thinly slicing your cabbage. You will only need about half a head of cabbage, and if you ask your grocer they will cut a head of cabbage in half for you so you don't have to buy the whole thing!
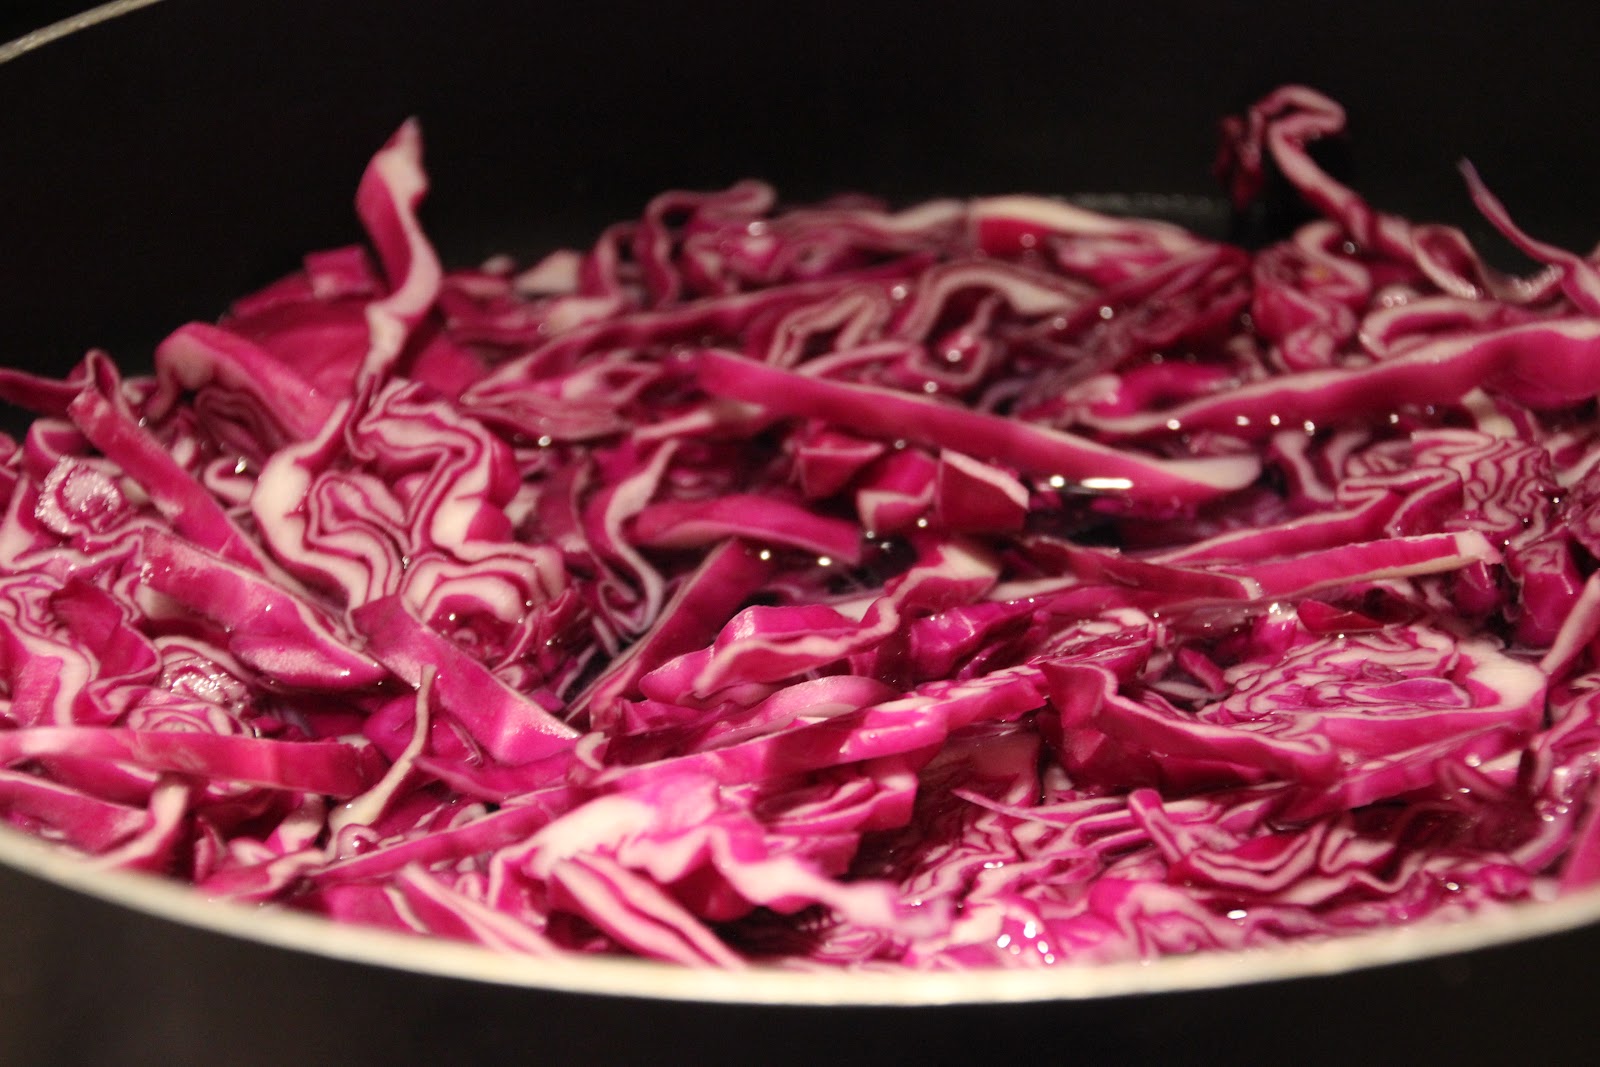
In a large skillet, add about 1 inch of water. Bring it to a boil and add the sliced cabbage, letting in boil uncovered about 15 minutes or until tender. (I like mine with a slight crunch to it still!) When it's done, strain the water and place the cabbage on a paper-towel lined plate to hang out.
Here is the awesome part - you are only using one pan!! Less dishes! Wipe out the pan from the cabbage to get the water out. Put in back on the stove and start cooking your chopped up bacon. After a few minutes add your sliced onions. Cook until bacon is done and onions are tender. Drain on a paper-towel lined plate (yes, again). In the bacon drippings add your brown sugar and flour, and then your salt, pepper, water and vinegar. Dump back in the cabbage and bacon/onion mixture and stir to combine.


Sweet Red Cabbage
by Girls in Aprons


1 medium head red cabbage (1 1/2 lb), thinly sliced
4 slices bacon, chopped (I'll be honest - I used 6 or 7)                                           
1 small onion, sliced
1/4 cup packed brown sugar
2 T all-purpose flour
1/4 cup water
3 T white vinegar
1/8 tsp pepper
1/4 tsp salt


In a large skillet bring 1 inch of water to boiling. Add your sliced cabbage and boil uncovered for about 15 minutes, stirring occasionally. Drain and set aside. Wipe out and dry the skillet with a paper towel.

In the same skillet, cook the bacon over mediu heat for about 4 minutes. Add the onion and continue cooking until bacon is cooked through and crispy and onion is tender. Remove from pan and drain on a paper towel.

Stir brown sugar and flour into bacon fat in the skillet. Add water, vinegar, salt, and pepper and mix well. Stir back in cabbage, bacon, and onion. Continue cooking until warmed through again, about 2 minutes.

 Recipe courtesy of Betty Crocker                                                                                                                                                        

Friday, August 17, 2012

Creamy Berry Cheesecake Salad

I'm not even sure what to call this. It's all over Pinterest with different names but the recipe is the same, and boy is it good. I made this for a potluck and one of the gals called it "crack salad" because you can't stop eating it. It's that good. I even ran across a blog that called it Poop Salad. Yup, don't get me started. The idea was that you make it the night before and the pudding is white, and overnight while the berries thaw, they "poop" their colors into the salad and make it pink. The idea is the same, but I have a hard time eating anything with the word "poop" in it, even though it is kind of funny, and even funnier when I told my kids that was the name of it. Oddly, it didn't phase them all that much!

I swear, make this, eat it, love it, and name it whatever you want. It's just yummy and easy and a great side dish all year long and perfect for potlucks (only if you want to share it!) so the name is not important.

The best part? You can make this relatively fat free. Or low fat. (Or full fat if you just want to live a little!). Just use fat free or low fat Cool Whip and low fat yogurt. So easy, right?

Also, if anyone knows me, I was running super late for the potluck (seriously, I can't be on time for anything) so the pictures aren't the best, but just humor me and go with it. Like I said, it's delicious. Trust me :)
I mean, just look at it. Creamy- check. Sweet- check. Berries (so it's "healthy")- check.
Mix your pudding, whipped topping and cheesecake pudding mix together.
Add your berries. I used two smaller bags, the amount is up to you. I'm pretty sure they were 32 oz each. If you are in a hurry, you can thaw them on your counter for about 10-20 minutes to get the juices flowing.

Seriously, folks. Look how pretty it is? My whole family loves it and it's a great side dish no matter what time of year it is!

Creamy Berry Cheesecake Salad

1 (8 oz) tub Cool Whip
1 (32 oz) vanilla yogurt
1 box Jello cheesecake instant pudding mix (I can only find the sugar free and it's fine)
2 bags (32 oz each) frozen berry mix (or one larger bag)

Mix the Cool Whip, yogurt and pudding mix together well. Add the berries and mix. Refrigerate at least an hour, then stir again to distribute the berry juices. Serve chilled.

Saturday, July 7, 2012

Caramel Apple Salad

I don't know why it is, but whenever I'm invited to a potluck or asked to contribute to a group meal of some sort, I take it as a challenge. Not that I'm judging those of you who grab a dozen cookies from Walmart instead of baking your own, but I feel it's my culinary duty to find something delicious and new to bring. And maybe I thrive on the compliments that I get...and get a little offended if there are still leftovers.
I get it. I'm a little snobby about my food.

Anyway, my work had a summer potluck last week and I signed up for fruit. I'd originally considered making patriotic fruit kabobs with strawberries, blueberries, and marshmallows. But of course, last week nothing was on sale. And as much as I like to show off my love of food, I also have a grocery budget. So I asked my mom, who suggested her apple salad with Snickers. It's so easy and apples are always on sale.

I was inspired at the grocery store to use Rolos instead of Snickers. Partly because I'm pretty sure someone at my work has a peanut allergy, and partly because I'm in love with Rolos. If you cut the Rolos in half you release some of that caramel heaven and it blends with the whipped cream and the tart apples to make a salad that tastes just like caramel apples.


Sorry about the picture quality, it was taken with my phone at work :)
Caramel Apple Salad
by Girls in Aprons

4 large Granny Smith apples
1 1/2 cup whipped cream
1 cup Rolos, halved

Cut apples into small, bite-sized pieces. Place apples and whipped cream into a bowl and mix together. Add Rolos, tossing everything together. Serve immediately.

Monday, December 12, 2011

Deviled Eggs- Classic and Fancy

Let's face it, deviled eggs have been stereotyped. When you hear the words "deviled eggs" I'm sure you think about picnics and barbecues and sunny weather. While that's true, deviled eggs are a great potluck side dish any time of the year. They are super easy to make and can be doctored up to fit any dinner, or party, or dinner party.
Start off with your hard boiled eggs, and cut them in half length-wise. Put your yolks into the food processor...
And put your white "cups" onto a platter. You can put something underneath (like a towel or napkin) to keep them from sliding around, or you can get one of those fancy platters that are meant to hold deviled eggs.
Throw in your mayo, mustard, vinegar, salt and pepper with your egg yolks and let the food processor do its job, until the mixture is nice and smooth. If you don't have a food processor, you can smash the yolks with a fork in a bowl, then stir in the remaining ingredients. It is perfectly fine to do it this way, I just like it in the processor because the texture is smooth and velvety.
After you've tested your seasonings, put the mixture into a pastry bag (or gallon-size freezer bag with the tip cut off like we did) fitted with a large star tip (again, totally fine if you don't use one, I just like the look of the star tip). Pipe into your egg white cups.
Sprinkle with paprika and you're set!
Deviled Eggs
by Carissa @ Girls in Aprons

12 eggs, hard boiled (see tip at the bottom)
1/2 cup mayonnaise (light is fine)
2 tsp mustard (I always squeeze in a little more!)
2 tsp white vinegar
Salt and pepper to taste
Paprika

Halve eggs lenghwise (obviously without the shells on!) and remove the yolks. In a food processor, add the yolks mayo, mustard and vinegar (or mash together in a bowl). Combine well. Add salt and pepper to taste. Stuff egg whites with yolk mixture (I put mine in a gallon size Ziploc and cut the tip off so I can just squeeze the mixture easily into the egg whites). Garnish with paprika.

**TIP** HOW TO BOIL AN EGG
To help avoid getting the green/grey ring around your egg whites, use this tip for boiling your eggs. Place your eggs in a pot and cover them with water an inch above your eggs. Bring to a boil, cover with a lid and turn off the heat. Let sit for 15 minutes. Remove from water and let cool completely before you peel. Warm eggs do not peel easily!

(VARIATIONS}
Skip the paprika and use these fun ways to spruce up your deviled eggs!

*Add chopped pickles or relish to your yolk mixture
*Top with one (or two!) baby shrimp
*Top with crispy crumbled bacon and chives or green onions
*Top with chopped tomatoes (or sundried tomatoes) and fresh basil
*Top with finely chopped pepper (red or green) and cilantro

Monday, December 5, 2011

Crunchy Loaded Potato Cakes

First of all, don't forget to read all about our 200 Fan Giveaway!!!

When I was first married, I wasn't much into cooking. Baking was something I'd done since I was a teenager and I turned to cookie baking as a form of stress relief - I think the fact that I ate half the batter helped.

However, after my first son was born, I found myself glued to the late night shows on Food Network. I watched Emeril with fascination, and I still remember Ina Garten's episode "Kids in a Candy Store" and couldn't wait to replicate some of her dishes. It wasn't long before I was whipping up amazing meals that made my husband fall in love with me all over again.

Now that I'm more comfortable in the kitchen, I'm more of what Rachael Ray would probably call an "Eyeballer" because I don't always measure what I through into a recipe. Especially if it's something I've made before or something I can alter after a quick taste test (think soups and such).

This is one of those eyeballer recipes, although I made a point to measure what I did so that I could share with you. But honestly, you don't need to measure, either. Just throw in what you love. Add extra bacon, use a different cheese, omit green onions, it doesn't matter. It's all about you and what you love and I guarantee these will be a favorite potato dish!

This dish uses leftover mashed potatoes. I always make WAY too many potatoes, but I also enjoy leftovers so maybe I unconsciously make too many. If you don't have leftover potatoes, make your favorite mashed potato recipe (NOT instant potatoes, they won't hold together) and let sit in the fridge for 4-6 hours.

You want the potatoes to be at room temperature or slightly warm (microwave works great), otherwise the outsides will get nice and crispy but the insides will still be cold. I stick mine in the microwave for 30 second intervals, mixing in between, until about room temperature.

Add your ingredients together in a bowl and mix together. I use cooked and crumbled bacon, sharp cheddar cheese, and green onions.
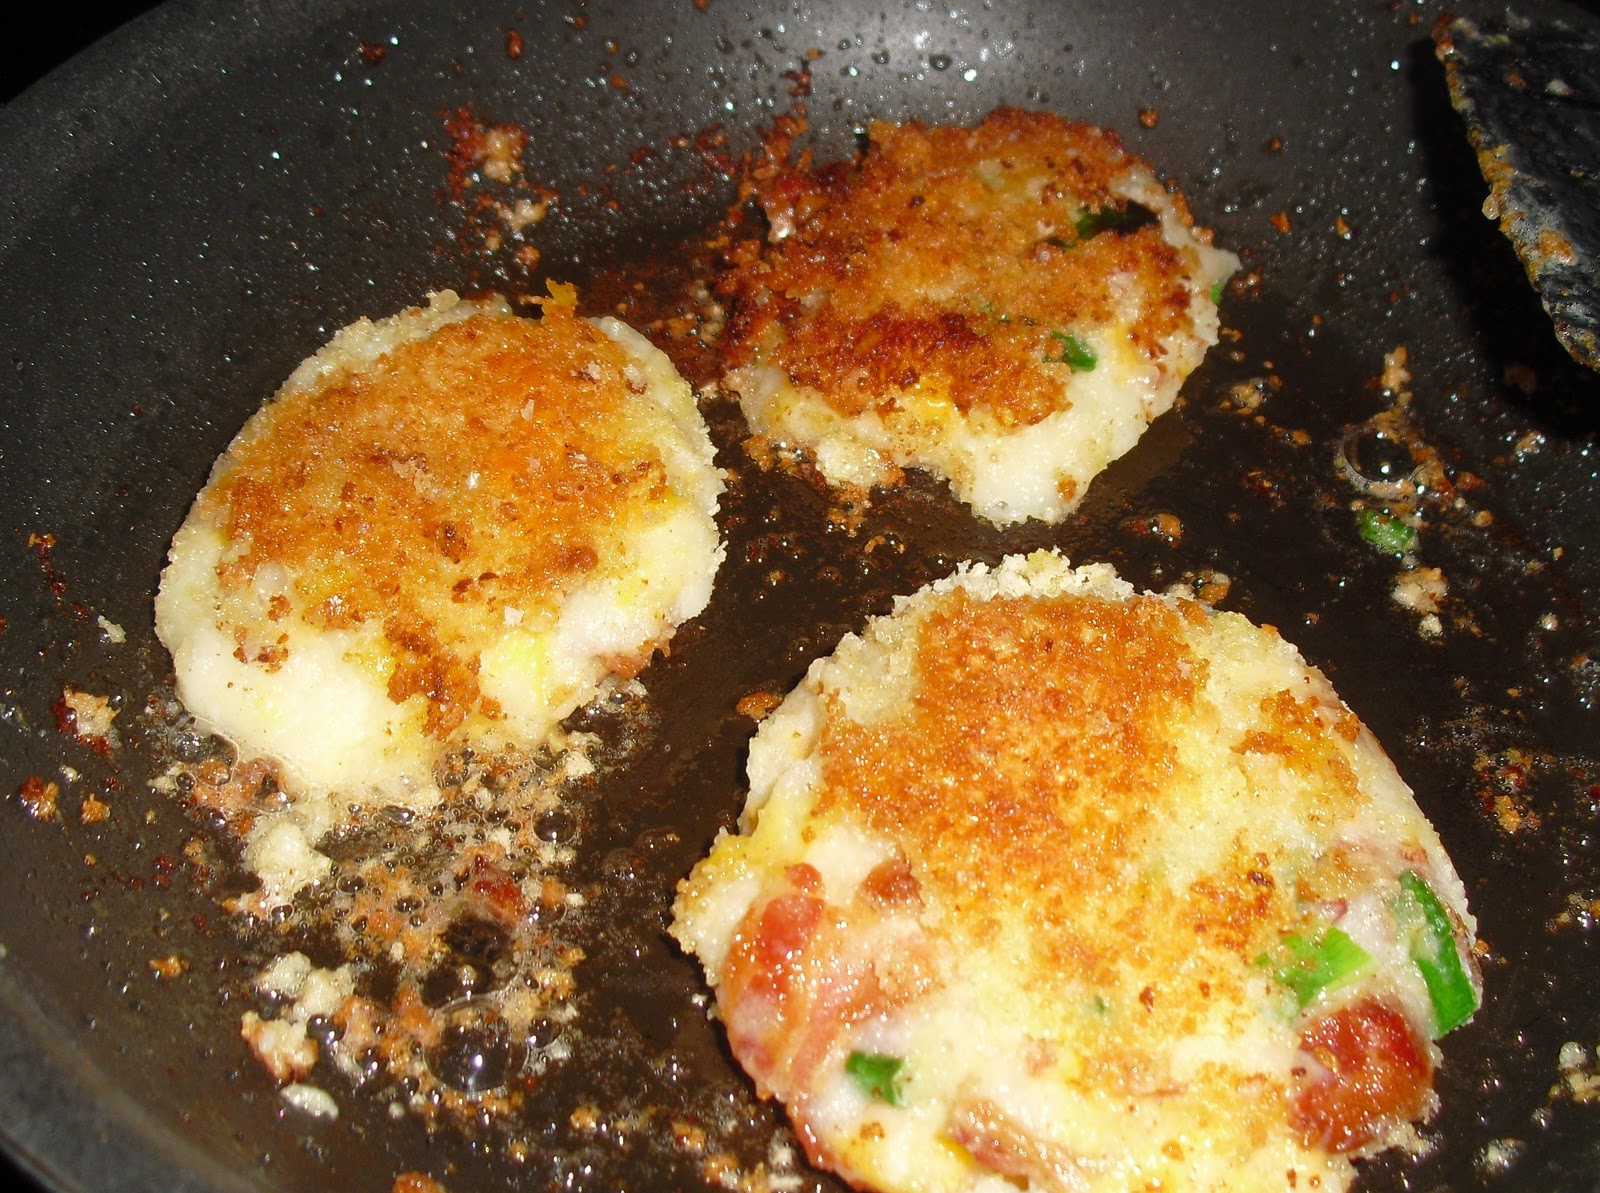
Form your mixed potato mixture into patties, relatively thick, otherwise they'll be too delicate and fall apart on you. Mine were about the size of golf balls and then slightly flattened.
Using a basting brush, give the potatoes a light coating of beaten egg and then dip in the seasoned panko crumbs. You can use regular bread crumbs but they won't be nearly as crunchy. If you've never tried panko, you're really doing yourself an injustice. They are located next to the bread crumbs in your grocery store and will be your go-to bread crumbs forever.
The potatoes were so crispy and warm and flavorful. They turn your leftover potatoes into a bit of heaven. We had dinner guests who literally bartered with each other for the last potato cake!

Crispy Loaded Potato Cakes
By Kelli Lafranca

4 cups previously made mashed potatoes
1 lb bacon, cooked and crumbled
1 cup shredded sharp cheddar cheese
1/2 cup green onions, dark green and light green parts chopped
1 egg beaten with 1 Tbsp water
1 cup panko bread crumbs
2 tsp dried basil
2 tsp dried oregano
Vegetable oil, for frying

In a large bowl, mix the potatoes, bacon, cheese, and green onions.
Place the beaten egg and water in a shallow bowl. In another shallow bowl, combine the panko with the seasonings.

Using your hands, form the mixture into balls the size of a golf ball and flatten slightly. Working one at a time, using a pastry or basting brush, lightly coat the potato ball with the beaten egg and then into the panko crumbs.

Heat a large pan over medium-high heat and add enough vegetable oil to coat the bottom. Make sure the oil is very hot before adding your potato cakes, otherwise the oil will just make them soggy. Fry the potatoes in batches (I fit about 6 in a pan at a time), flipping them over when the bottoms are golden brown. Cook until both sides are golden brown. Serve immediately.


Sunday, November 27, 2011

Raspberry Pretzel Salad

Waaay back when I was first married (and sadly, the worst cook ever), I bought a cookbook. I was seriously done with the terrible meals I had been making for my poor, patient husband (who apparently also didn't have high expectations for my cooking skills, or he had really bad taste in good food). I can't even remember what we ate most the time, although thoughts of spaghetti (really, just pasta and sauce) and overdone steaks come to mind. Yikes! I remember branching out and actually made a decent meatloaf once, and I was great with a slow cooker. And pancakes.

The cookbook I bought was "The Essential Mormon Cookbook", and let me tell you, I was terrified. I hadn't made most of the stuff in the book, and I had never even made Jello before either! I perused the recipes and found a few I still use today (their meatball recipe is delicious, and so is their Missionary Meatloaf). One recipe, though, that my mother helped me make when she came to help after the birth of my first baby was the Raspberry Pretzel Salad. It was amazing! I was so weirded out to be using preztels with cream cheese and raspberries, but something about those things all together makes perfection!

We've made this recipe lots of times before, but this was the first time I had actually made it on my own. I only the second time I had made Jello before (I'm slowly becoming the ultimate Mormon housewife). It was a major hit at the Thanksgiving feast. It was like eating dessert with my turkey!

So start off with your pretzels. The recipe calls for sticks, I had regular so I went with it. I just broke them up into thirds and fourths and had them lay as flat as possible.
Add the butter. Make sure you cover them as much as you can. 
Mix your cream cheese, sugar and Cool Whip. I could eat this concoction all day! 
Butter + Pretzels = Amazing! Somehow it has this toffee flavor that is to die for!
Carefully place the cream cheese mixture on top of the cooled pretzels. You don't want to lift the pretzels, so I put spoonsfuls all around and then lightly spread it with my spatula. Cover from edge to edge, so when you pour your syrupy Jello on top, it does not leak to the bottom. This will cause soggy pretzels!
Pour on the raspberry goodness!
This is what you're looking for. Three distinct layers, and no Jello leaking to the bottom!
So. Good. And bonus, it can be made the day before!

Raspberry Pretzel Salad
by Carissa Poyfair, adapted from "The Essential Mormon Cookbook"

3/4 cup butter (1 1/2 sticks), melted
2 1/2 cups thin pretzel sticks
1 (8 oz) package cream cheese, softened
1 (8 oz) tub Cool Whip, thawed
1 cup sugar
2 cups water
1 large pkg raspberry jello
2 (10 oz) pkgs frozen raspberries undrained and slightly thawed
Melt butter and pour into 9X13 pan.  Break pretzels in half and pat evenly into pan.  Bake 10 minutes at 400.  Remove from oven and cool. 

In a large bowl, combine cream cheese, Cool Whip and sugar.  Dab on top of pretzels and spread to edges of pan, leaving no spaces (if the Jello gets under this layer, it will make the pretzels soggy).  Refrigerate 1 hour.  Bring water to a boil.  Completely dissolve gelatin in boiling water and cool in fridge until syrupy.  Add raspberries and pineapple and stir.  Pour carefully over top of cream cheese mixture.  Refrigerate overnight or until firm.

Monday, November 21, 2011

Herbed Cornbread & Bacon Stuffing

This year, I am not in charge of our Thanksgiving dessert. I'm always in charge of dessert! So while this is a break from the norm, I'm secretly excited. Pies can take a lot of work! When I was 9 months pregnant with my third child, I entered a pie baking contest. I didn't expect to win, mostly because I'd never ever ever baked a pie before. But it was a challenge for me and I made it up as I went along. Worst part? I was up at 5am to bake the thing, hoping against hope that it turned out okay. Best part? I won first place and $100! All those old ladies who entered thought for sure they'd won, how could an amateur, first-pie-maker win? Probably luck, but also because when I can't sleep at night my mind wanders to how to make the perfect recipe. It doesn't always work out, but sometimes I'm a genius :)

Anyway, back to stuffing. I was asked to make stuffing for Thanksgiving this year and again, I've never made stuffing. Ever. At least not from scratch. I'm not counting the boxed stuffing that my kids could probably make with their eyes closed.

My mother in law makes this amazing cornbread stuffing. It was my first time having stuffing made with cornbread and I was in love. I think I literally fought over the last spoonful. It was just that good.

So here's my version of cornbread stuffing. It's delish, in my opinion. Give it a whirl!


Start with your cornbread. No, I don't usually use egg substitute but Target was sold out of eggs. Apparently that really happens.


Make your cornbread as directed on the box, easy enough. Then add your dried herbs. Pour into a 9x13 pan and cook for about half hour or until golden brown on top.


Chop up your veggies - onions and celery. You'll saute these in bacon grease!


When your cornbread has cooked and cooled, cut into 1-inch cubes and spread them out on a jelly roll pan. You'll stick these back in the oven to dry out. That way they soak in the flavors better while cooking.


Toss everything together in a large bowl. Add enough chicken stock to moisten the cornbread. I used a little over 2 cups in mine.

Cook in a buttered 9x13 pan until golden brown on top and firm in the middle.

So. Amazing. (The stuffing, not me. Well, okay, me too).


Herbed Cornbread and Bacon Stuffing
by Kelli Lafranca

2 boxes cornbread mix, Jiffy brand
2 eggs
2/3 cup milk
1 1/2 tsp dried oregano
1 1/2 tsp dried rosemary
1 1/2 tsp dried basil
1 lb bacon
1 large onion, chopped
2-3 ribs celery, chopped
2-3 cups chicken stock
Butter, for greasing the pan

Preheat oven to 400 degrees. Mix together cornbread mix, eggs, and milk until blended. Batter may be lumpy. Add dried herbs. Bake in a 9x13 greased pan for 30 minutes or until golden on top and cooked through. Set aside to cool.

Saute bacon in a large skillet or until bacon is crispy. Transfer to a plate topped with a paper towel to drain. Using the bacon grease, saute the onion and celery until the vegetables are tender. Remove from grease and set aside. Crumble the cooled bacon.

When cornbread as cooled, remove from pan and cut into 1-inch cubes. Transfer to a jelly roll pan and lay in a single layer. Cook at 400 degrees for 5-7 minutes or until dry (it will feel like toast).

In a large bowl, combine cornbread, crumbled bacon, onions, and celery. Pour chicken stock over mixutre, stirring after each 1/2-cup addition. Add enough chicken stock to moisten the cornbread (I used 2 1/4 cups). Pour mixture into buttered 9x13 pan and cook at 350 degrees for 45 minutes.